
15 Spooky Halloween Treats
These spooky Halloween treats are the best part of October. Ghost cupcakes, mummy hot dogs, spiderweb brownies, and graveyard pudding cups turn any party table into a haunted (and delicious) spread.
Every treat below is easy enough for kids to help with and impressive enough for the neighborhood party. Pick a few favorites, or work through all 15 before the jack-o-lanterns burn out.
1. Ghost Meringue Cupcakes
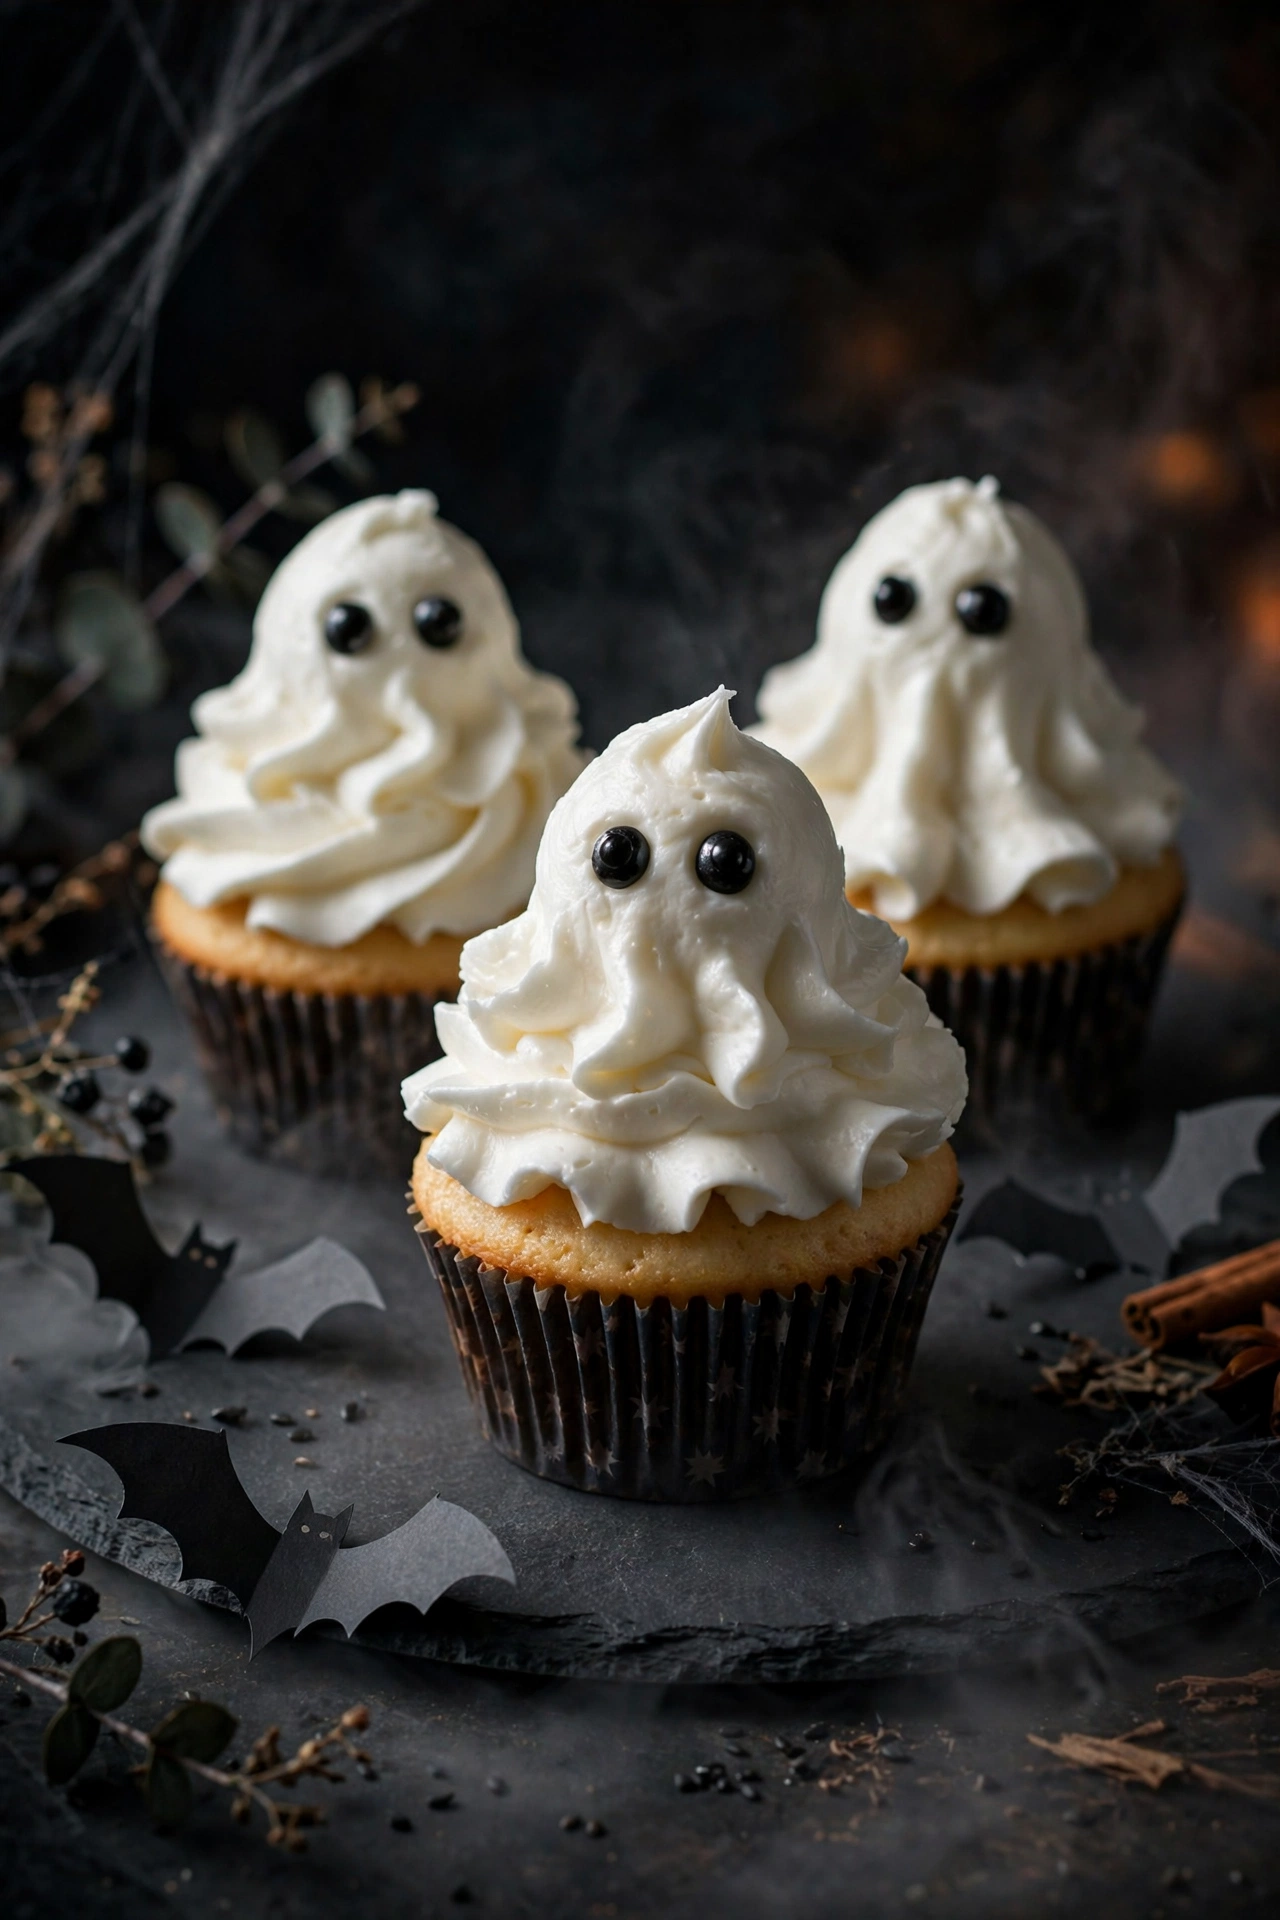
Boo-tiful and delicious. Fluffy vanilla cupcakes topped with swirls of white frosting shaped into little ghosts, finished with candy eyes. They look adorable and taste even better.
Tip Callout
Use a large round piping tip and pull straight up to form the ghost shape. Add the candy eyes while the frosting is soft so they stick.
Make them ahead
Bake the cupcakes a day early and store unfrosted. Frost the morning of the party for the freshest look.
Pipe the meringue ghosts onto parchment first and bake them separately for the most defined shapes. Use a toothpick dipped in black gel to dot the eyes, which gives more control than a piping bag. Assemble the cupcakes the day of serving so the meringue stays crisp.
2. Mummy Hot Dogs
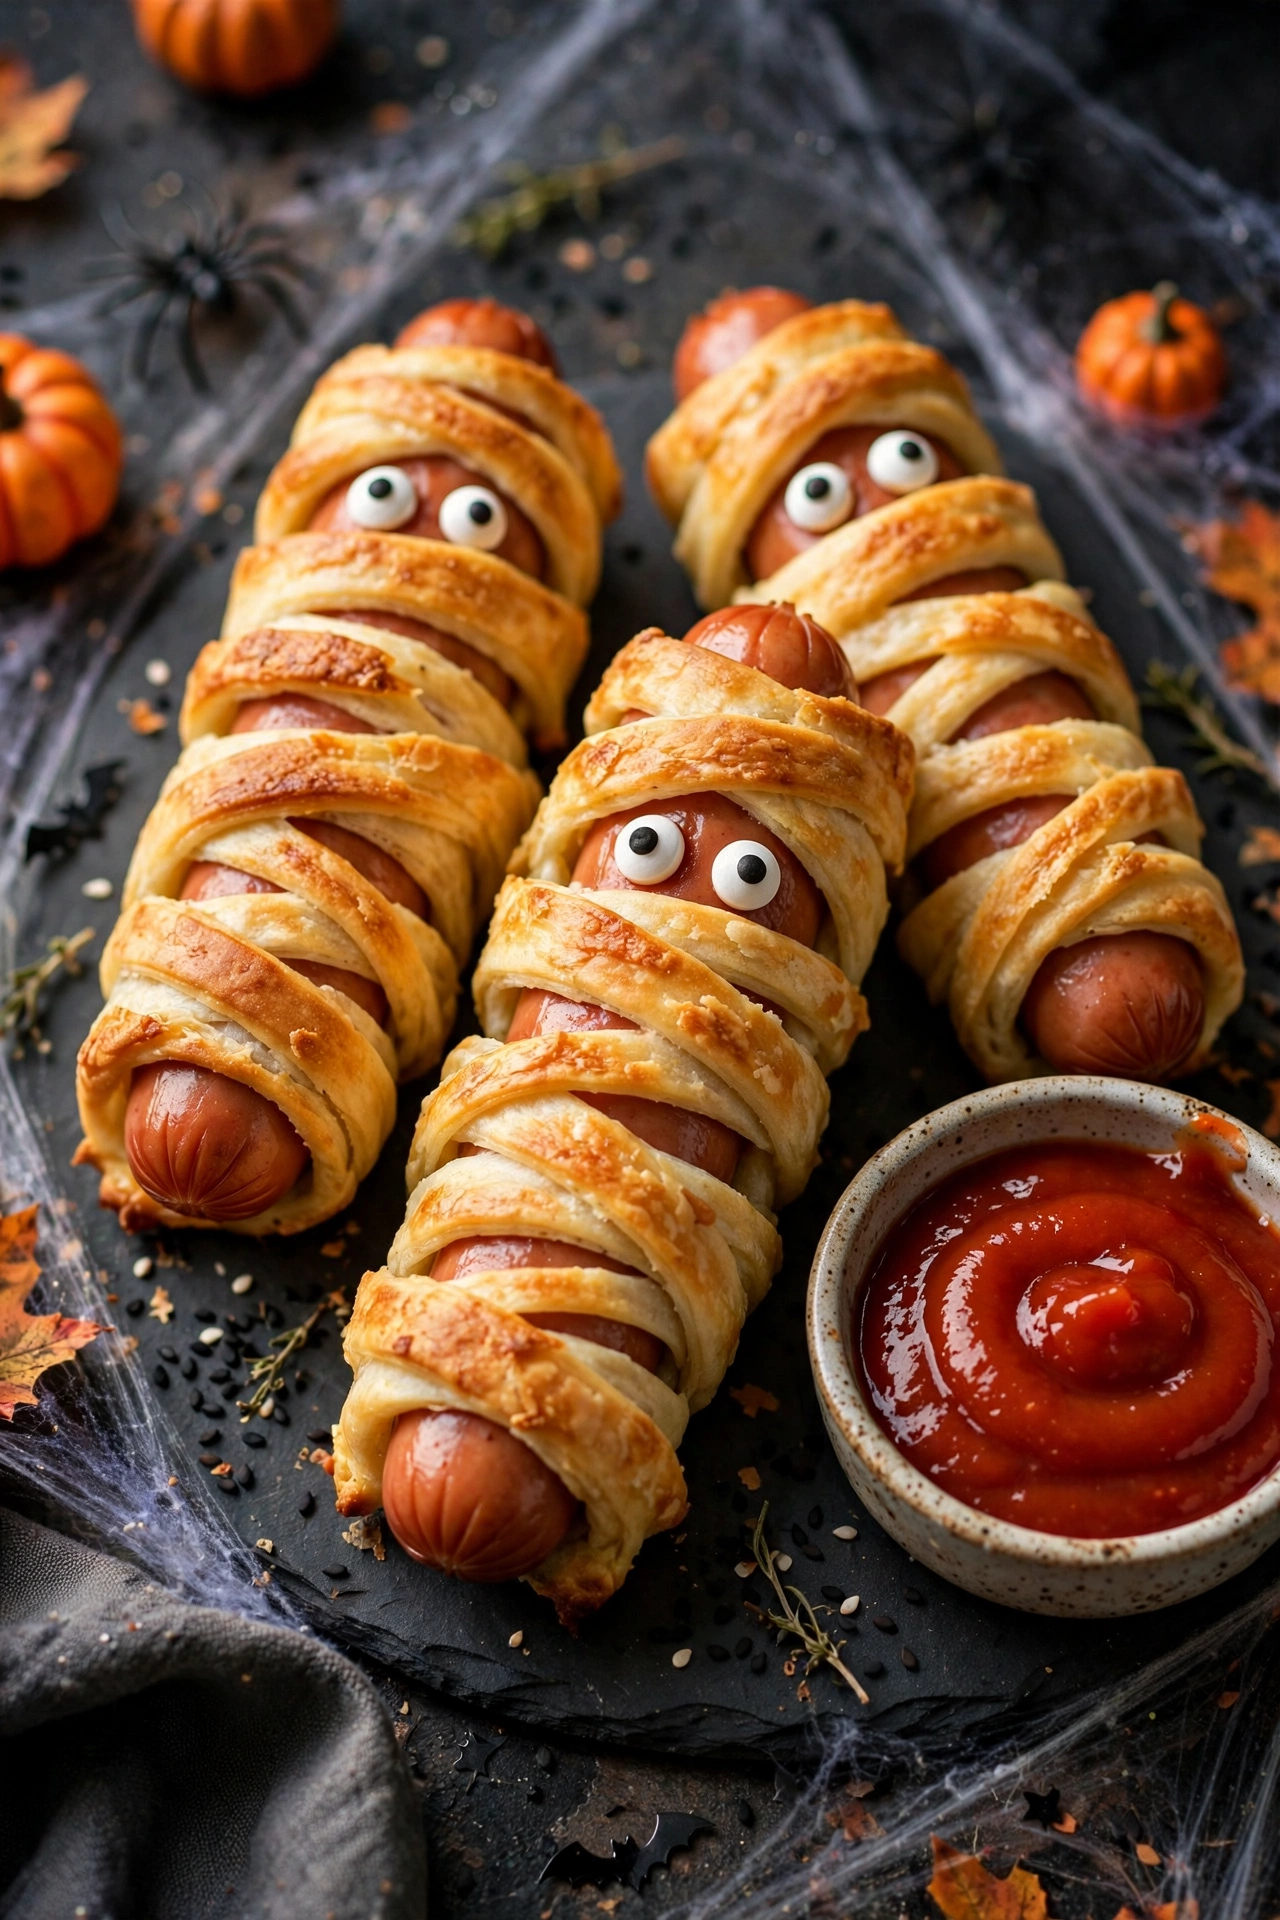
The savory hero of the party table. Hot dogs wrapped in strips of golden crescent dough like mummy bandages, with candy eyes peeking out. Kids go wild for these.
More party hits? Browse our spooky dessert recipes.
Wrapping trick
- Stretch the dough strips thin so they bake crisp
- Leave a gap near the top for the eyes
- Serve with ketchup “blood” for dipping
Ingredients Checklist
- 8 hot dogs
- 1 can crescent roll dough
- 16 candy eyes
- Mustard or ketchup, for attaching eyes
- Ketchup, for serving
Cut the crescent dough into thin strips, since thick strips look clumsy and bake unevenly. Leave a small gap near one end for the face, then dot mustard eyes after baking. Serve warm with a trio of dipping sauces for a crowd-pleasing appetizer.
3. Pumpkin Rice Krispie Treats
At a Glance
| Prep time | 15 minutes |
|---|---|
| Set time | 30 minutes |
| Makes | 12 pumpkins |
| Difficulty | Kid friendly |
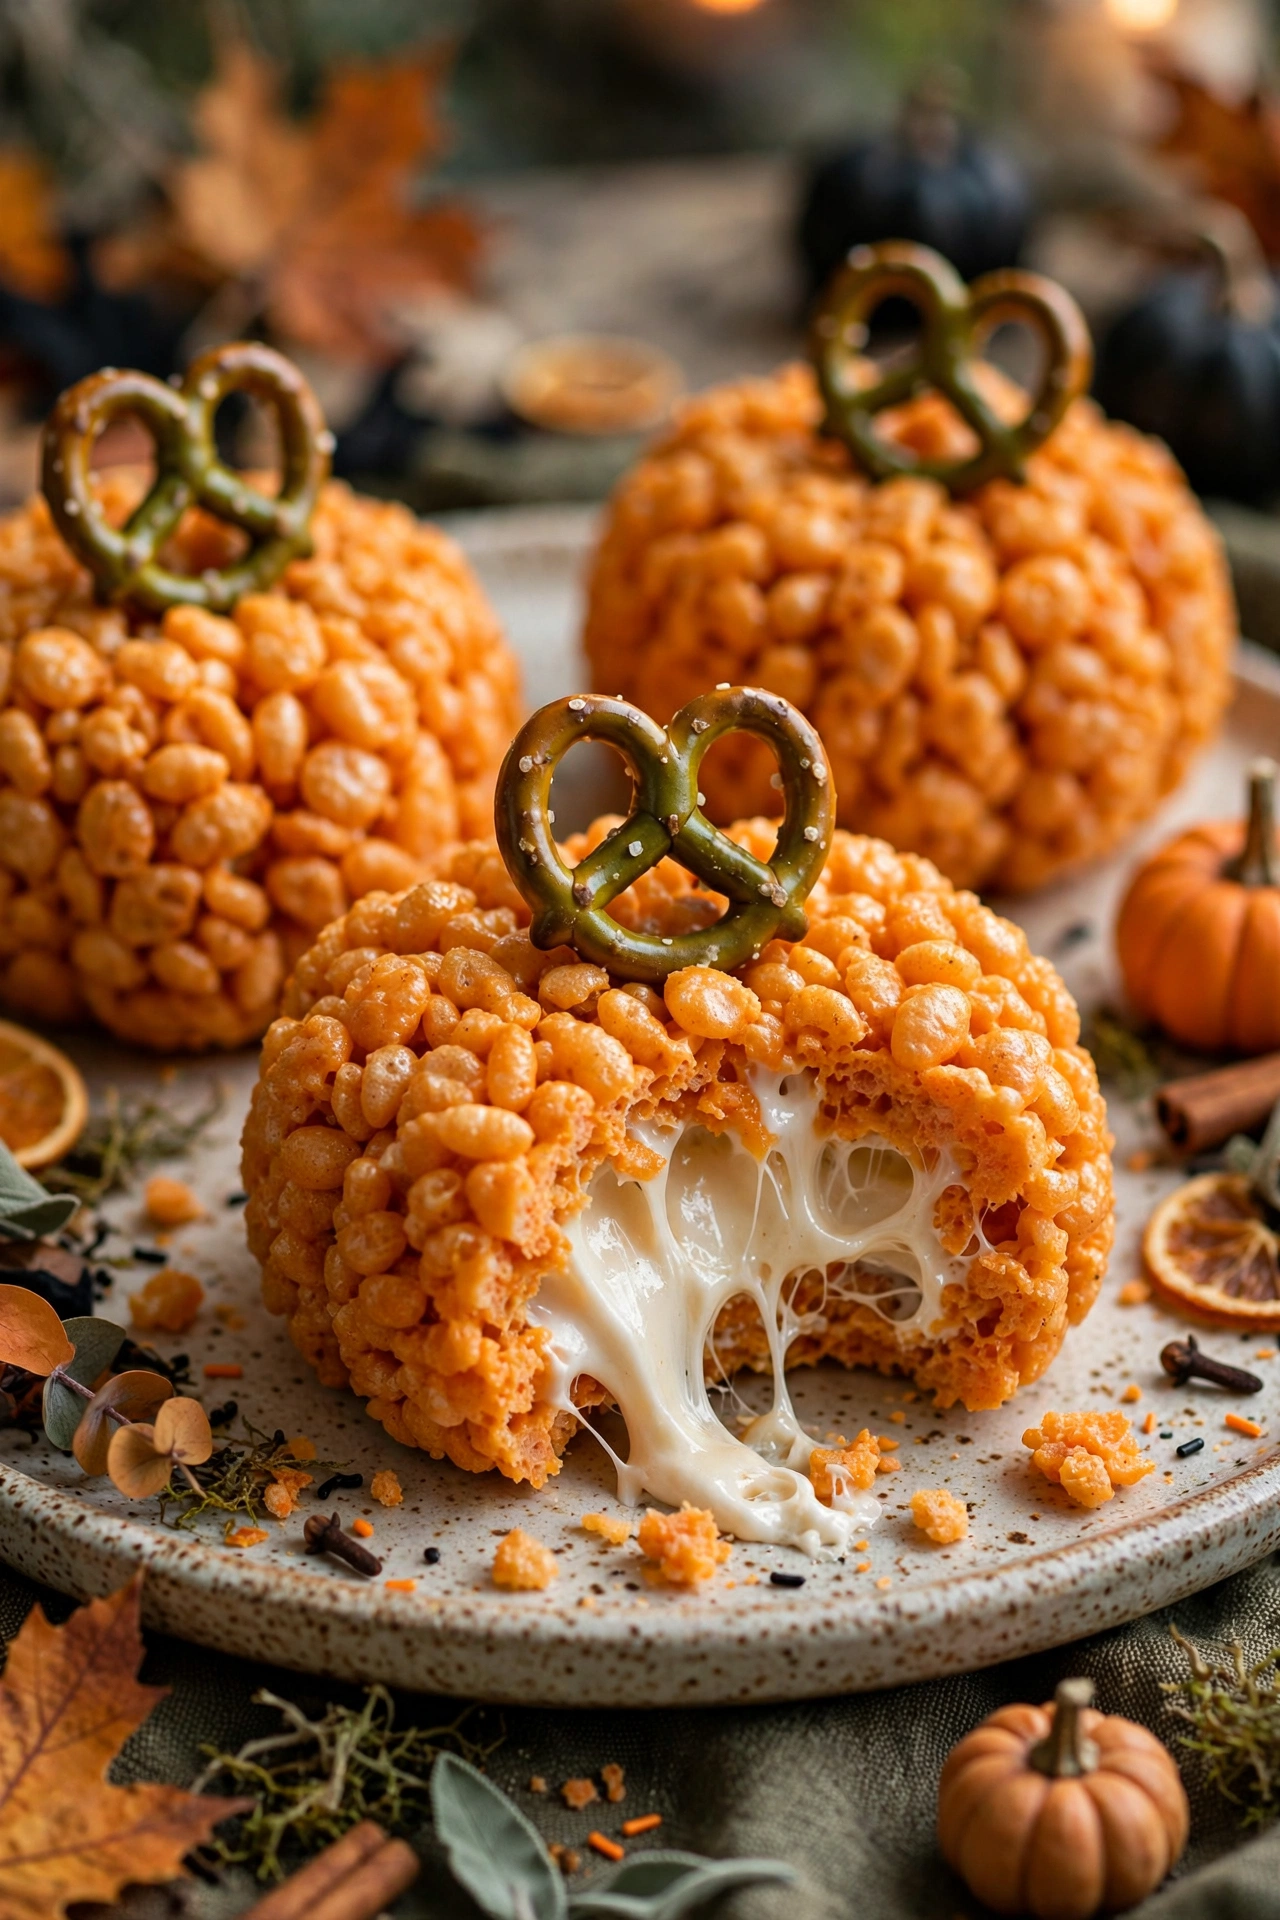
Orange, round, and gooey. Classic marshmallow treats tinted pumpkin orange and shaped into mini pumpkins with pretzel stems. No baking required.
Shaping secret
Butter your hands before shaping. The mixture is sticky, and buttered hands make perfect pumpkins without the mess.
Add orange gel coloring to the melted marshmallows before stirring in the cereal for even color throughout. Shape the treats while the mixture is still warm but cool enough to handle, using buttered hands. A pretzel stick stem and green candy leaf complete the pumpkin look.
4. Spiderweb Brownies
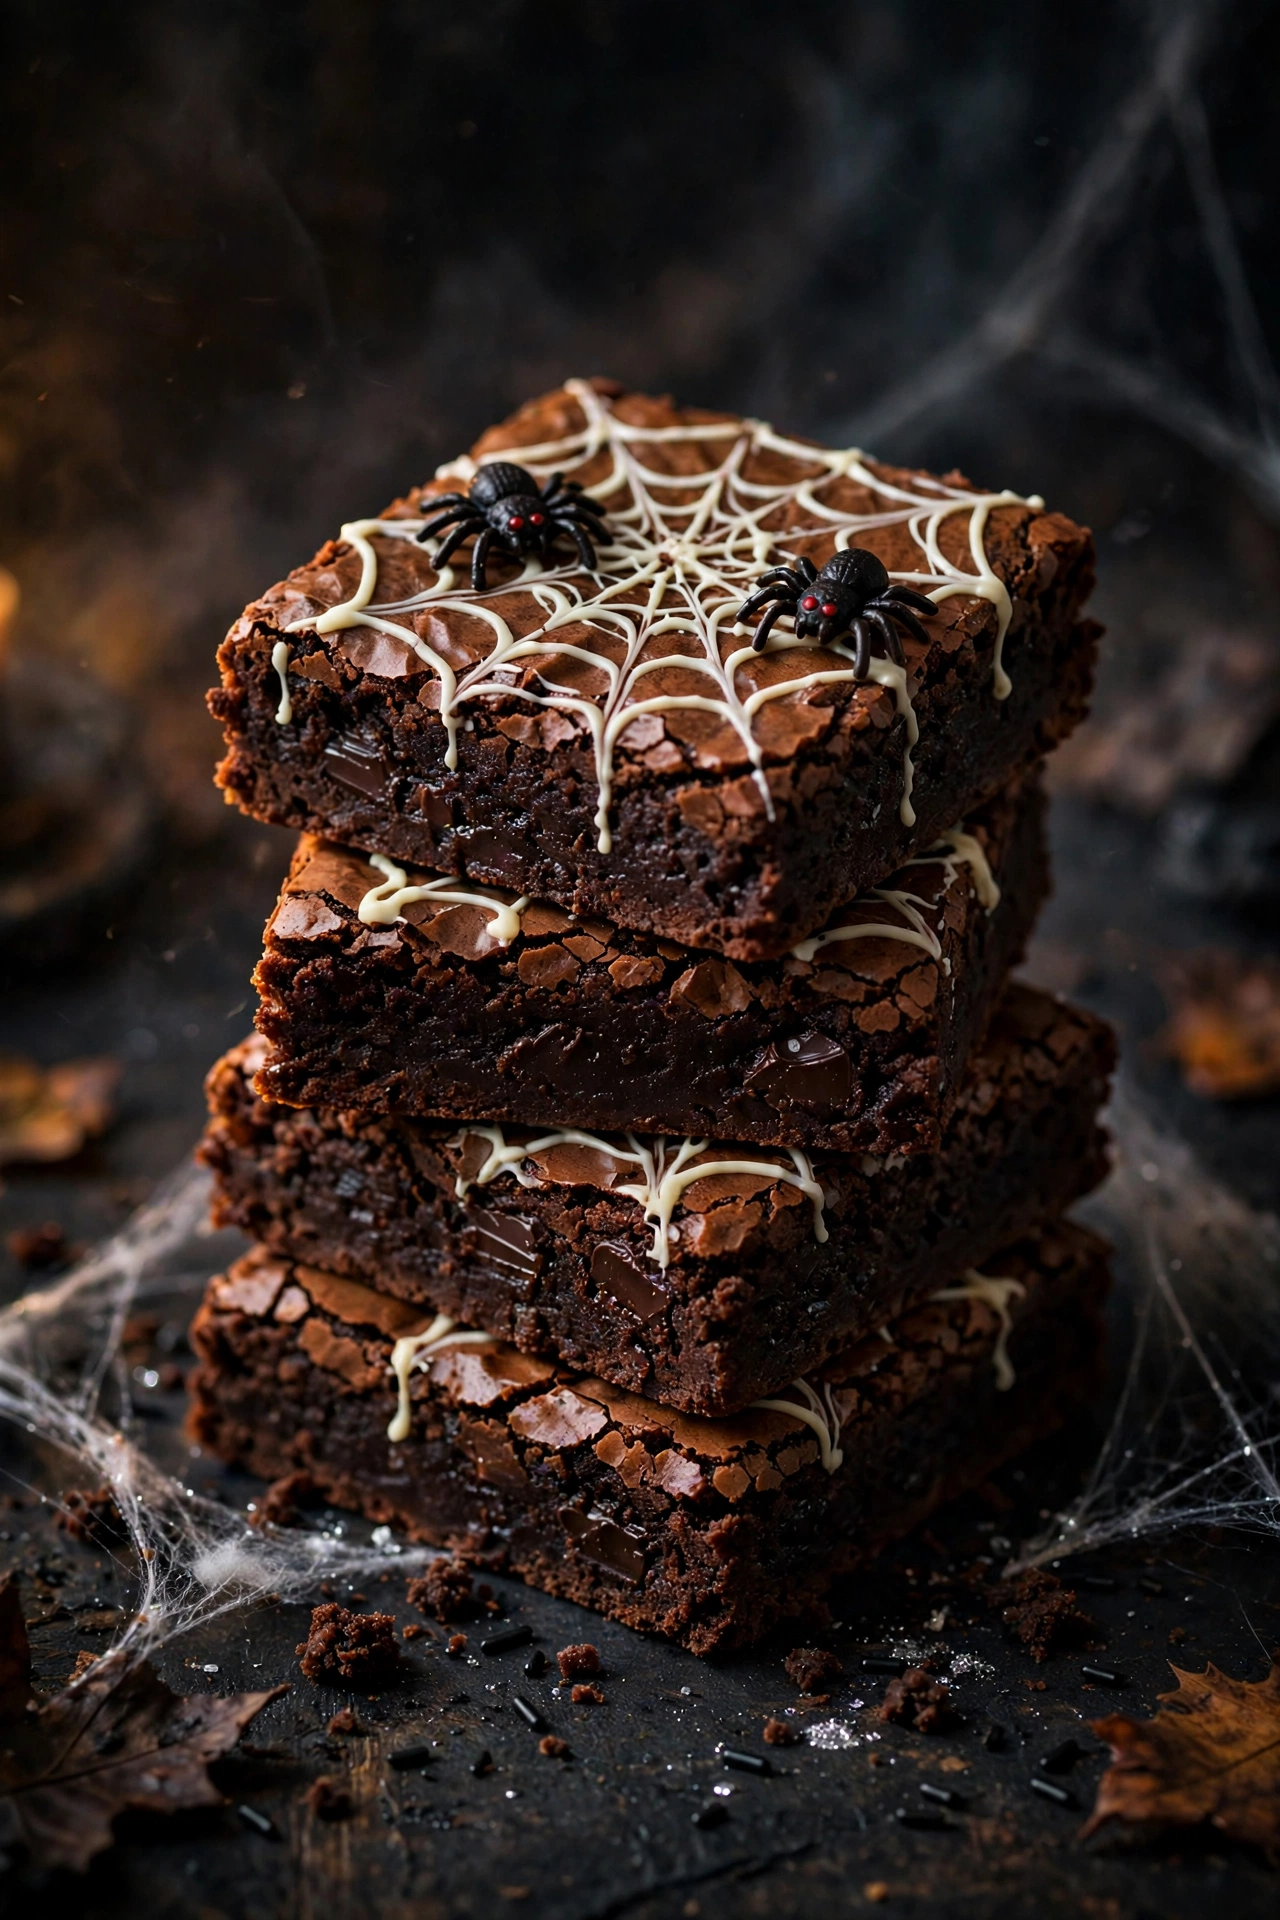
Fudgy with a frightful finish. Rich chocolate brownies decorated with a white chocolate spiderweb and candy spiders on top. They slice into dramatic squares.
Do and Don’t
Do: pipe the web while the brownies are still slightly warm so it sets smoothly.
Don’t: overbake. Fudgy centers make the best brownies.
Chocolate lover? See our chocolate dessert recipes.
Pipe the white chocolate web onto the brownies while they are still slightly warm so it adheres smoothly. Start from the center with concentric circles, then drag a toothpick outward to create the web effect. Chill for twenty minutes to set the chocolate before cutting.
5. Witch Hat Cookies
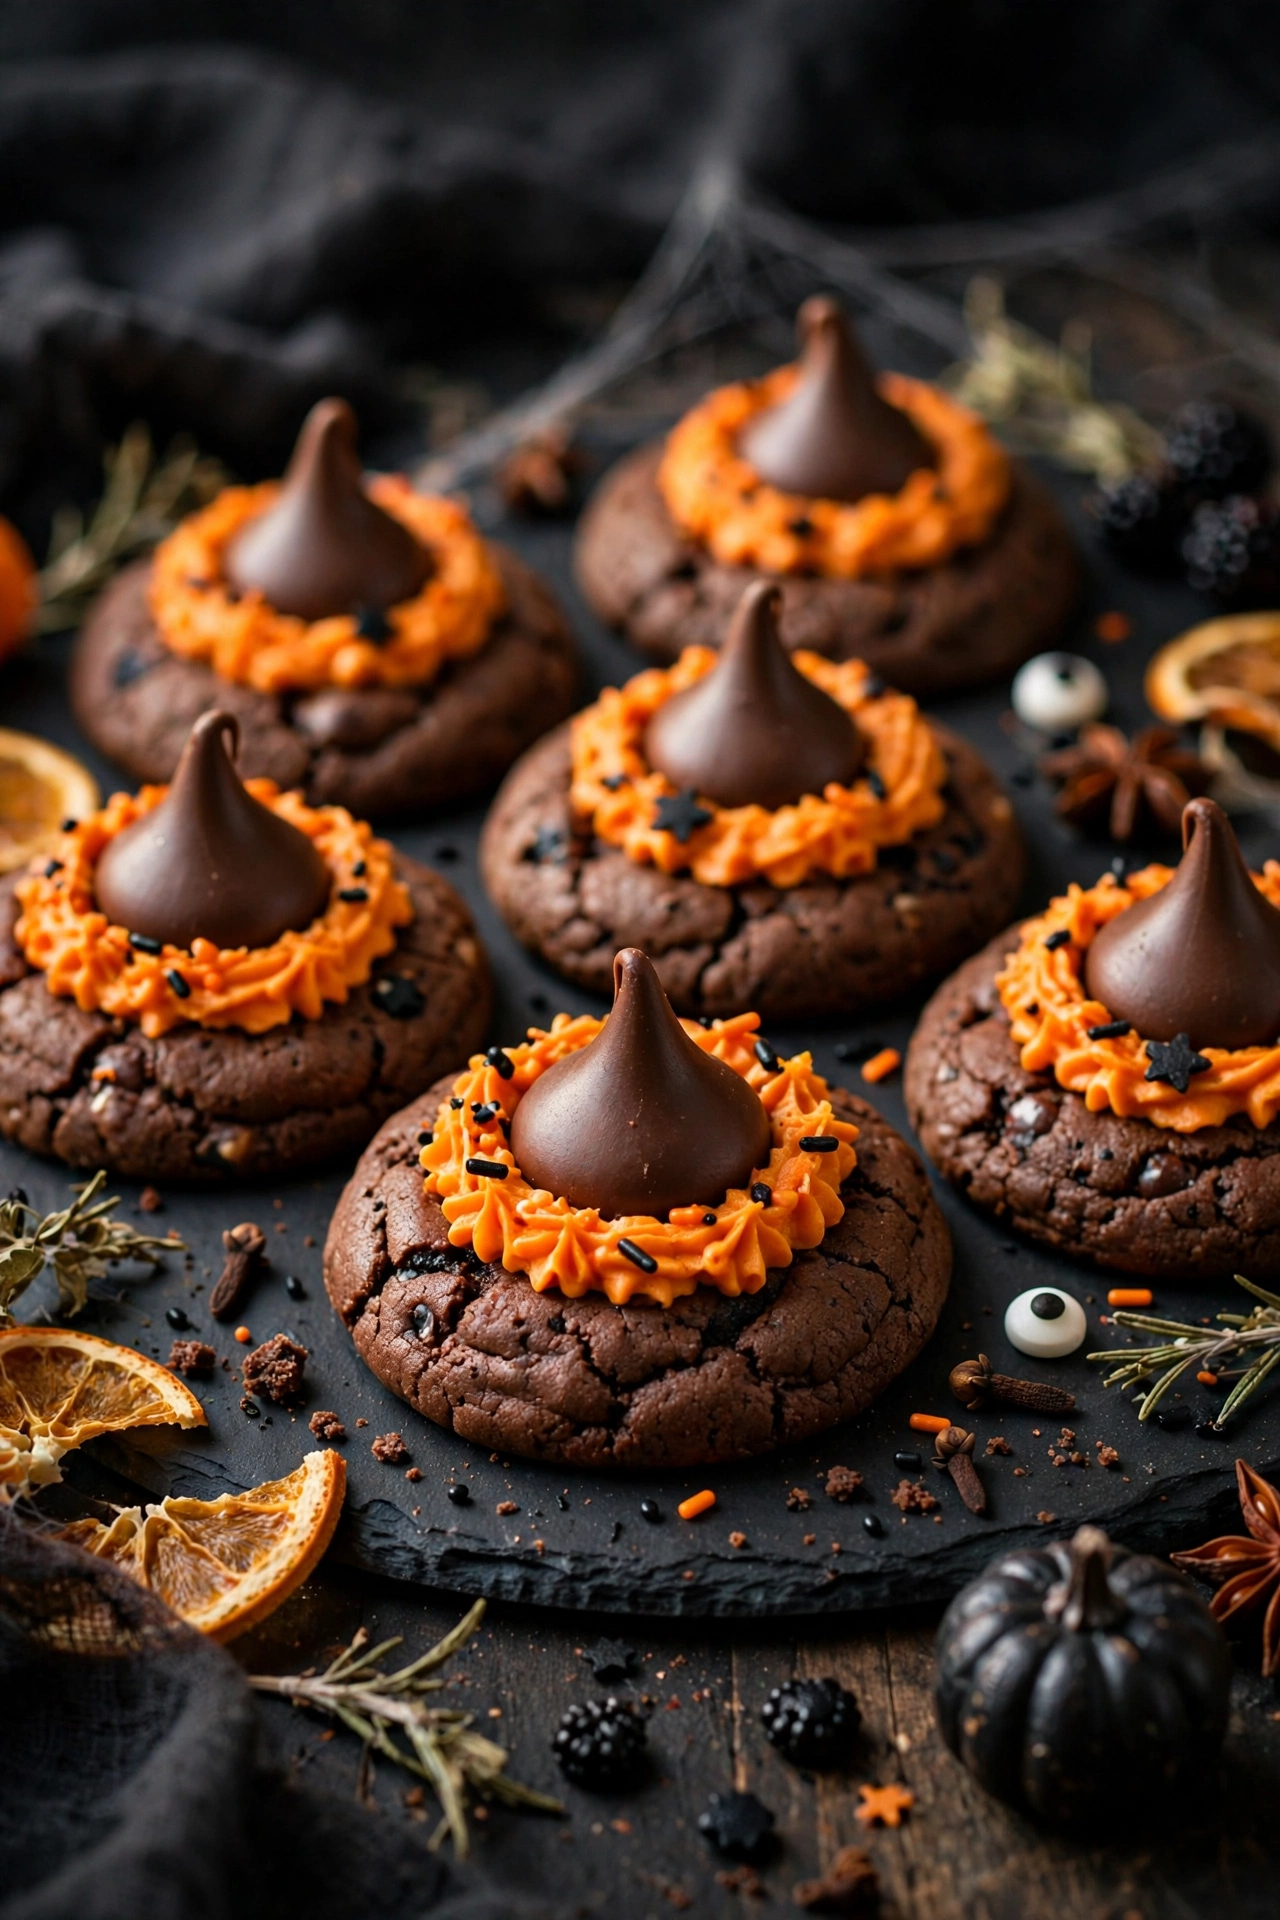
Pointy, chocolatey, and cute. Fudge cookies topped with chocolate kiss “hats” set on orange frosting brims. They look like a coven marched across the platter.
Assembly line
Set up brims, pipe frosting, press on kisses. An assembly line makes 24 hats in minutes.
Mini Method
- Bake chocolate cookies and cool completely.
- Pipe a ring of orange frosting on each cookie.
- Press an unwrapped chocolate kiss into the center.
- Let set 20 minutes before stacking or packing.
Use a dab of melted chocolate as glue to attach the cone to the cookie base, holding for ten seconds to set. A buckle made from yellow frosting or a fruit candy adds the classic witch detail. These keep five days in an airtight container, making them great for advance prep.
6. Candy Corn Parfaits
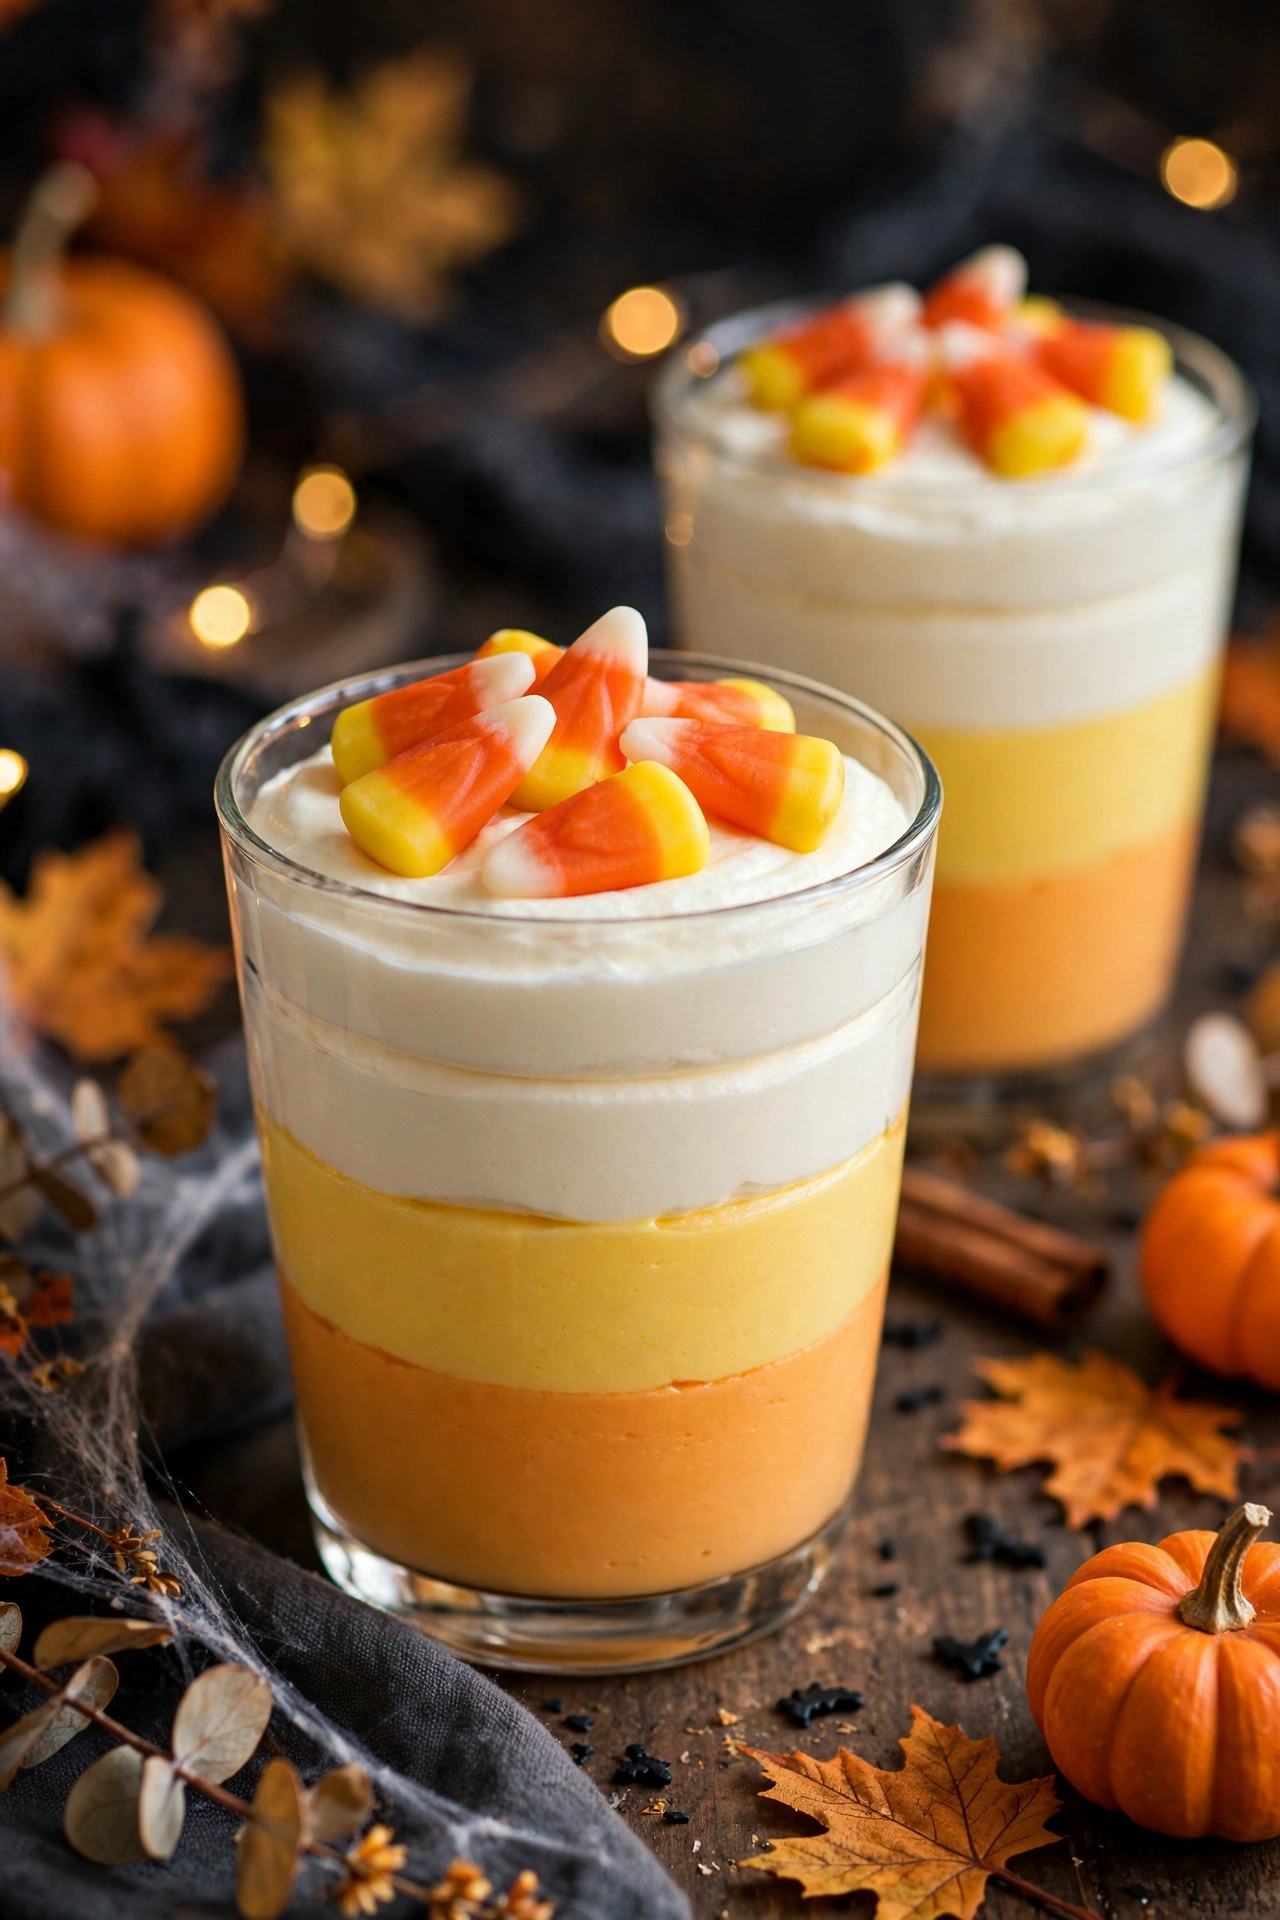
Layers of Halloween color. Orange, yellow, and white cream layered in clear glasses to mimic candy corn, topped with actual candy corn pieces. Pretty enough for the adults’ table too.
No-bake needed? Find more no-bake dessert recipes.
THE ONE THING TO REMEMBER
Chill the glasses before layering. Cold glass keeps the cream layers sharp and distinct instead of melting together.
Layer order
- Bottom: orange mousse
- Middle: yellow whipped cream
- Top: white cream with candy corn
Chill the glasses before layering so the mousse layers set faster and stay distinct. Use a piping bag for clean layers, wiping the glass rim between colors. Top with whipped cream and candy corn just before serving so nothing weeps or softens.
7. Monster Apple Bites
Tip Callout
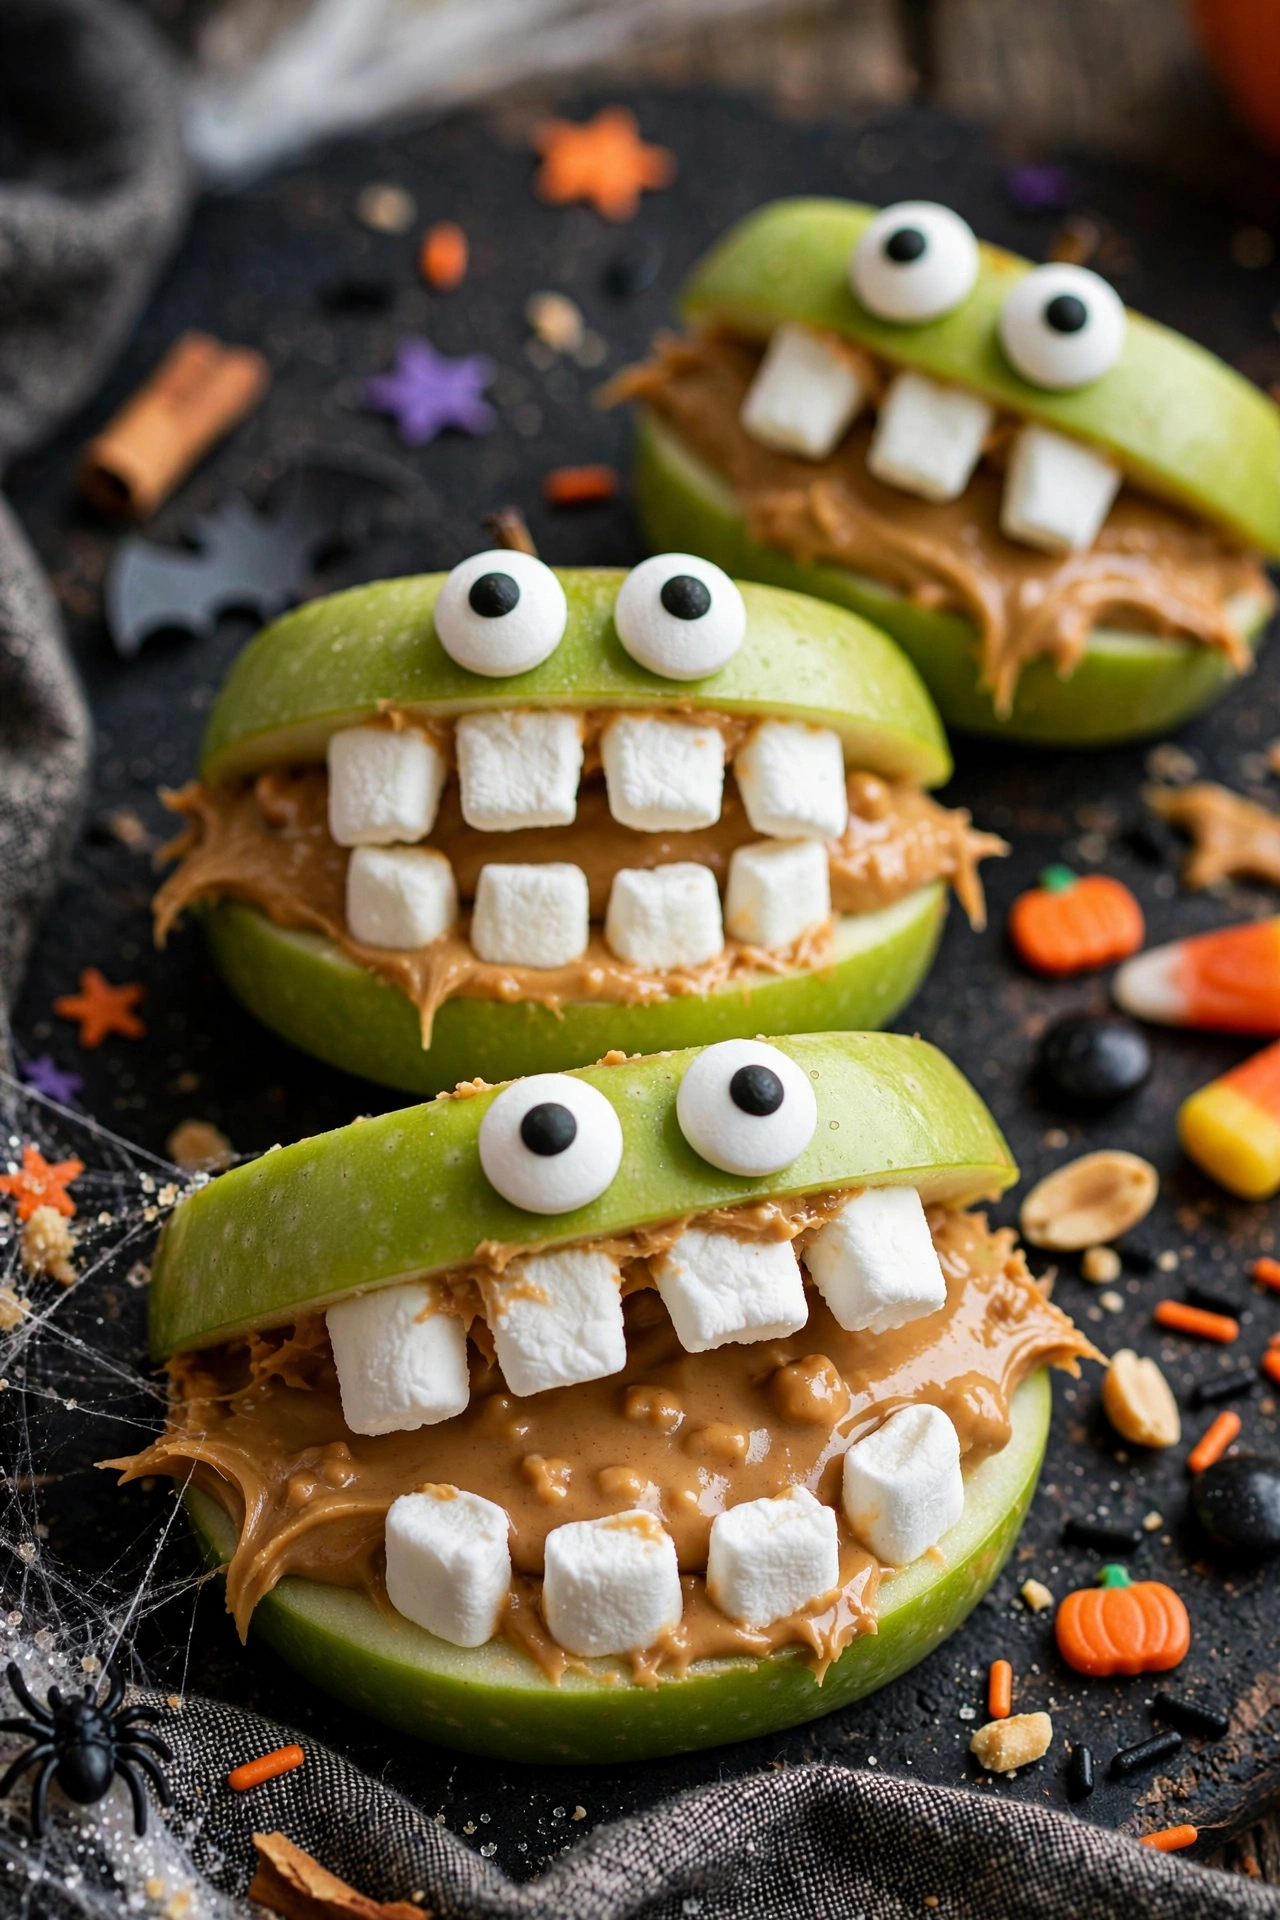
Brush apple slices with lemon juice first. It keeps them from browning while little hands assemble the monsters.
The healthy-ish Halloween snack. Green apple “mouths” filled with peanut butter, marshmallow teeth, and candy eyes. Kids love building their own monsters.
Allergy friendly swap
Use sunflower seed butter instead of peanut butter for nut-free classrooms.
Toss the apple slices in lemon juice right after cutting to keep them bright green for hours. Use sunflower seed butter for a classroom-safe version that looks identical to peanut butter. Assemble within two hours of serving so the apples stay crisp.
8. Graveyard Dirt Cups
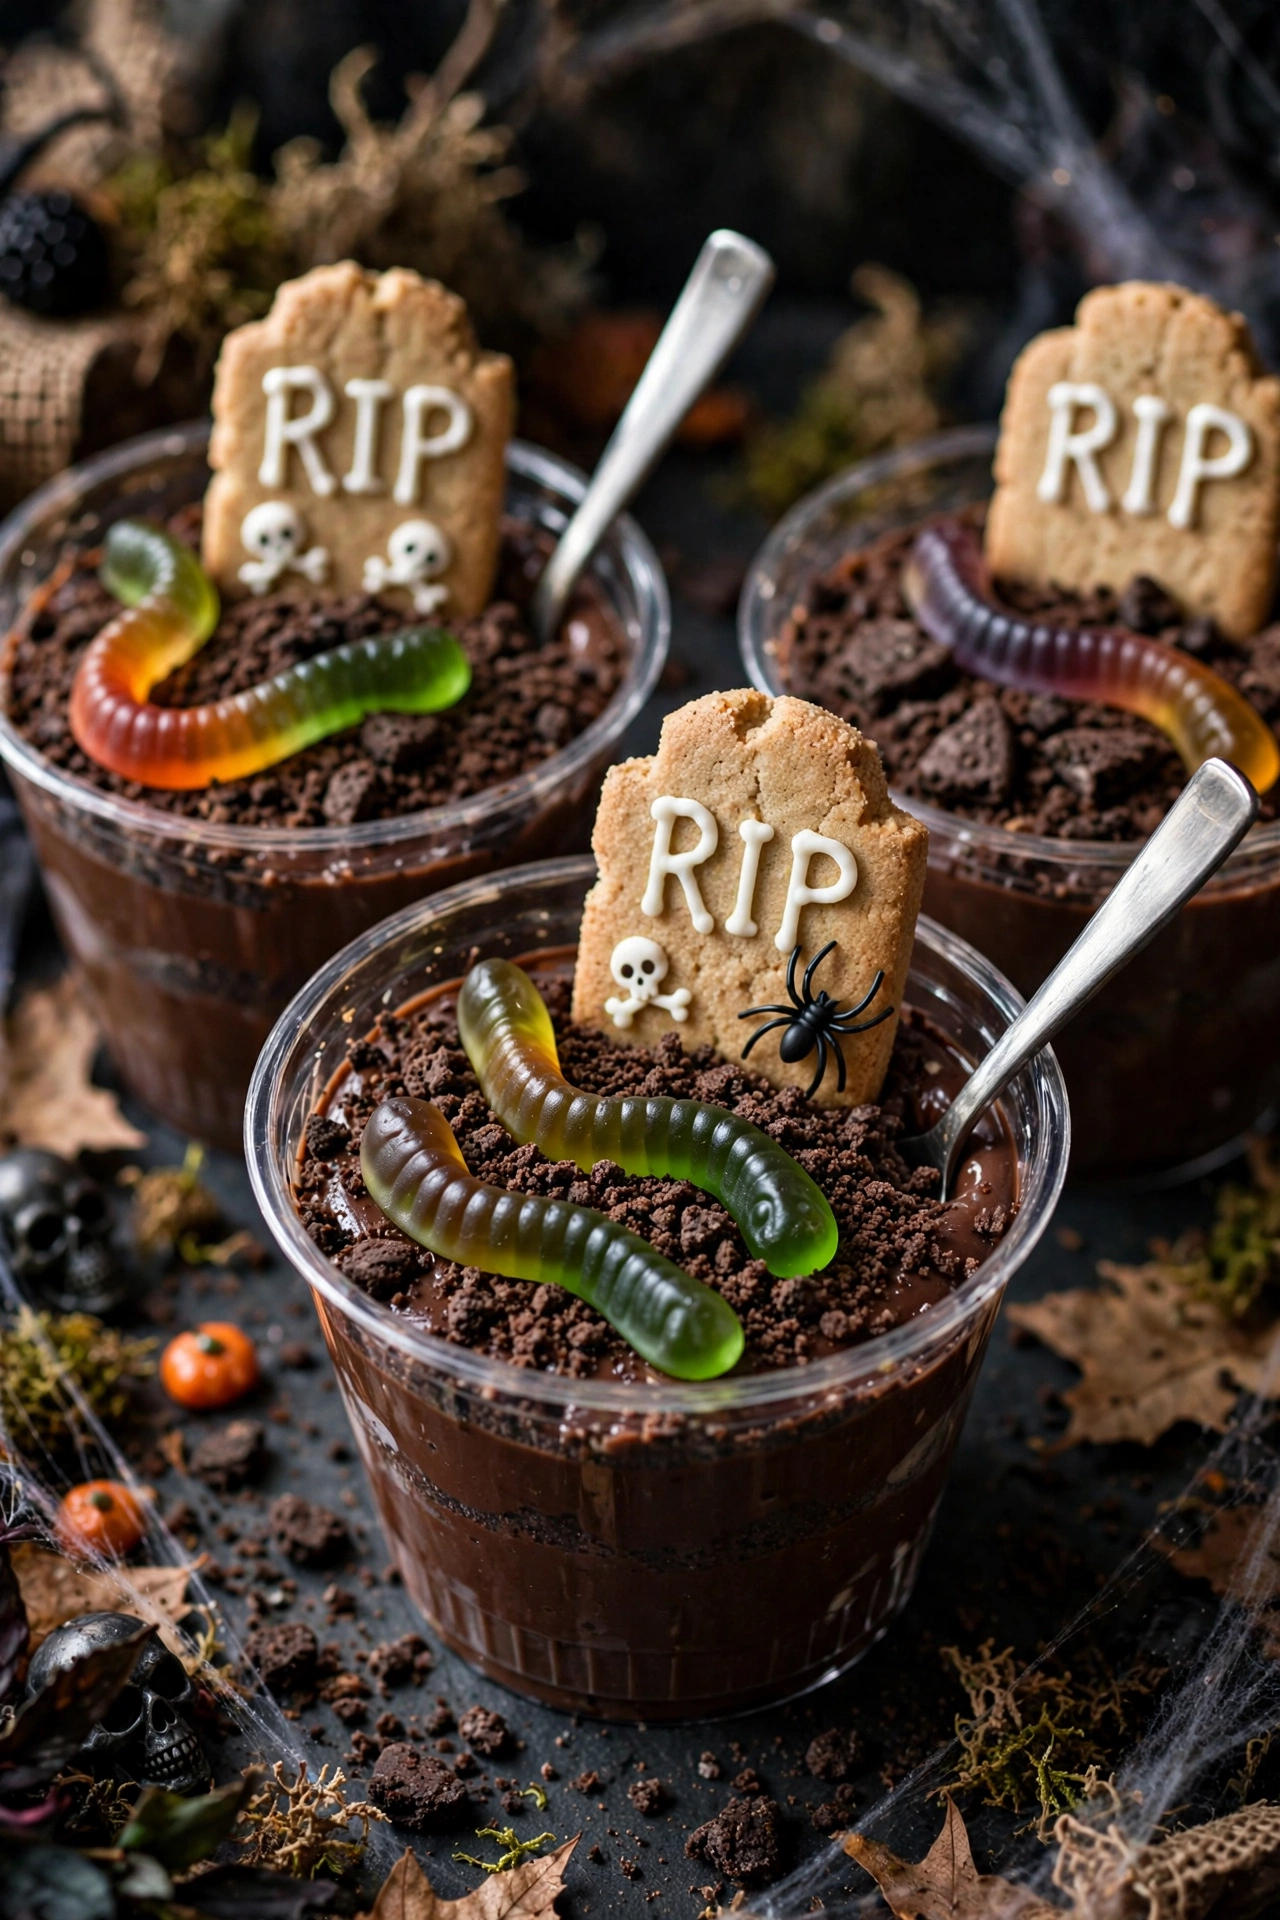
Dig in, if you dare. Chocolate pudding cups topped with crushed cookie “dirt,” gummy worms, and cookie tombstones with RIP piped in icing. A classic for a reason.
Tombstone trick
Use rectangular cookies and pipe RIP with white icing. Let them dry upright before sticking into the cups.
At a Glance
| Prep time | 20 minutes |
|---|---|
| Chill time | 1 hour |
| Makes | 8 cups |
| Best for | Kids parties |
More kid-approved sweets? Browse our kid-friendly desserts.
Crush the cookies in a zip-top bag for a mix of fine dirt and chunky pieces. Insert the cookie tombstones at a slight angle for a delightfully crooked graveyard look. Make these a day ahead, since the pudding needs time to chill and set properly.
9. Pumpkin Cheesecake Bars
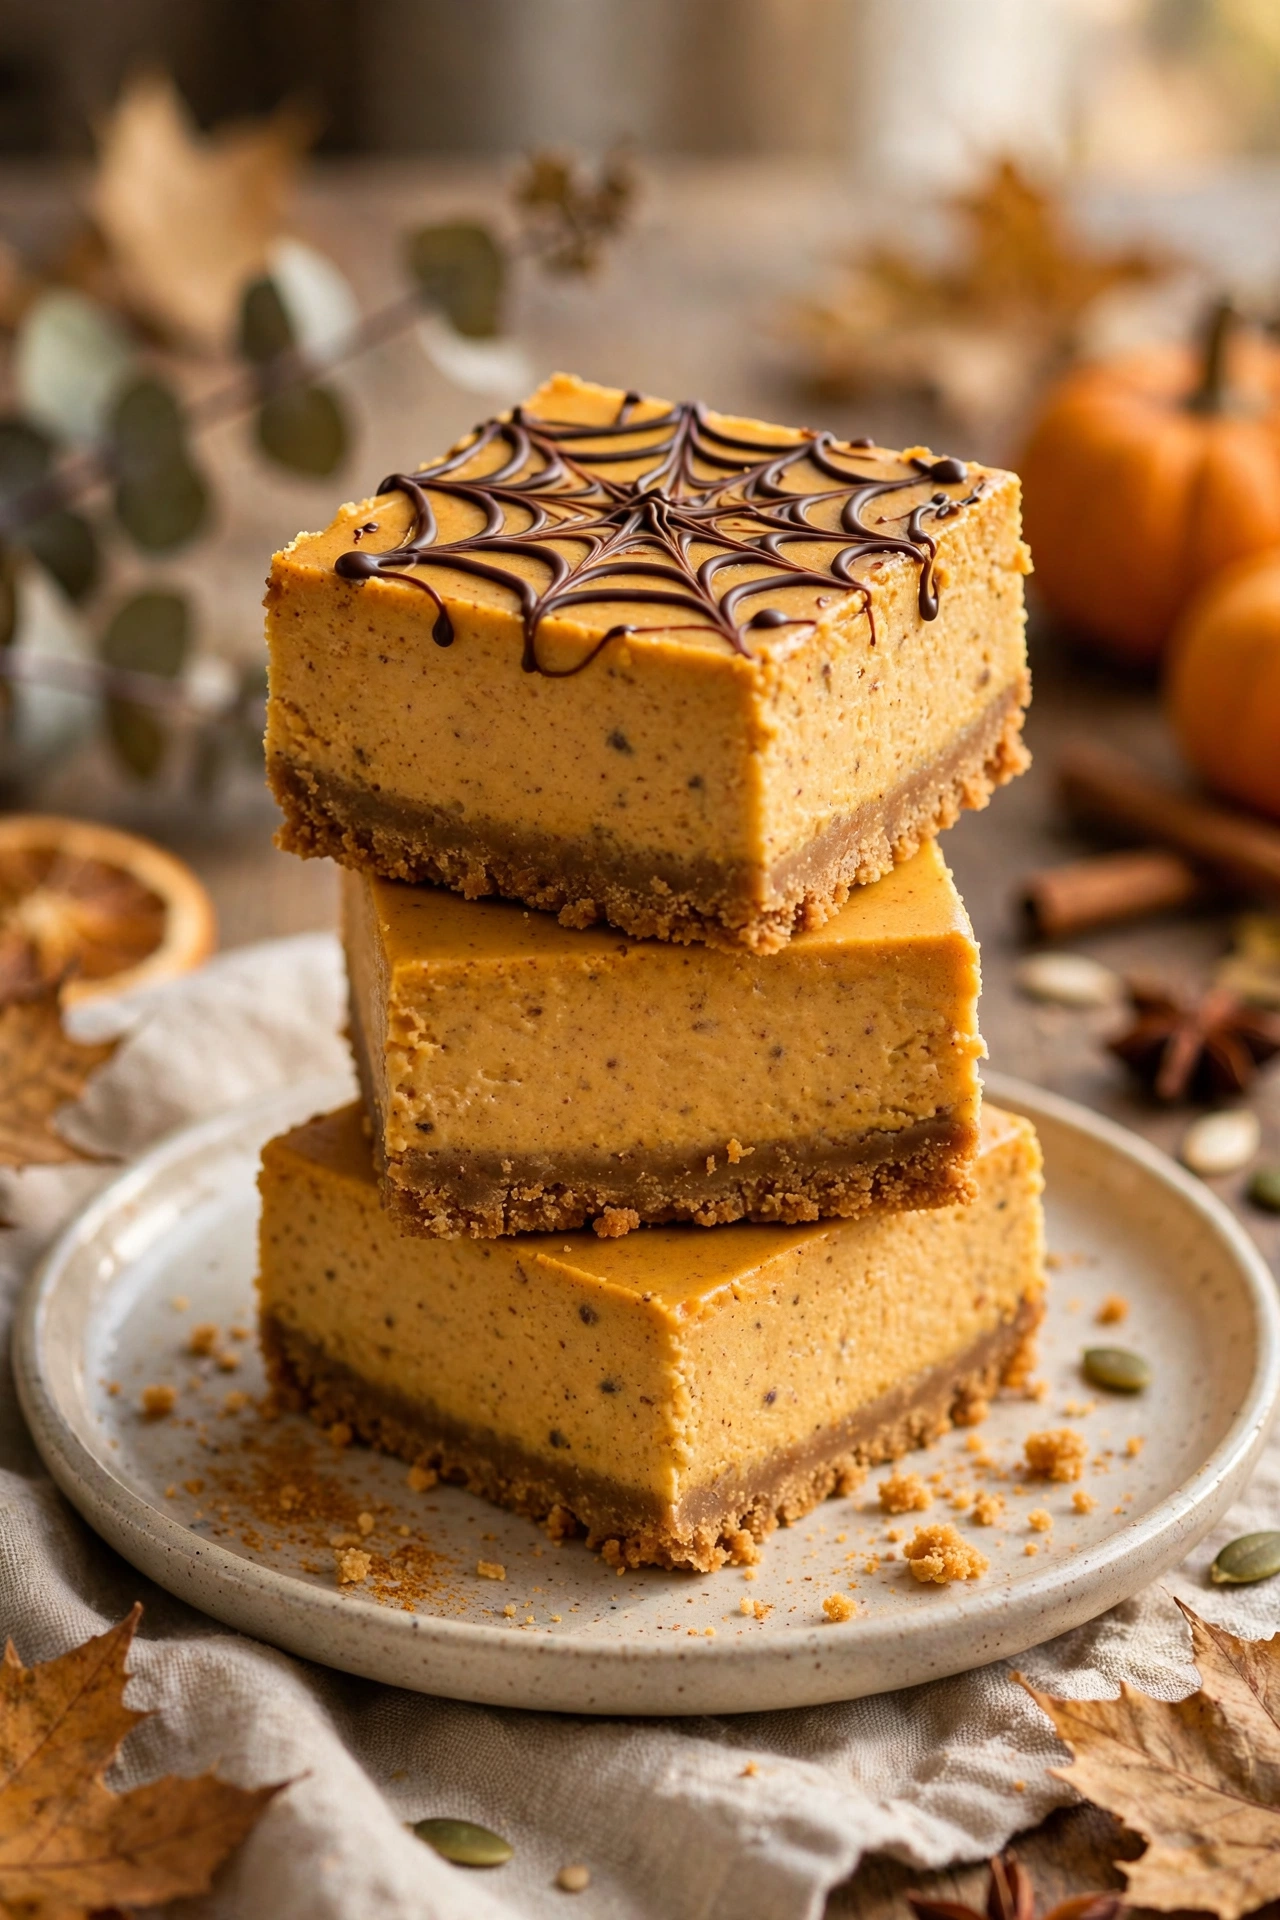
Creamy with a Halloween twist. Spiced pumpkin cheesecake bars on a graham crust, finished with a chocolate spiderweb drizzle. Easier to serve than a whole cheesecake.
Do and Don’t
Do: chill the slab fully before cutting for clean squares.
Don’t: add the web drizzle until serving day so it stays crisp.
Cutting clean bars
Run a long knife under hot water and wipe between cuts. Bakery-clean edges every time.
Line the pan with parchment overhang for easy lifting and perfectly clean edges. Swirl the pumpkin and plain batters with a knife for a marbled top that looks impressive with minimal effort. Chill overnight before cutting into bars with a hot, dry knife.
10. Oreo Bat Truffles
Ingredients Checklist
- 1 package chocolate sandwich cookies, crushed
- 8 oz cream cheese, softened
- 12 oz chocolate candy melts
- Mini cookies, for wings
- Candy eyes
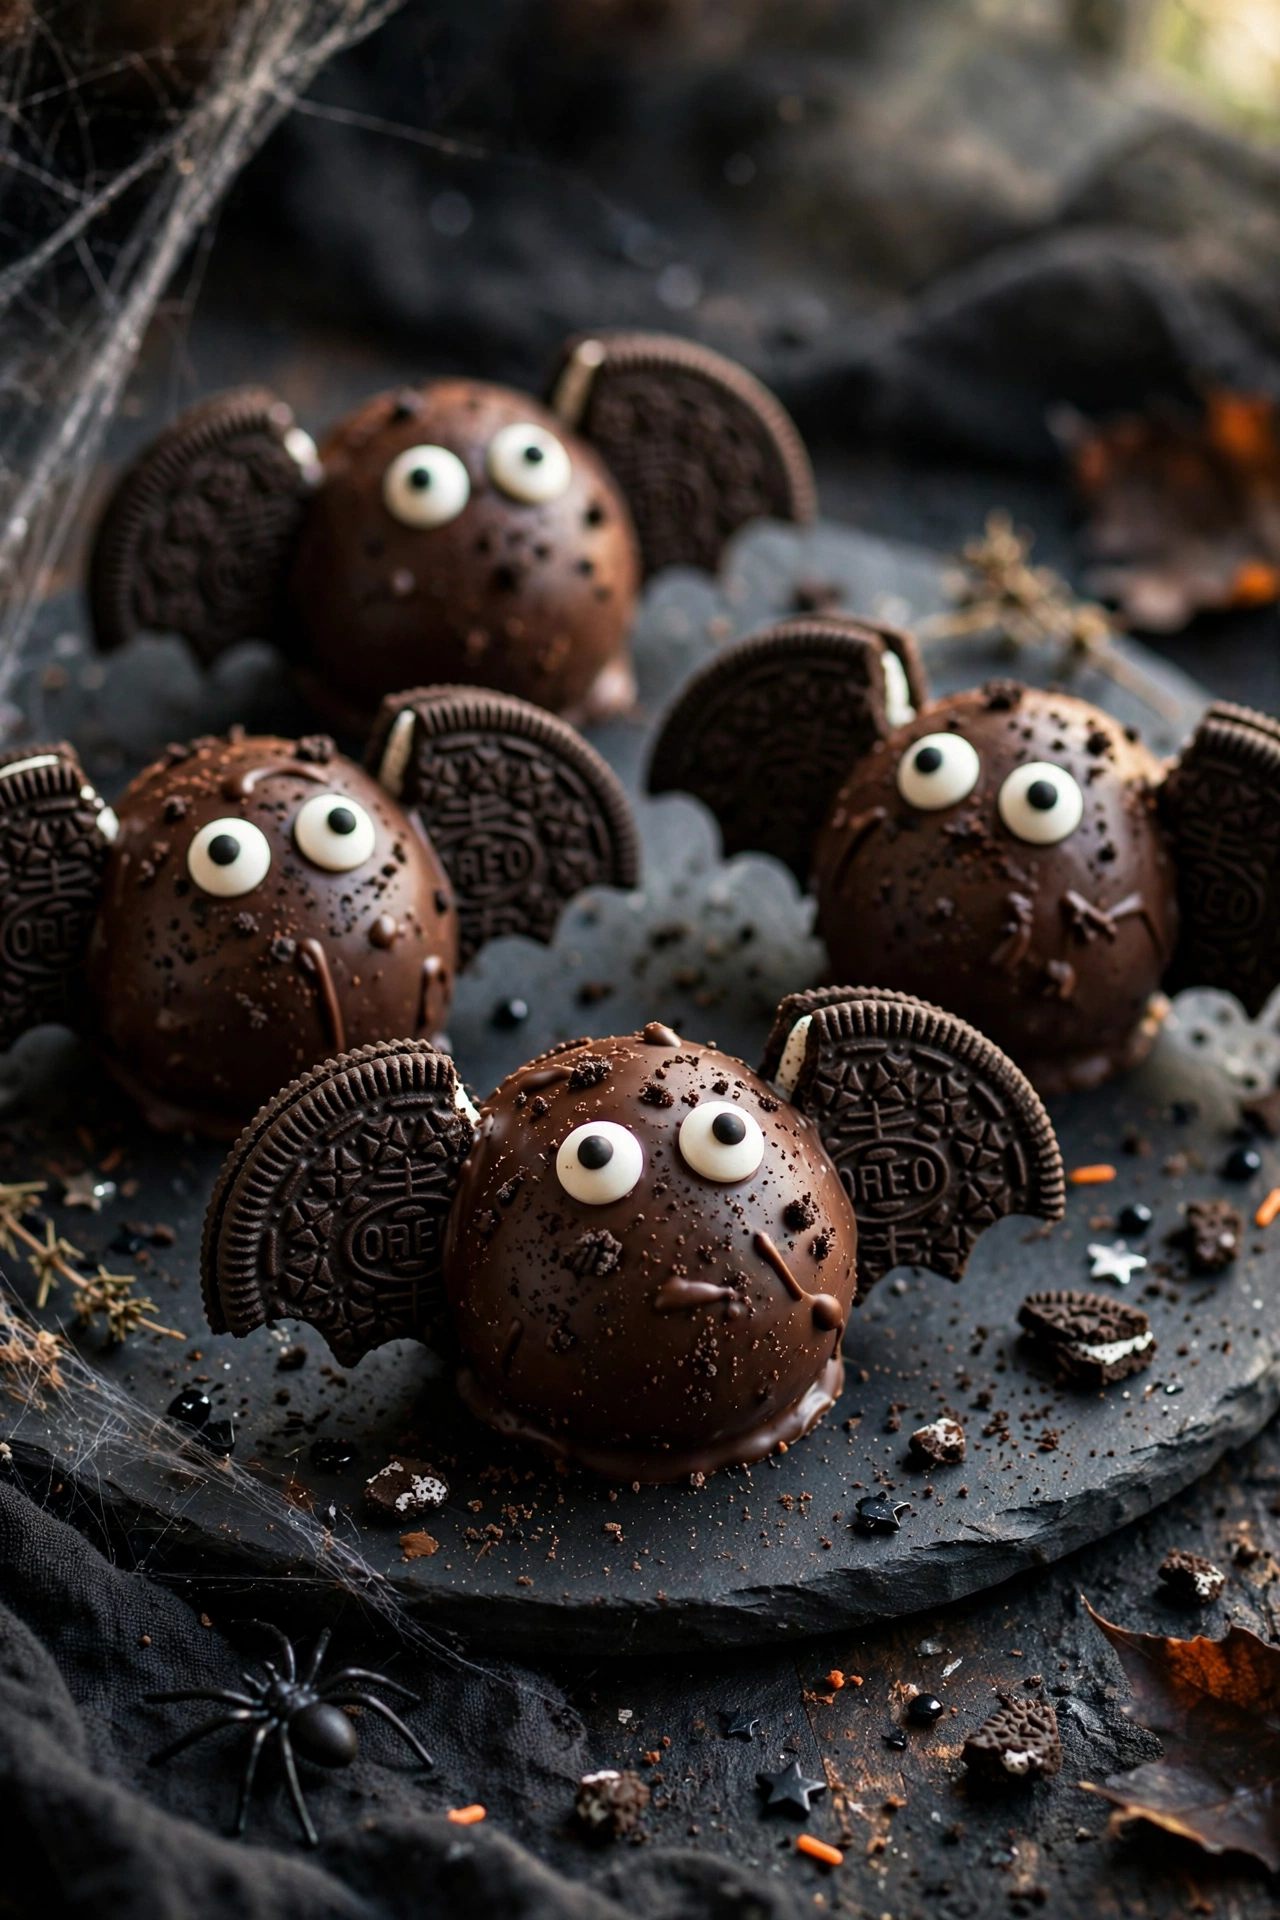
Three ingredients, endless cute. Cookie-and-cream-cheese truffles dipped in chocolate, decorated as bats with cookie wings and candy eyes.
Truffle fan? See our easy truffle recipes.
Freeze the truffles for twenty minutes before dipping in chocolate so they hold their shape. Attach the cookie wings while the chocolate coating is still wet so they adhere firmly. Draw the eyes with white gel after the coating sets completely.
11. Caramel Apple Monsters
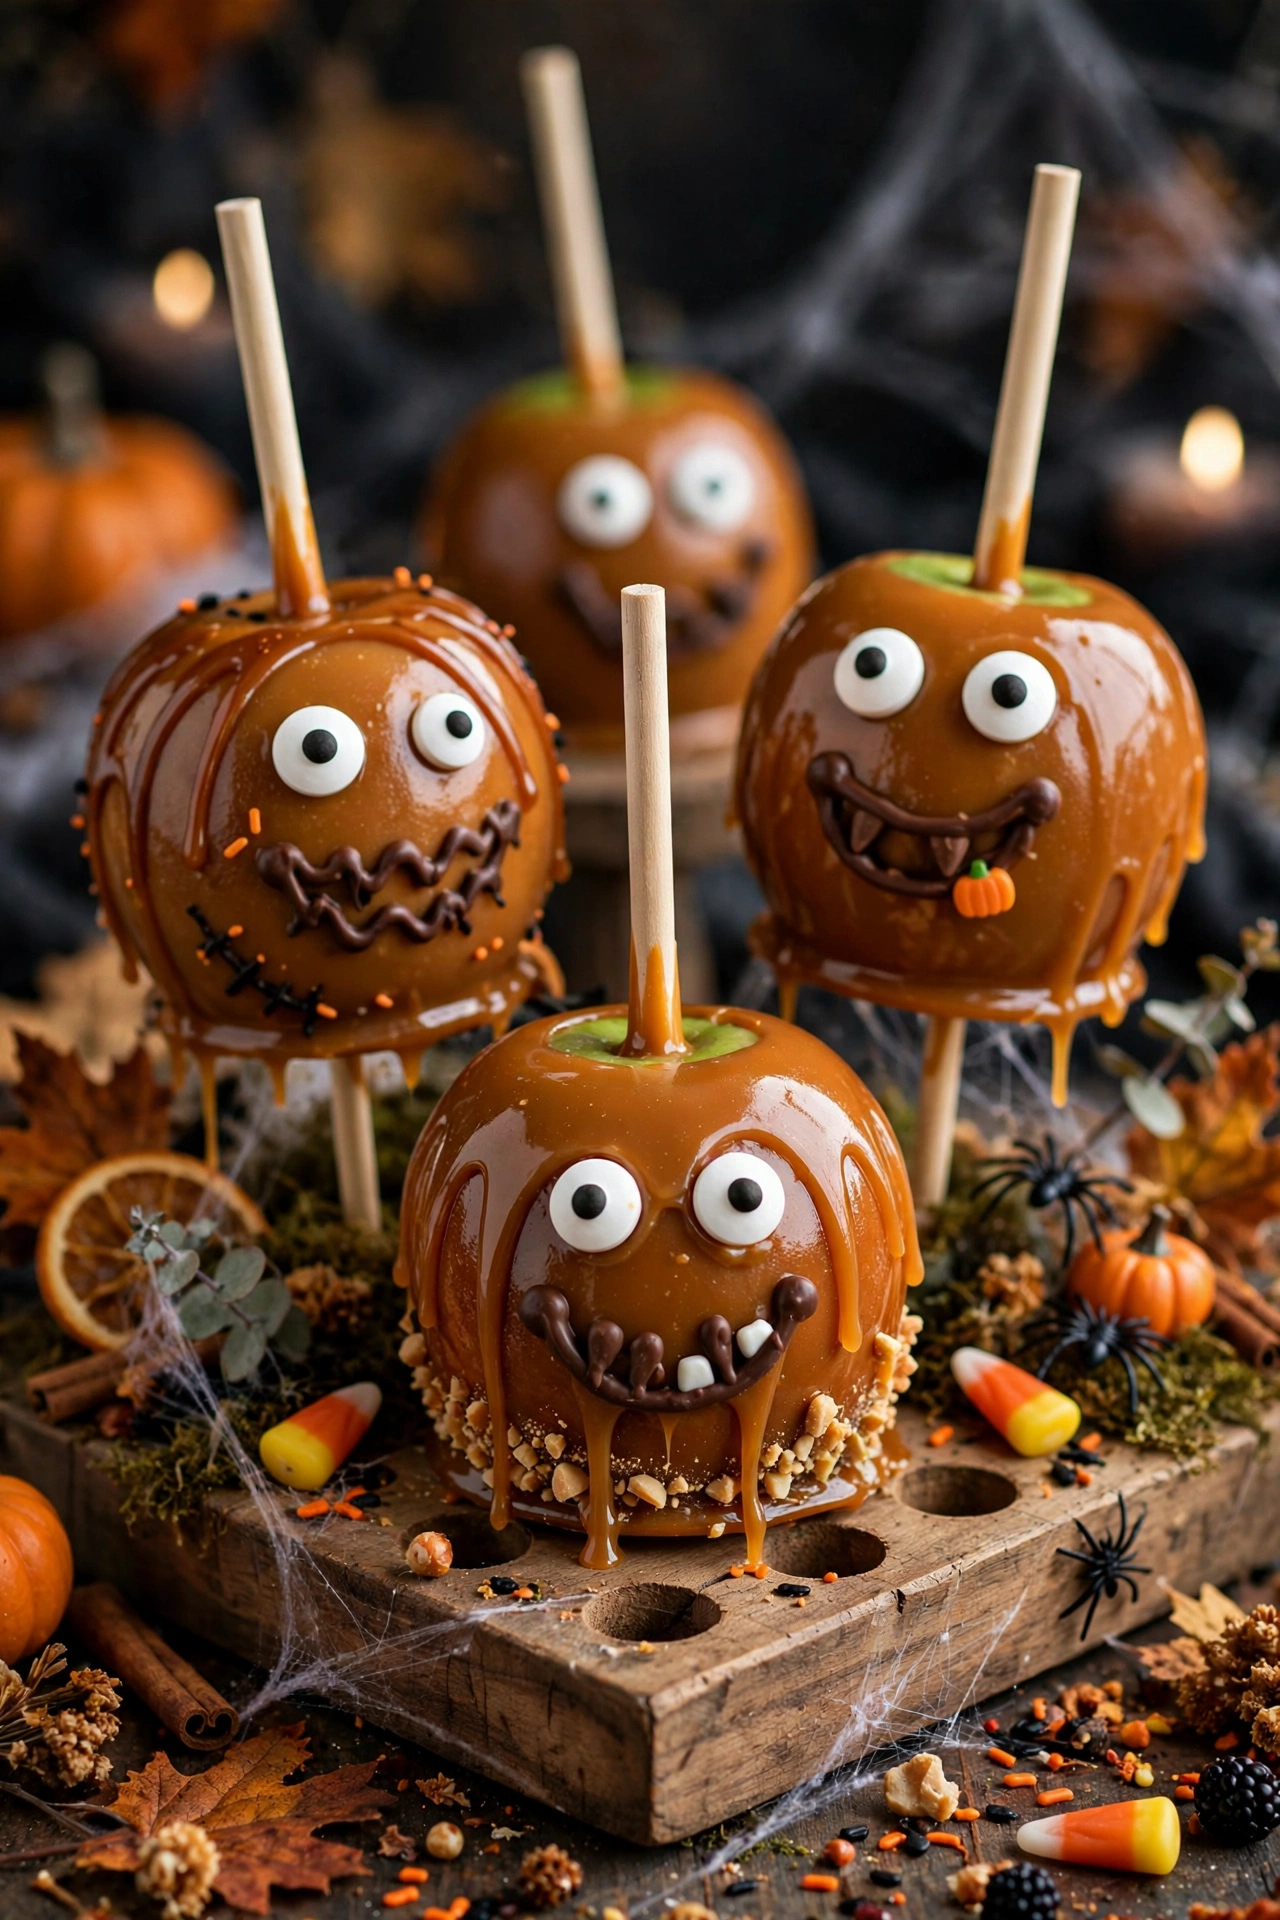
Fall meets fright night. Crisp apples dipped in buttery caramel and decorated as goofy monsters with candy eyes and chocolate mouths. A caramel apple station is always a hit.
THE ONE THING TO REMEMBER
Chill the apples first. Cold apples help the hot caramel set fast instead of sliding off.
Decorating station
Set out bowls of candy eyes, sprinkles, and mini chocolate chips so guests can design their own monsters.
Chill the apples for an hour before dipping so the caramel sets quickly and evenly. Use sliced almonds or candy eyes pressed into the caramel while it is still tacky. Serve within a day, since the caramel slowly slides as the apple releases moisture.
12. Frankenstein Rice Krispie Pops
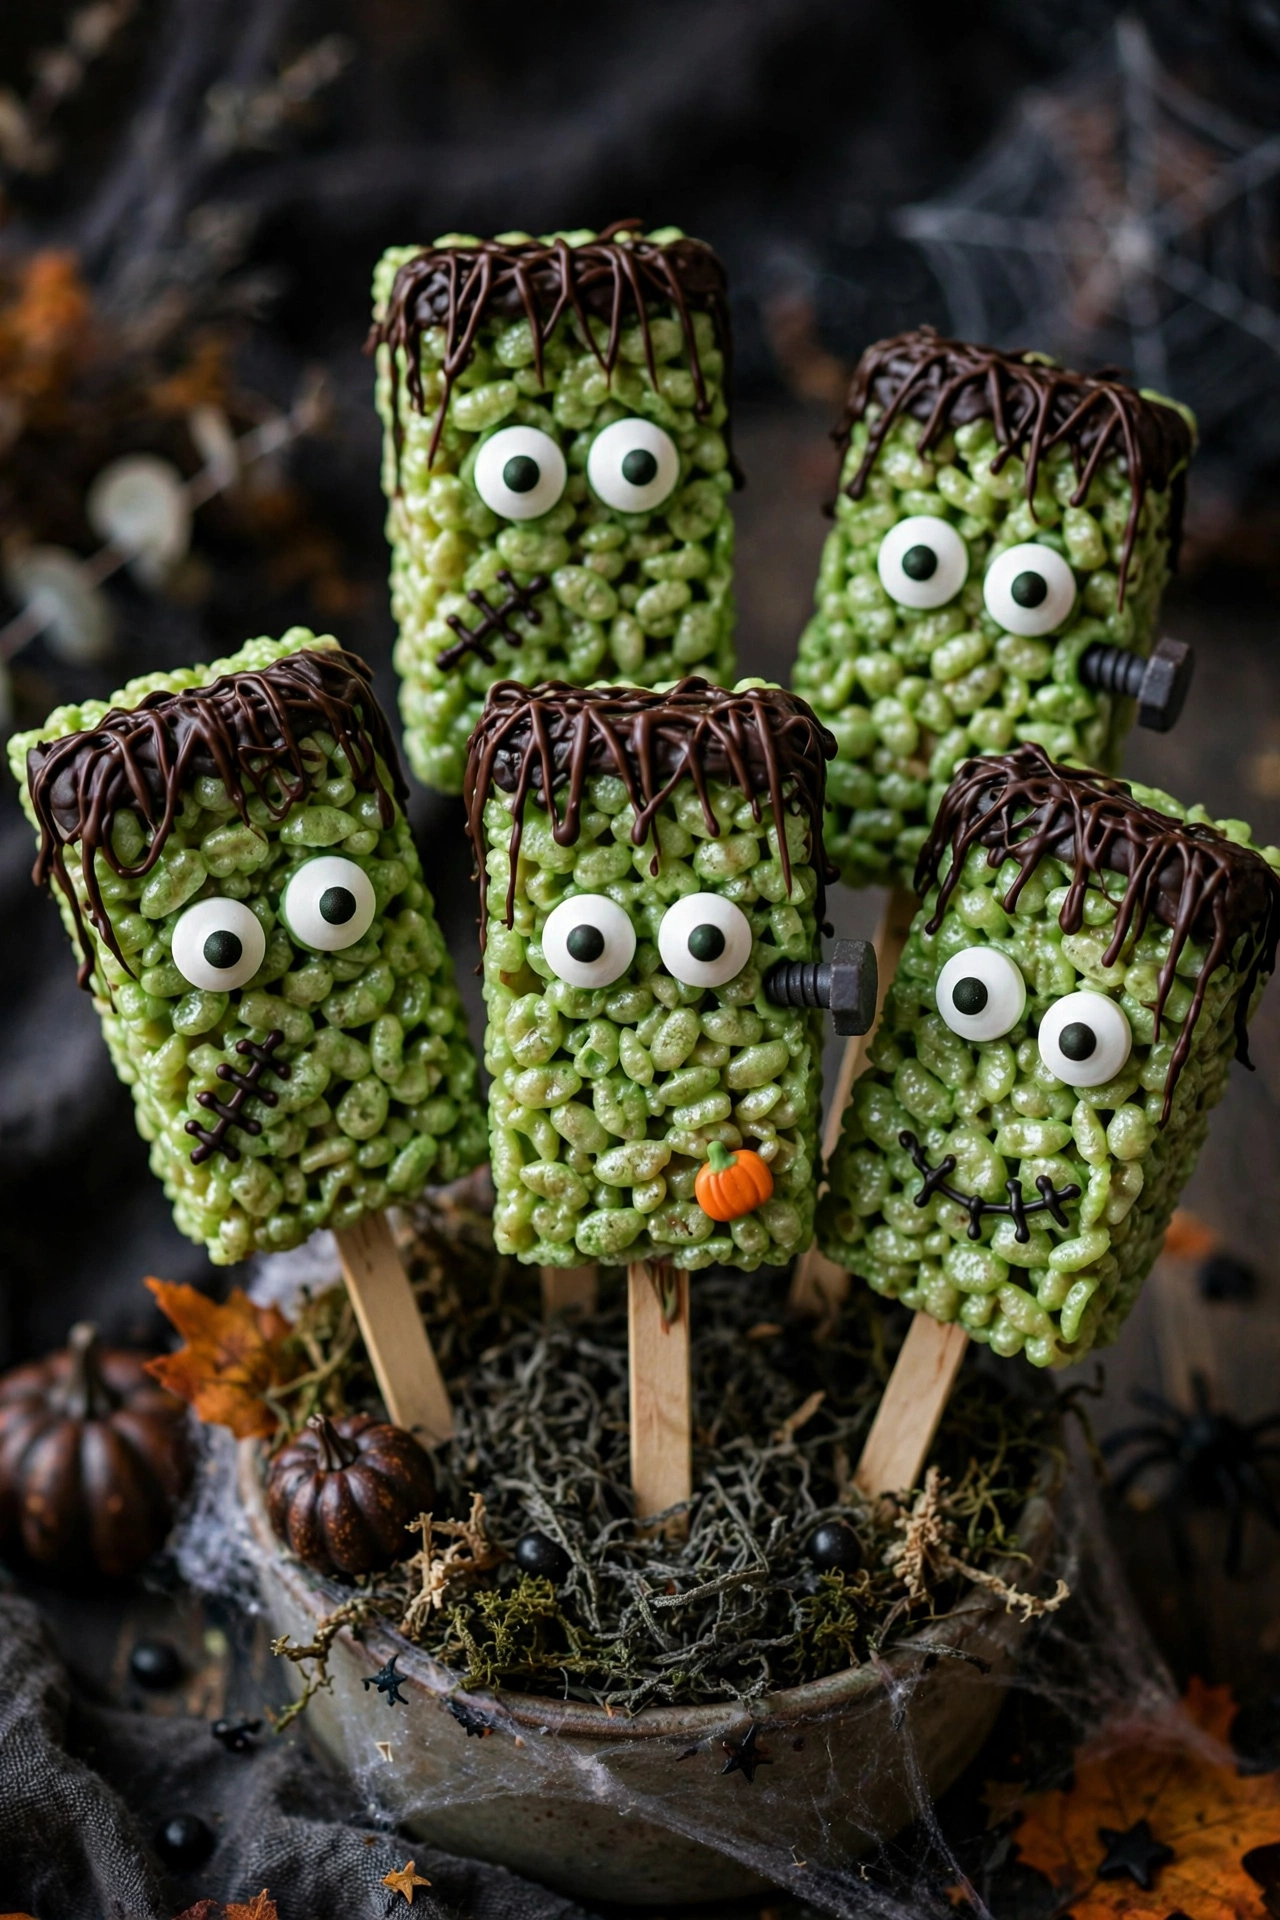
It’s alive! Green-tinted crispy treats on sticks, decorated as Frankenstein with chocolate hair, candy eyes, and a stitched mouth. Kids will not stop giggling.
Stick strategy
Insert the sticks while the treats are still soft. Once set, they hold firm for little hands.
Mini Method
- Make crispy treats with green food coloring.
- Press into a pan, cool, and cut into rectangles.
- Insert sticks and dip tops in melted chocolate for hair.
- Add candy eyes and pipe a stitched smile.
Party planning? Find more party treat recipes.
Tint the marshmallow mixture green before adding the cereal for the most even Frankenstein color. Insert the sticks while the treats are still warm so they anchor firmly. Draw the face with black gel once the treats have cooled completely to prevent smearing.
13. Vampire Donuts
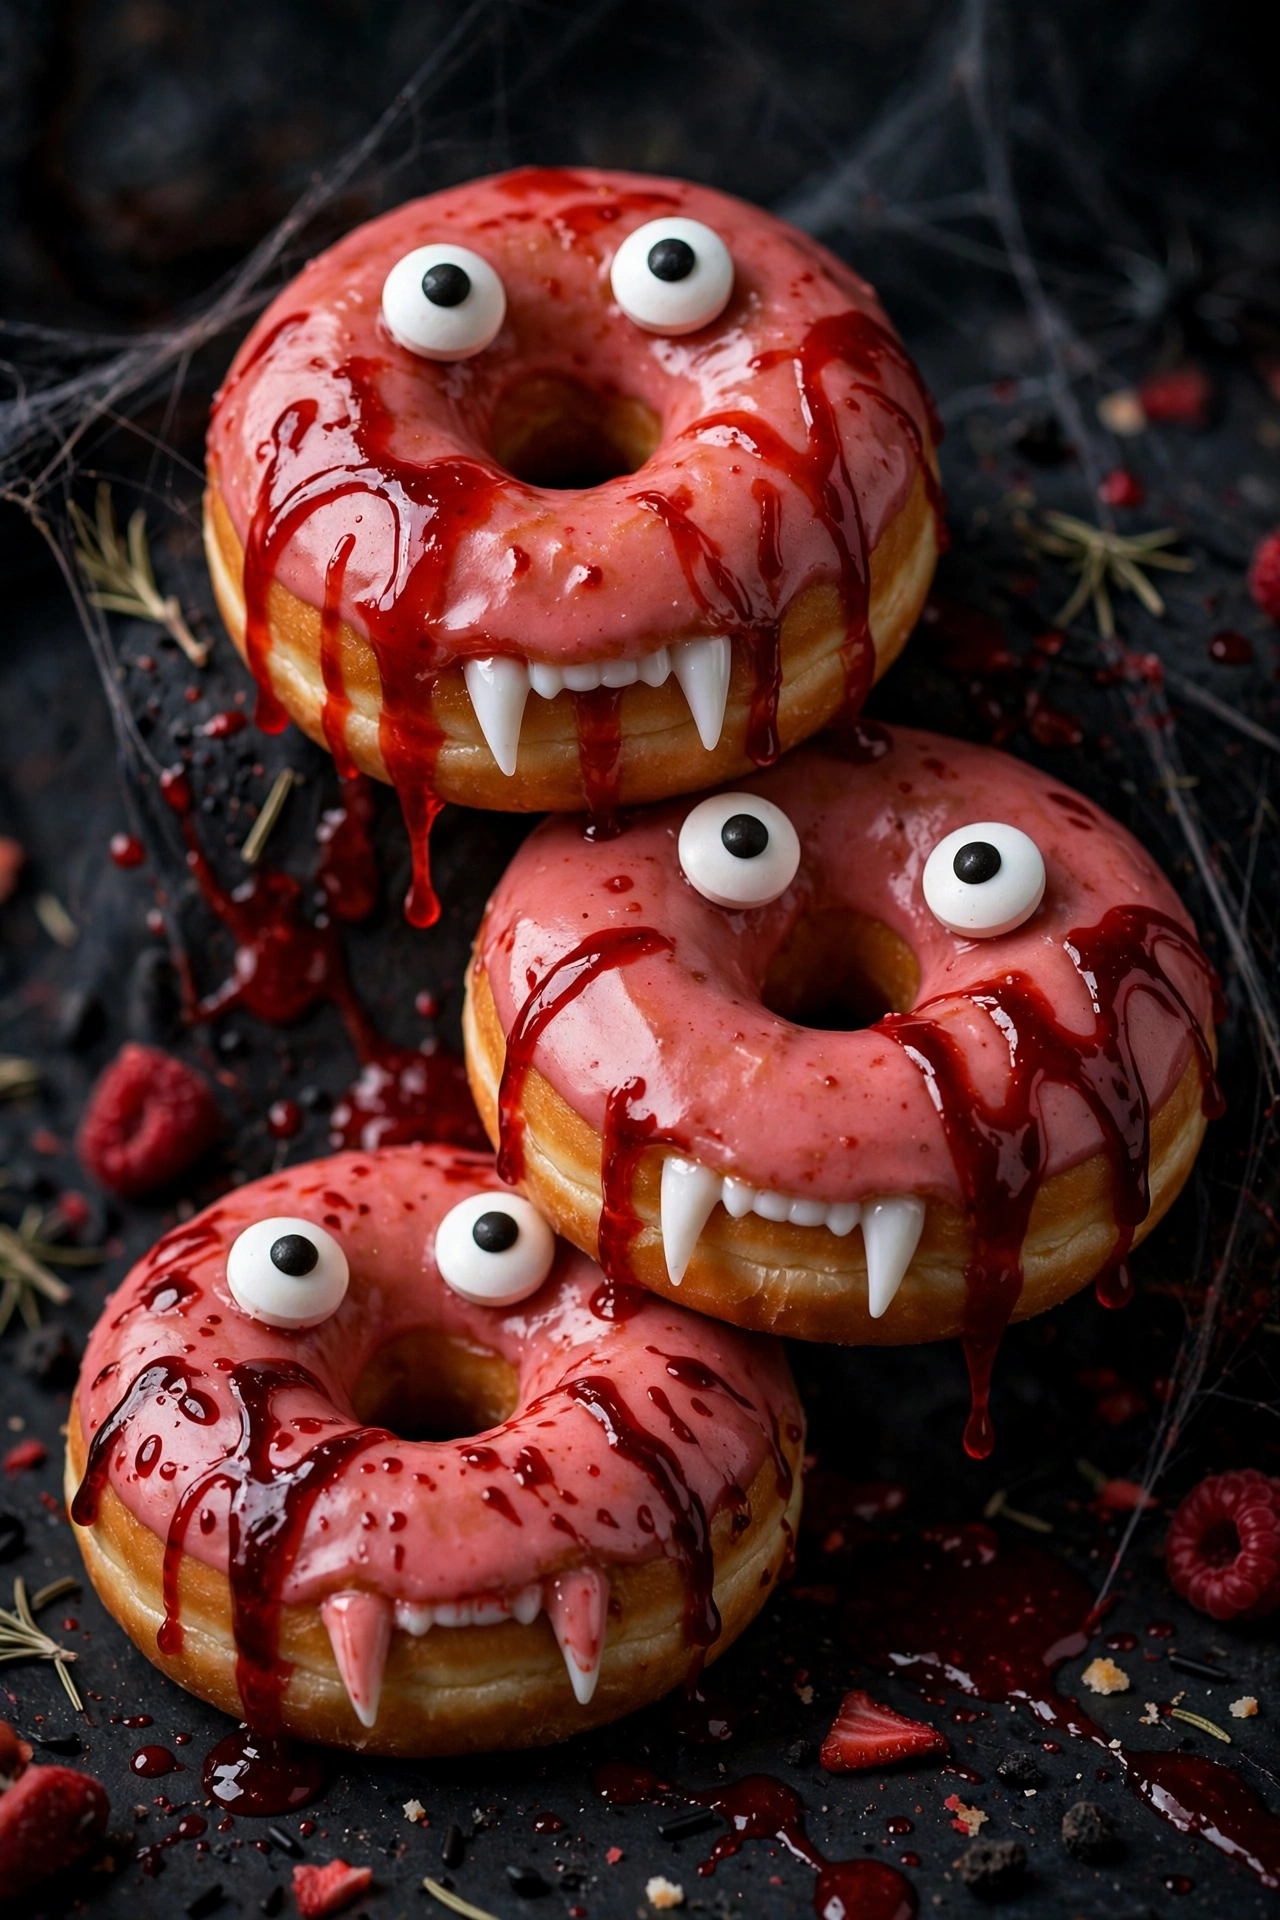
They vant to be eaten. Glazed donuts turned into vampires with candy eyes, plastic fangs, and strawberry “blood” drizzle. Store-bought donuts make this a 10-minute project.
Blood drizzle
Warm strawberry jam thins into the perfect drippy “blood.” Spoon it over just before serving.
Tip Callout
Add the plastic fangs at the very last minute. They are for decoration, so remind everyone to remove them before biting.
Use a small round cutter to remove the center bite mark before dipping in glaze. Plastic vampire teeth press easily into soft glazed donuts, so work while the glaze is tacky. Red gel dripping from the bite mark completes the spooky effect.
14. Witch Finger Pretzels
At a Glance
| Prep time | 25 minutes |
|---|---|
| Set time | 15 minutes |
| Makes | 20 fingers |
| Storage | 1 week airtight |
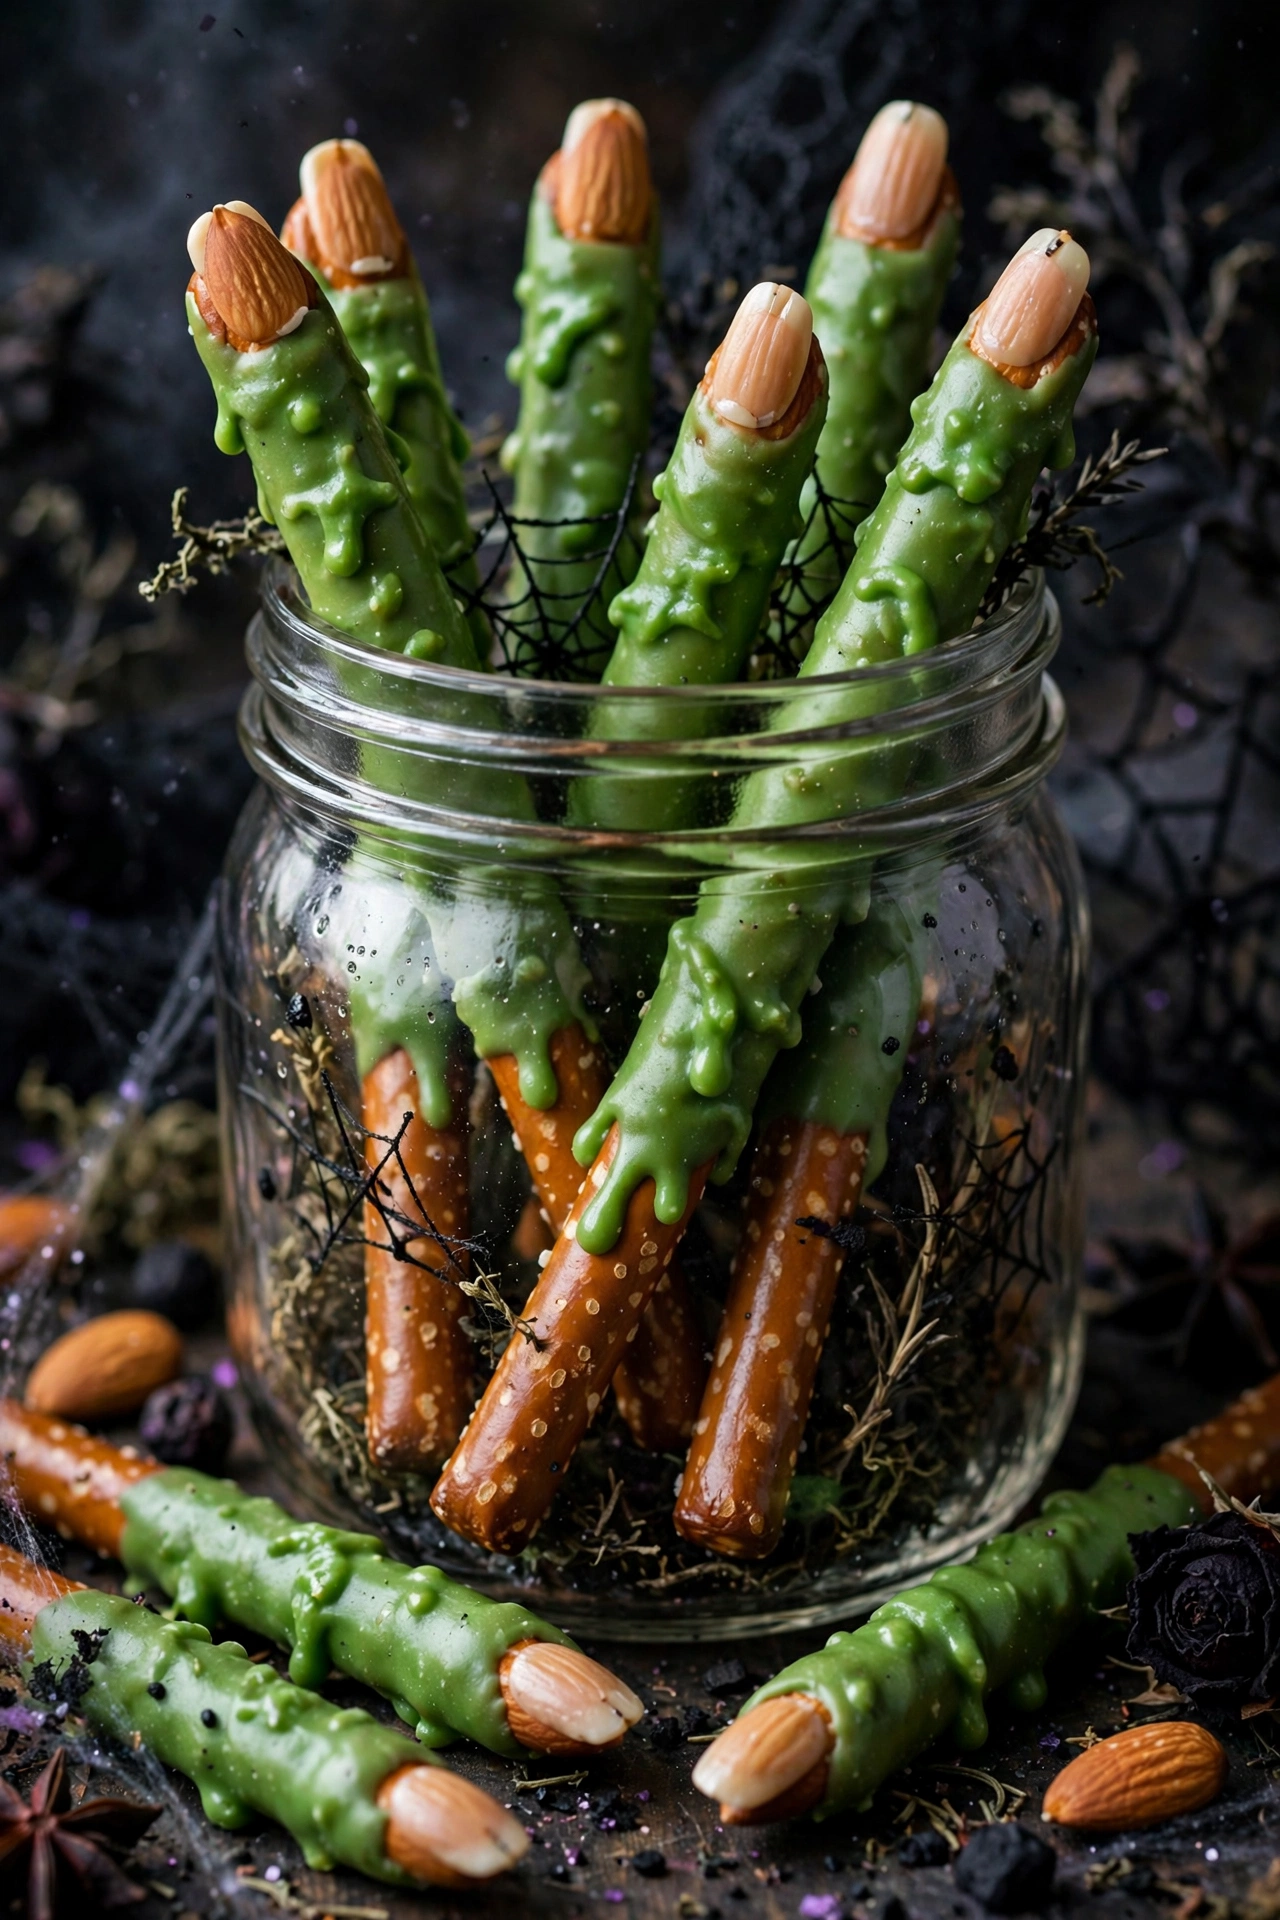
Creepy and crunchy. Pretzel rods dipped in green candy coating with almond “fingernails.” They look gross in the best possible way and taste like sweet-salty heaven.
See what’s new in our latest recipes on Spoon and Sizzle.
Nail placement
- Press the almond on while the coating is wet
- Angle it slightly for a gnarled look
- Let them set upright in a jar
Dip the pretzel rods in almond bark rather than chocolate, since it sets faster and holds the almond nail firmly. Press the sliced almond nail into the coating immediately before it hardens. Stand the finished fingers upright in a jar to dry without smudging.
15. Candy Corn Fudge
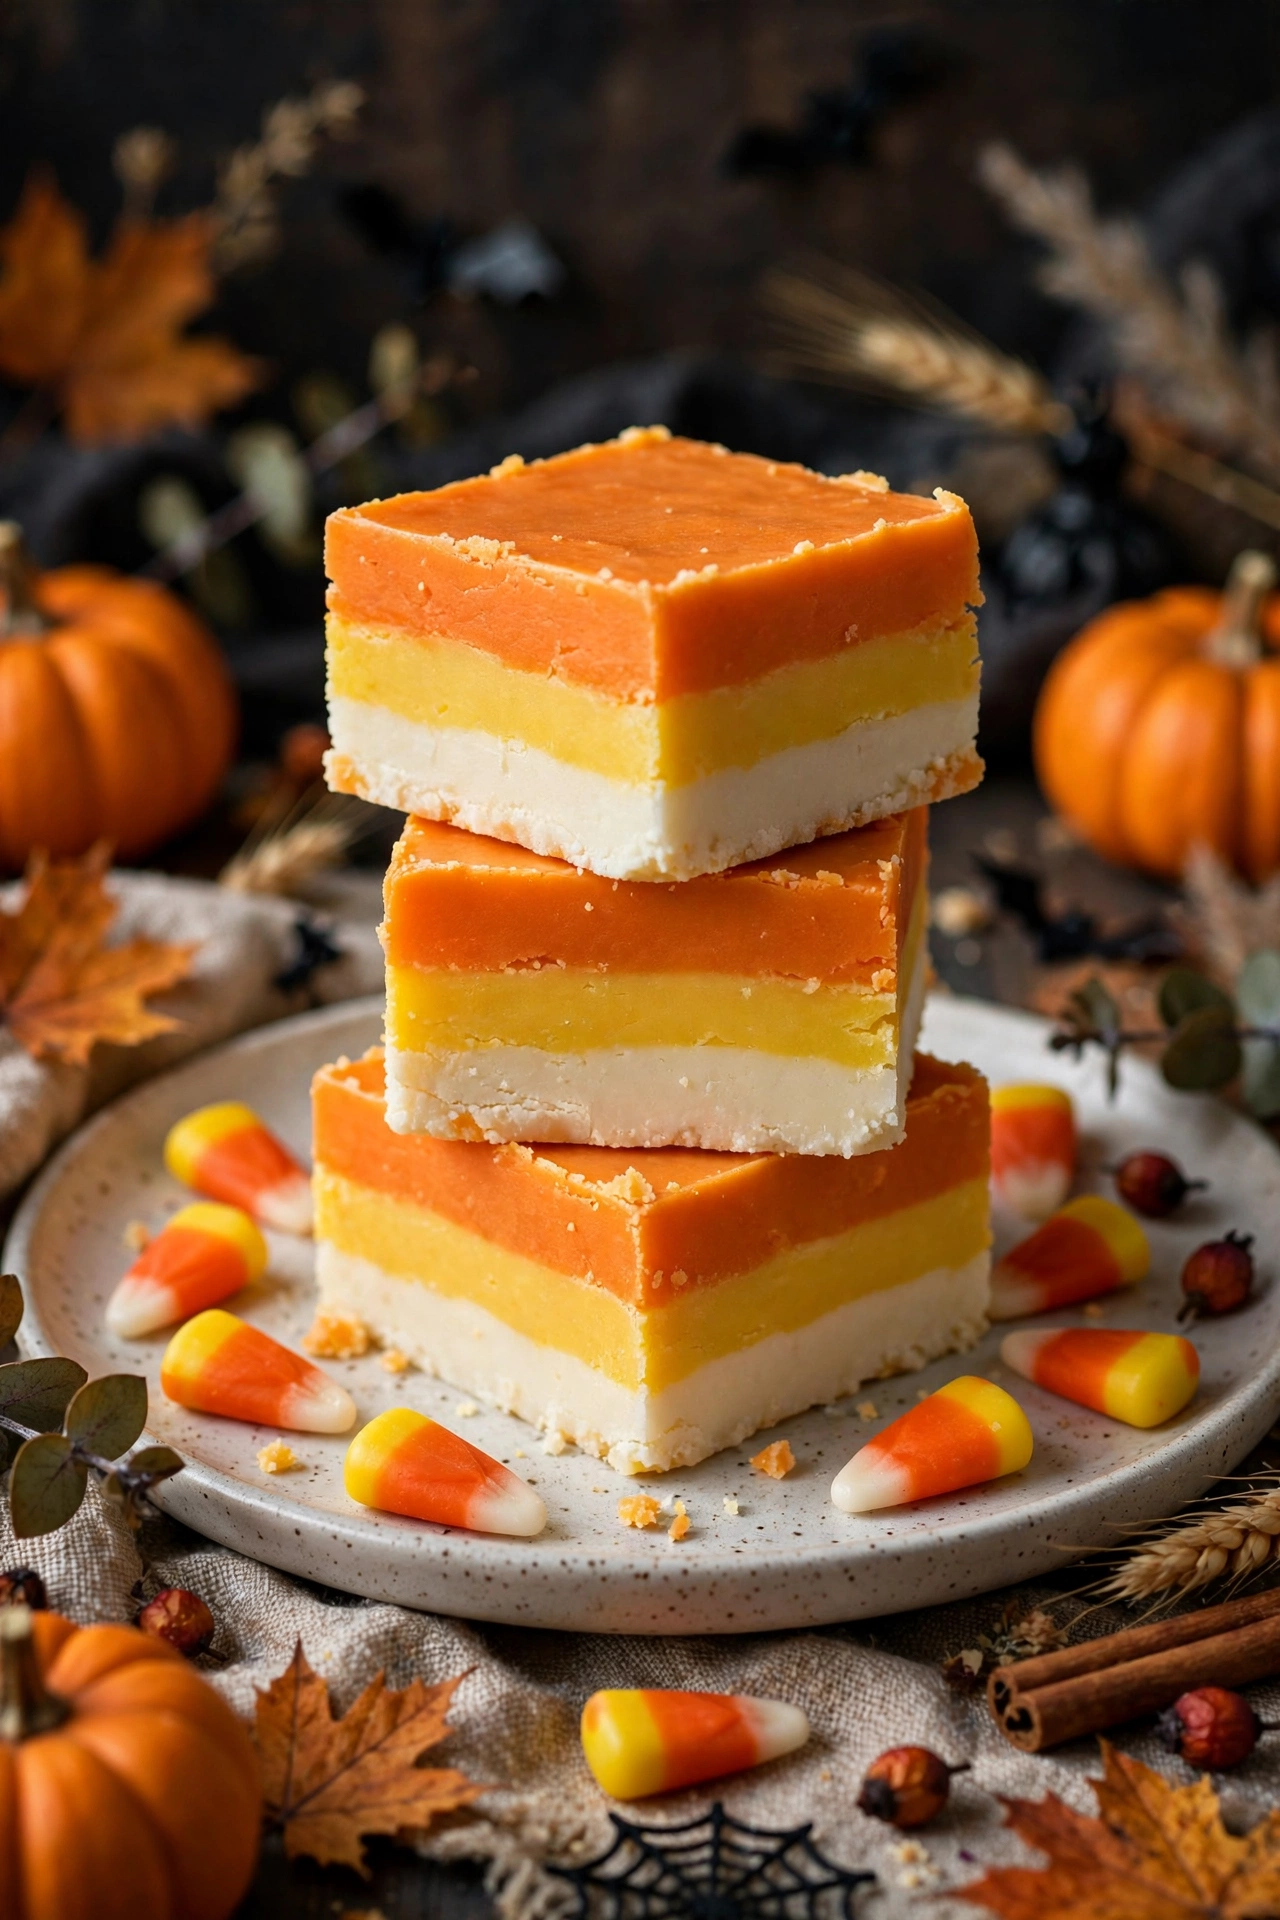
Three layers of nostalgia. White chocolate fudge layered in candy corn colors: white, orange, and yellow. It tastes like vanilla and looks like Halloween.
Do and Don’t
Do: let each layer set 20 minutes before pouring the next.
Don’t: rush the layers. Patience gives you razor-sharp stripes.
Layer the colors quickly while the fudge is still pourable, since it begins setting within minutes. Use gel food coloring for the most vivid orange and yellow without thinning the fudge. Score the top lightly before it fully sets for cleaner cuts later.
Final Thought
These 15 spooky Halloween treats prove that the scariest thing about October should be how fast the dessert table empties. From ghost cupcakes to candy corn fudge, there is something here for every little monster and grown-up ghoul. Which Halloween treats will you make first?