
24 Pumpkin Pie Recipes
There is no Thanksgiving table without pumpkin pie, and these pumpkin pie recipes make sure yours is the one everyone talks about. From the classic spiced custard in a flaky crust to chocolate swirls, crunchy streusel tops, and no-bake versions for busy cooks, this list covers every style of pie a pumpkin lover could want.
Every recipe here starts with the same promise: a silky, well spiced filling that slices clean and a crust that stays crisp. Pick your favorite, warm up the oven, and get ready for the smell of cinnamon and nutmeg to take over your kitchen.
Streusel Success Check
Butter cold and cut into pea sized bits. Crumbs loose and shaggy, never packed down. Streusel scattered on partway through baking, so it stays crisp. Top deep golden and smelling toasty before the pie comes out. If the crumbs brown too fast, tent the pie loosely with foil.
Why You’ll Love These Pumpkin Pie Recipes
- Every style covered: classic, no-bake, vegan, mini hand pies, and a slab pie for a crowd
- Silky filling tips: no cracks, no soggy bottoms, clean slices every time
- Make ahead friendly: most of these pies taste even better the next day
- Simple ingredients: canned pumpkin puree and pantry spices do the heavy lifting
- Holiday tested: these are the pies that earn a permanent spot on the Thanksgiving table
1. Classic Pumpkin Pie
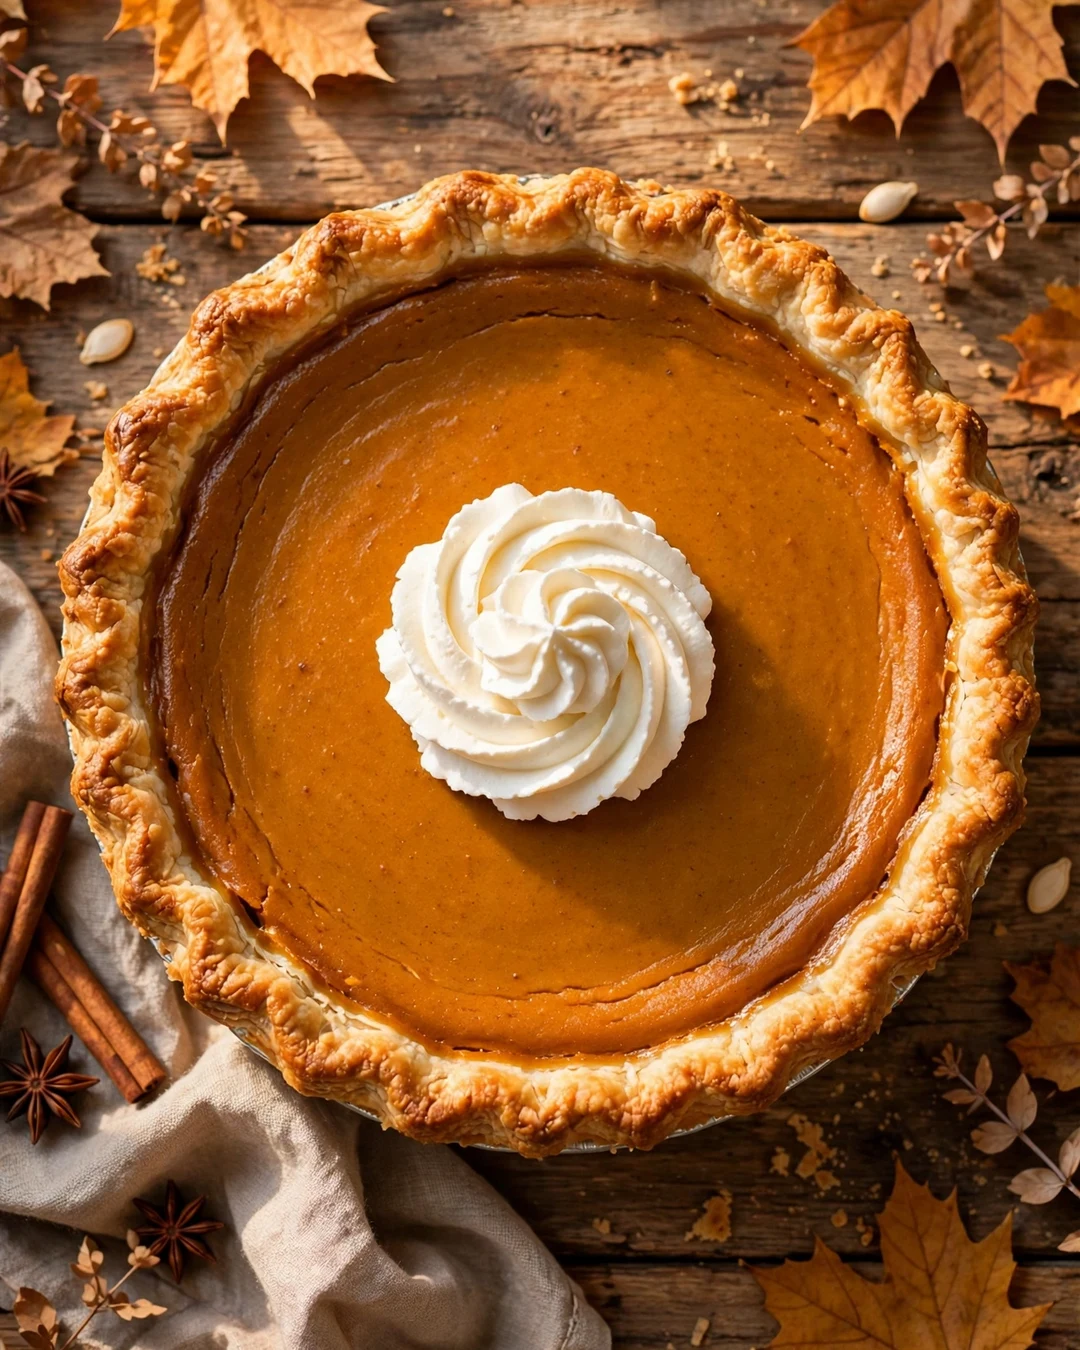
Every family has one, the classic pumpkin pie that shows up year after year and never gets a single complaint. The filling is a smooth, warmly spiced custard made from pumpkin puree, eggs, and evaporated milk, baked in a flaky pastry crust until it just barely jiggles in the center. This is the benchmark pie, the one every creative variation in this list is happily measured against.
The method is gentle and forgiving. Whisk the pumpkin, brown sugar, cinnamon, ginger, nutmeg, and salt until smooth, then whisk in the eggs and milk until the filling pours like thick cream. Blind bake the crust for ten minutes so the bottom stays crisp, pour in the filling, and bake until the edges are set and the middle still trembles slightly when you nudge the pan.
Pro Tips
That little jiggle matters more than any timer. Custard pies keep cooking as they cool, so pulling the pie while the center still wobbles like set gelatin gives you a silky slice instead of a dry, cracked one. If the crust edges brown too fast, cover them with a ring of foil for the last stretch of baking.
- Use plain pumpkin puree, never pumpkin pie filling
- Blind bake the crust 10 minutes for a crisp bottom
- Pull the pie when the center still jiggles gently
- Cool at least 2 hours before slicing
Serving Suggestions
A cloud of lightly sweetened whipped cream is the classic finish, with a tiny pinch of cinnamon dusted over the top. Serve at room temperature or lightly chilled. If you are building a full holiday dessert spread, these thanksgiving dessert recipes pair beautifully alongside it.
Make it ahead with confidence: this pie keeps beautifully for up to three days in the fridge, and the flavor actually deepens overnight as the spices settle into the custard. Bake it on Tuesday, hide it behind the milk, and Thanksgiving Day becomes a whole lot calmer for the cook.
2. Brown Butter Crust Pumpkin Pie

If you want one small change that makes people ask what your secret is, brown the butter. Using brown butter in the crust, and stirring a spoonful into the filling, gives this pie a deep, nutty, almost toffee like flavor that regular pumpkin pie simply cannot match. The crust bakes up extra flaky, and the filling tastes richer without feeling heavy.
Making brown butter is simple: melt butter in a light colored pan over medium heat, swirling often, until the foam subsides and the milk solids turn amber and smell like toasted hazelnuts. Pour it straight into a bowl so it stops cooking. Chill most of it for the pastry, and whisk the rest, still warm, into your pumpkin filling with the spices.
Pro Tips
Chill the brown butter until it is solid but scoopable before cutting it into the flour. Solid fat makes flaky layers, while melted butter makes a tough crust. A tiny pinch of extra salt in the crust balances the sweetness of the filling and makes the nutty flavor pop even more.
- Brown the butter until amber and nutty smelling
- Chill it solid again before making the crust
- Add a spoonful to the filling for deep flavor
- Extra pinch of salt in the crust balances sweetness
Serving Suggestions
This pie needs nothing more than softly whipped cream and maybe a drizzle of warm caramel. Brown butter fans, take note: these brown butter desserts use the same trick in cookies, cakes, and more.
Shortcut worth knowing: brown a full stick of butter, pour it into a heatproof jar, and keep it in the fridge for up to a week. Anytime a recipe calls for melted butter, scoop out what you need and your crusts, cookies, and cakes all get that same deep, nutty upgrade.
3. Maple Pumpkin Pie
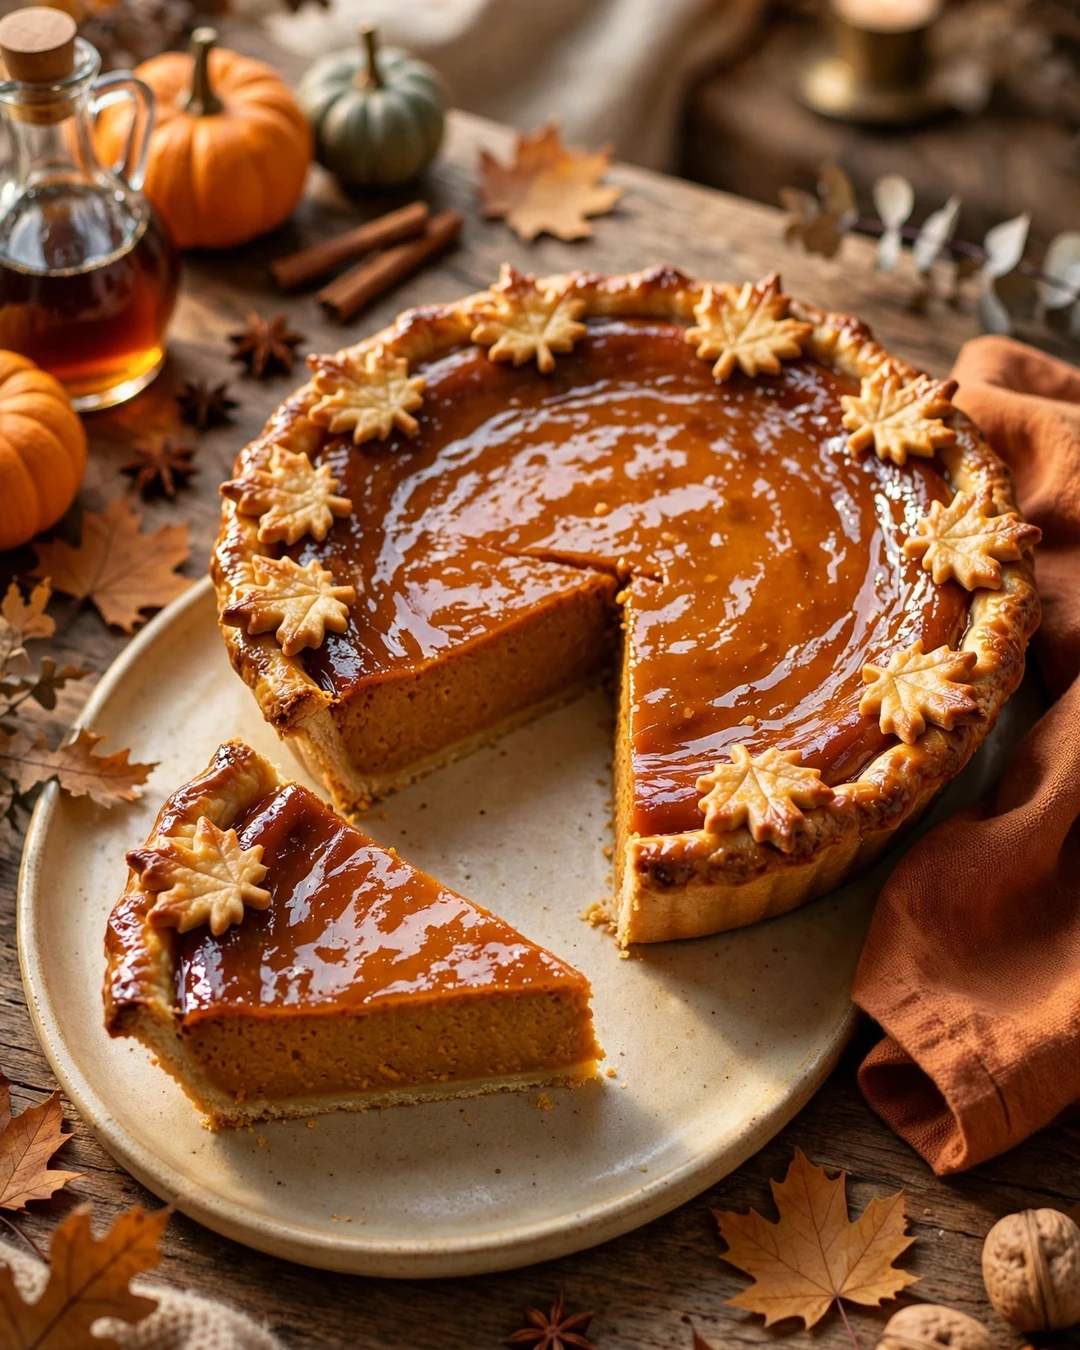
Maple syrup does something magical to pumpkin. It swaps the plain sweetness of sugar for a deep, woodsy caramel flavor that tastes like fall itself. This pie is a little darker, a little richer, and completely irresistible to anyone who pours real maple syrup on their pancakes with a heavy hand.
For the strongest maple flavor, use the darkest syrup you can find, the kind labeled dark and robust. Simmer the syrup for five minutes to concentrate it slightly, then whisk it with the pumpkin, eggs, and cream. Because syrup is a liquid sweetener, hold back a few tablespoons of the cream so the filling still sets up silky and firm.
Pro Tips
Go easier on the cinnamon here than in a classic pie, so the maple stays in the spotlight. Pastry cutouts shaped like maple leaves, baked separately and placed on top, make this the prettiest pie on the table with almost no effort. Brush them with a little syrup as they come out of the oven for shine.
- Dark, robust maple syrup gives the deepest flavor
- Simmer syrup 5 minutes to concentrate it
- Reduce the cream slightly to balance the liquid
- Let the maple shine; use a lighter hand with cinnamon
Serving Suggestions
A spoonful of maple whipped cream doubles down on the theme in the best way. Still planning the rest of the menu? These thanksgiving side dishes round out the table.
Syrup swap idea: if maple syrup is not in the budget this year, use dark brown sugar plus one teaspoon of maple extract for a very close flavor at a fraction of the cost. Real maple is worth it when you can, but nobody at the table will ever guess the difference.
4. Bourbon Style Pumpkin Pie

This is the grown up pumpkin pie. A couple of tablespoons of bourbon stirred into the filling add warm oak and vanilla notes that make the spices taste deeper and more interesting. Most of the alcohol bakes off in the oven, leaving behind flavor and just the gentlest warmth at the back of each bite.
The base is a classic brown sugar pumpkin custard, with the bourbon whisked in along with the evaporated milk. Bake it just like the classic, until the edges are set and the center jiggles. The bourbon makes the filling a shade darker and gives the whole kitchen an incredible smell while it bakes.
Pro Tips
Use a bourbon you would happily sip; harsh spirits stay harsh in the oven. Two tablespoons is the sweet spot, since much more can keep the custard from setting cleanly. A splash more in the whipped cream, just half a teaspoon, ties the whole dessert together.
- Two tablespoons of bourbon is the sweet spot
- Use a bourbon you enjoy drinking
- Bake until the center just barely jiggles
- Add half a teaspoon to the whipped cream
Serving Suggestions
Serve this one after dinner with strong coffee for the full grown up dessert experience. It is also wonderful slightly warm, so the bourbon notes bloom. Save it for the adults at the table and let the kids fight over the classic.
No bourbon in the house? Use one tablespoon of vanilla extract plus two tablespoons of milk for a family friendly version with the same warm depth. The pie loses the gentle bite but keeps all the cozy spice, and the kids can have seconds without anyone doing math at the table.
Press-In Crust, Step by Step
One: pulse the cookies to fine, sandy crumbs with no big chunks. Two: stir in melted butter until the crumbs look like wet sand. Three: press into the plate with the flat bottom of a measuring cup, building the sides first. Four: bake 8 minutes, cool 10 minutes, then fill.
5. Gingersnap Crust Pumpkin Pie
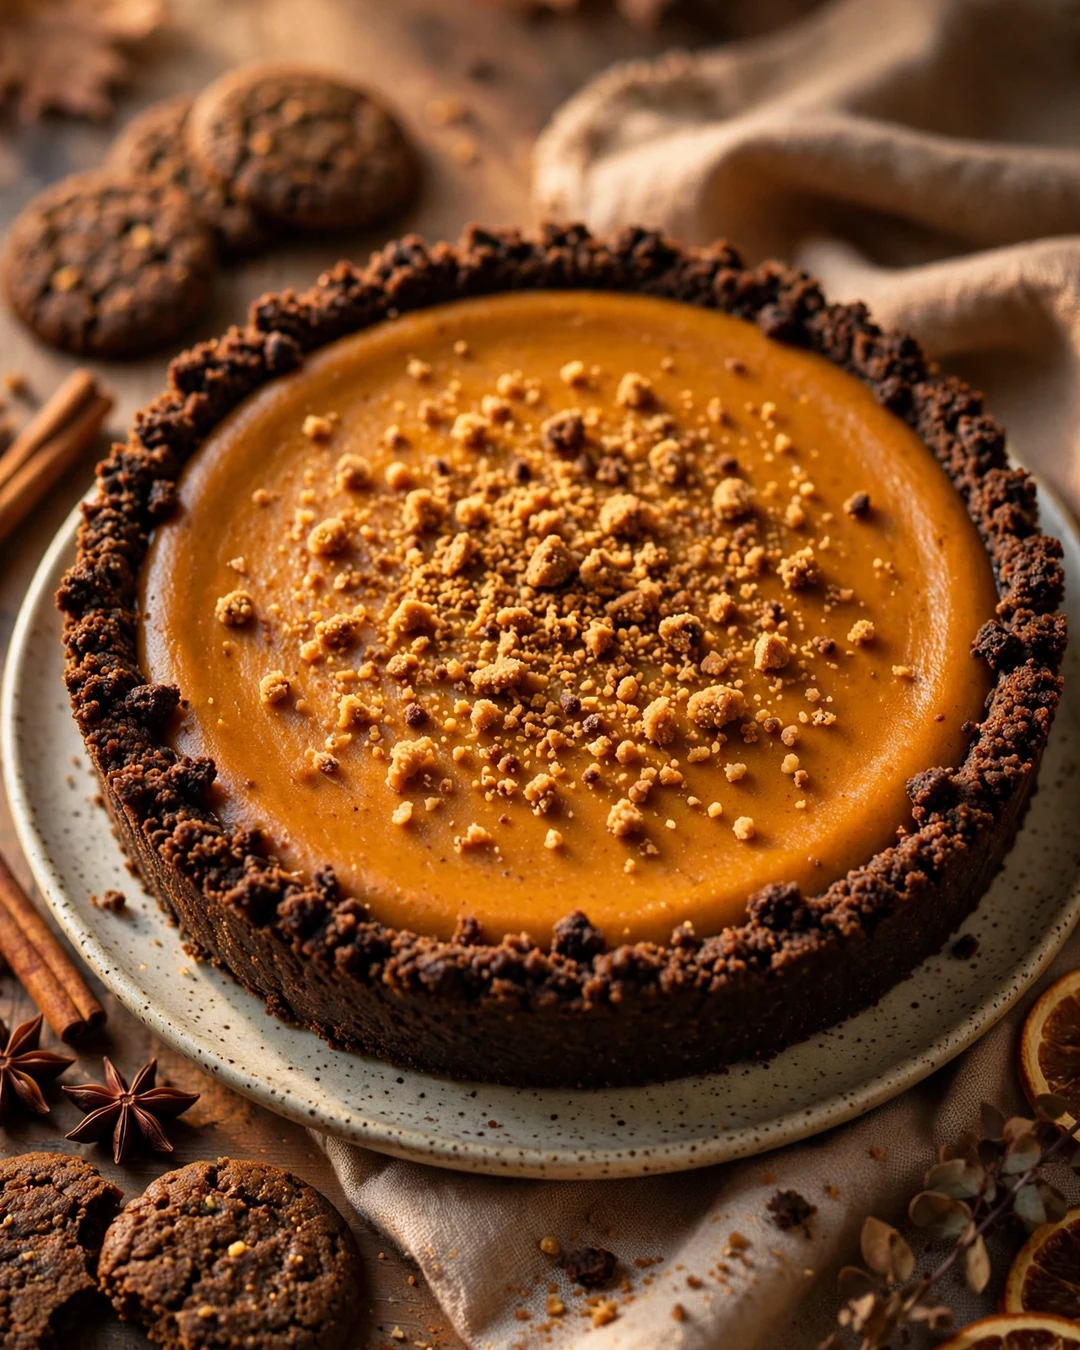
Crunchy, spicy gingersnap crumbs might be the perfect partner for smooth pumpkin filling. The crust bakes up crisp and dark, with a ginger kick that wakes up the whole pie. Every bite gives you that contrast of snappy crust and silky custard that keeps forks going back for one more sliver.
Pulse store bought gingersnaps into fine crumbs in a food processor, then stir them with melted butter and a pinch of salt. Press the mixture firmly into the pie plate, working it up the sides, and bake for eight minutes until it smells toasty. Fill and bake as usual, and the crust stays crisp for days.
Pro Tips
Fine crumbs are the whole secret. Chunky crumbs make a crust that crumbles apart when you slice it, while sandy crumbs press into a sturdy shell. Save a tablespoon of crumbs to sprinkle over the whipped cream on each slice for a pretty finish and a hint of what is inside.
- Pulse cookies to fine, sandy crumbs
- Press firmly with a flat measuring cup
- Bake the crust 8 minutes before filling
- Reserve crumbs for garnishing slices
Serving Suggestions
A little candied ginger chopped fine over the whipped cream makes this pie look and taste extra special. Cookie crust fans should also browse these christmas cookies for more ginger spiced baking.
Crust insurance: if your crumb crust ever cracks while pressing, just patch it with a pinch of extra crumbs and press firmly with the flat bottom of a measuring cup. The filling hides every repair, and the baked crust comes out even and sturdy enough to slice cleanly every single time.
6. Chocolate Swirl Pumpkin Pie
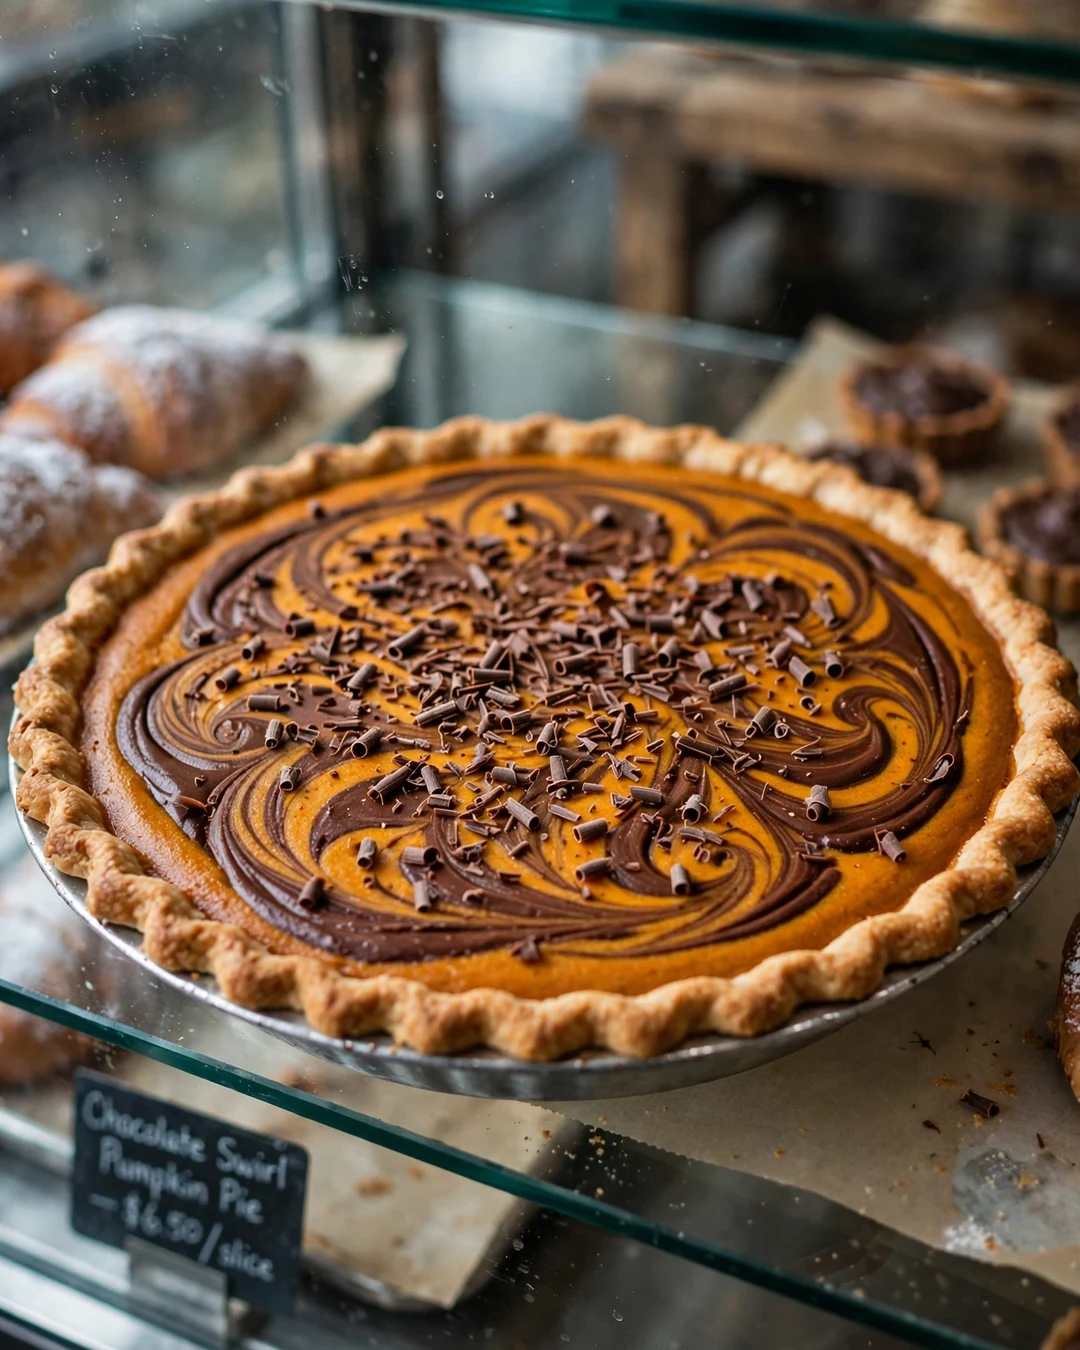
For the person at the table who claims not to like pumpkin pie, this is the pie that changes their mind. Ribbons of dark chocolate marble through the spiced pumpkin filling, so every slice looks like it came from a fancy bakery case. The chocolate and warm spices get along beautifully, like a pumpkin spice truffle in pie form.
Make the classic filling and pour it into your prepared crust. Melt dark chocolate with a splash of cream until it pours like honey, then spoon it in ribbons over the top. Drag a butter knife through the filling in slow figure eights, just a few passes, and bake. The swirls set into the custard as it cooks.
Pro Tips
Use dark chocolate in the 60 to 70 percent range; milk chocolate disappears against the spices. Keep the chocolate warm and pourable, because cold chocolate clumps instead of ribboning. Resist the urge to keep swirling, since a few bold ribbons look far better than a muddy blur.
- Dark chocolate, 60 to 70 percent, works best
- Keep the chocolate warm so it pours in ribbons
- Five slow swirl passes, no more
- Serve slightly warm for the prettiest slices
Serving Suggestions
A small scoop of vanilla ice cream melting over a warm slice is hard to beat. If dramatic desserts are your love language, this basque cheesecake collection has the same showpiece energy.
Swirl like a pro: warm the chocolate mixture until it pours like honey, then use a butter knife and make exactly five slow passes through the filling, no more. Over swirling turns the marble into mud, so stop while the ribbons still look bold and you will get that bakery case finish.
7. Streusel Topped Pumpkin Pie
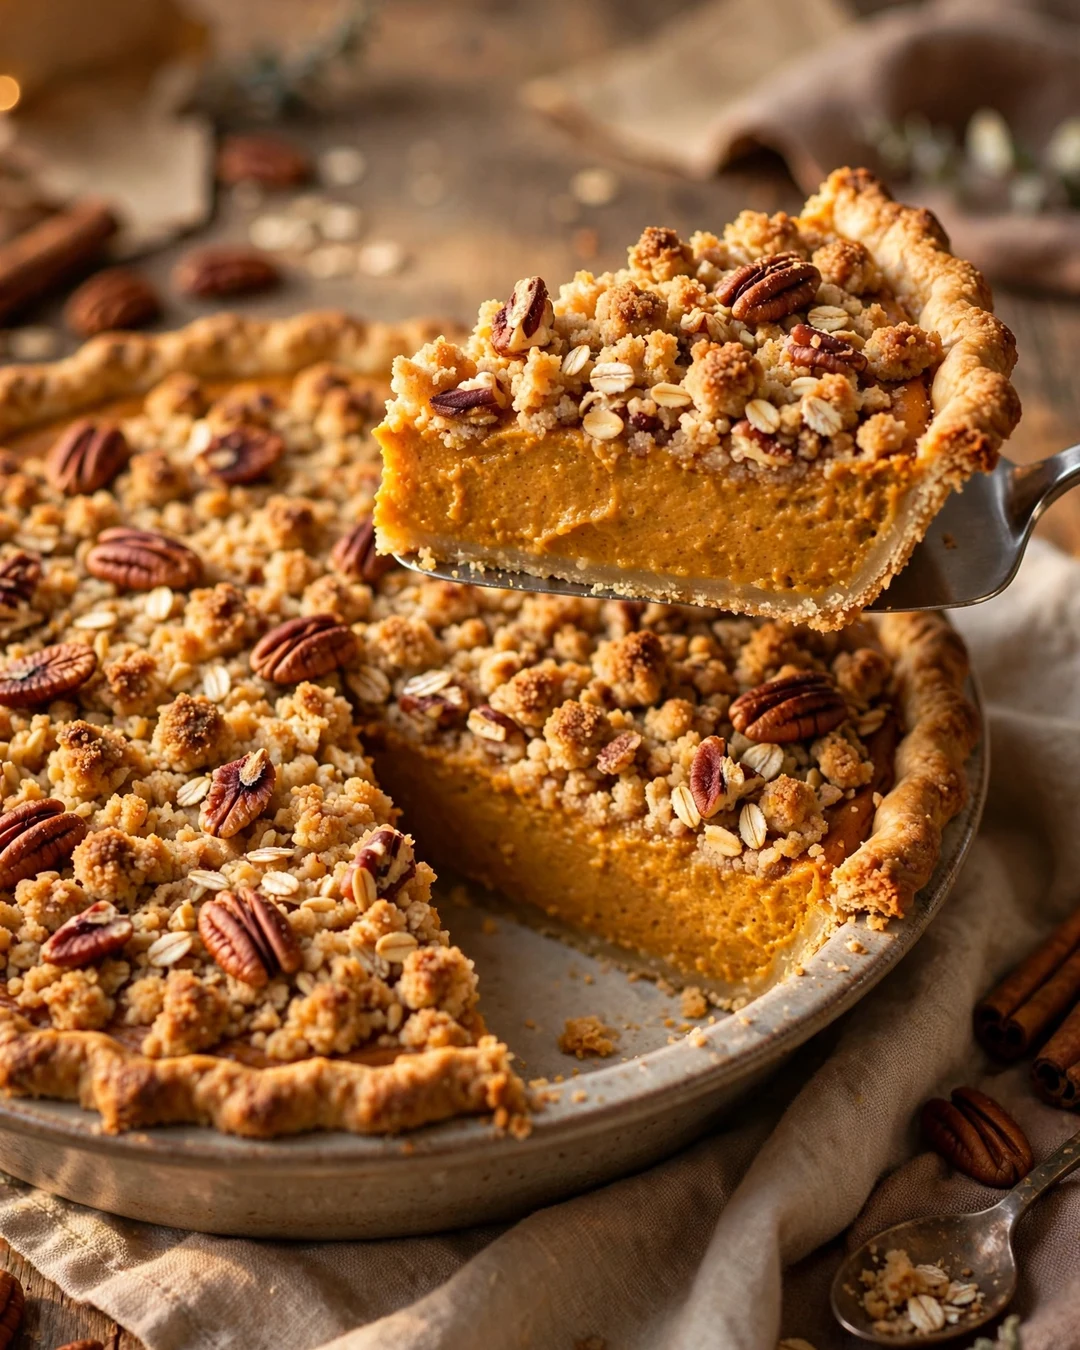
Some pies are all about the filling, but this one is about contrast. A buttery oat and pecan streusel bakes into a crunchy, golden blanket over the smooth pumpkin custard below. Every bite gives you crisp, crumbly, and creamy at once, and it is the first pie to disappear at every potluck.
Bake the filled pie for the first twenty five minutes on its own, so the filling starts to set and the streusel has something firm to sit on. Scatter the cold streusel over the top and return the pie to the oven for the last twenty minutes, until the crumbs are deep golden and smell like toasted nuts and brown sugar.
Pro Tips
Chopped pecans make the streusel taste like praline, but walnuts or even sunflower seeds work if nuts are an issue. A pinch of flaky salt over the hot streusel makes the brown sugar flavor sparkle. This pie slices best fully cooled, when the streusel has firmed up.
- Add the streusel partway through baking
- Keep the butter cold for crisp crumbs
- Pecans give a praline like crunch
- Tent with foil if it browns too quickly
Serving Suggestions
Warm slices with a scoop of cinnamon ice cream turn this into a full fall dessert plate. Crumb topping fans will also love these caramel apple desserts, which use the same cozy flavors.
Streusel storage trick: mix a double batch of the topping and freeze half in a zip bag. Next time you bake muffins, an apple crisp, or another pie, you have instant crumble ready to scatter straight from the freezer, no extra dishes and no measuring cups to wash on a busy morning.
8. Mini Pumpkin Hand Pies
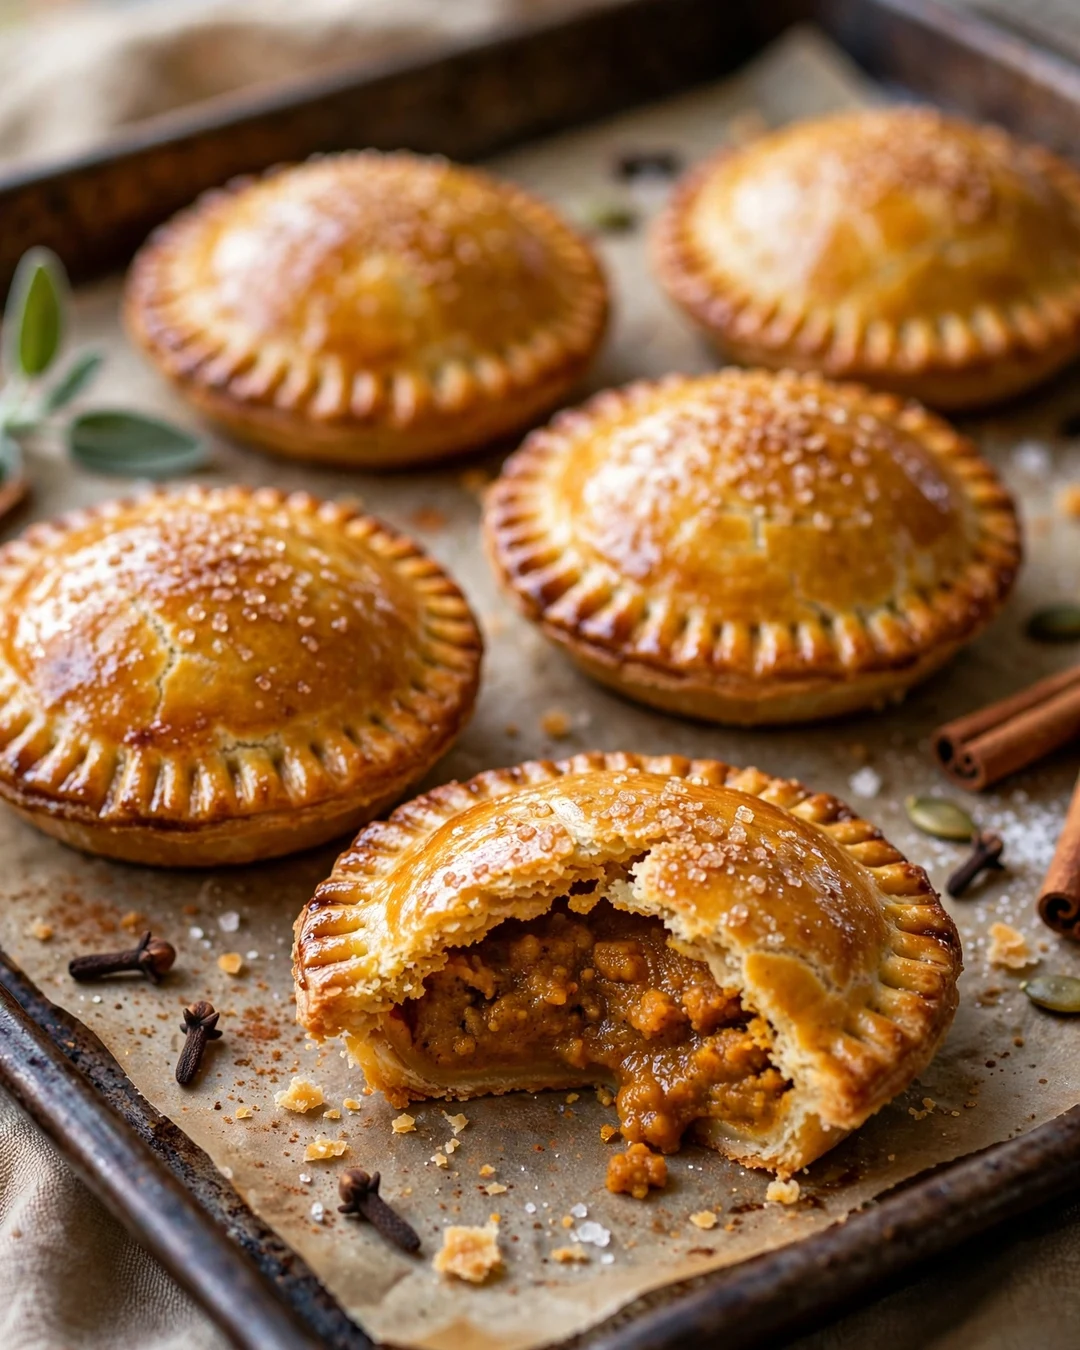
All the flavor of pumpkin pie, none of the slicing drama. These little handheld pies have flaky pastry, crimped edges, and a few spoonfuls of spiced filling in every pocket. They are made for lunchboxes, bake sales, pie bars, and anyone who believes dessert should be grab and go.
Roll pie dough to about an eighth of an inch and cut five inch rounds. Spoon two tablespoons of thick pumpkin filling onto one half of each round, fold, and crimp the edges with a fork. Chill the assembled pies for fifteen minutes, brush with egg wash, sprinkle with coarse sugar, and bake until deeply golden, about twenty to twenty five minutes.
Pro Tips
Thick filling is essential here, so simmer your pumpkin mixture for a few minutes to cook off extra moisture, or stir in a tablespoon of flour. Cut a tiny vent in the top of each pie so steam can escape instead of bursting the seams. Cold dough going into a hot oven gives the flakiest result.
Brown Butter Basics
Use a light colored pan so you can see the color change. The butter will foam, then crackle, then go quiet; that quiet moment, with brown flecks settled at the bottom, is your finish line. Pour it into a bowl immediately, flecks and all, because thirty extra seconds in the hot pan can burn it.
- Thicken the filling so it does not leak
- Chill assembled pies 15 minutes before baking
- Cut a small vent in every top
- Egg wash plus coarse sugar for a bakery finish
Serving Suggestions
Set out a platter of these at any fall party and watch them vanish. They need no plates, no forks, and no fuss, and a little cup of whipped cream for dipping makes them feel extra special. Kids especially love having a whole pie to themselves.
Lunchbox legend move: bake a batch on Sunday, wrap each hand pie in parchment, and freeze them in a single layer bag. On busy mornings, grab one and let it thaw in a lunchbox by noon, or warm it for eight minutes in a low oven for a cozy handheld dessert anytime.
9. No-Bake Pumpkin Pie
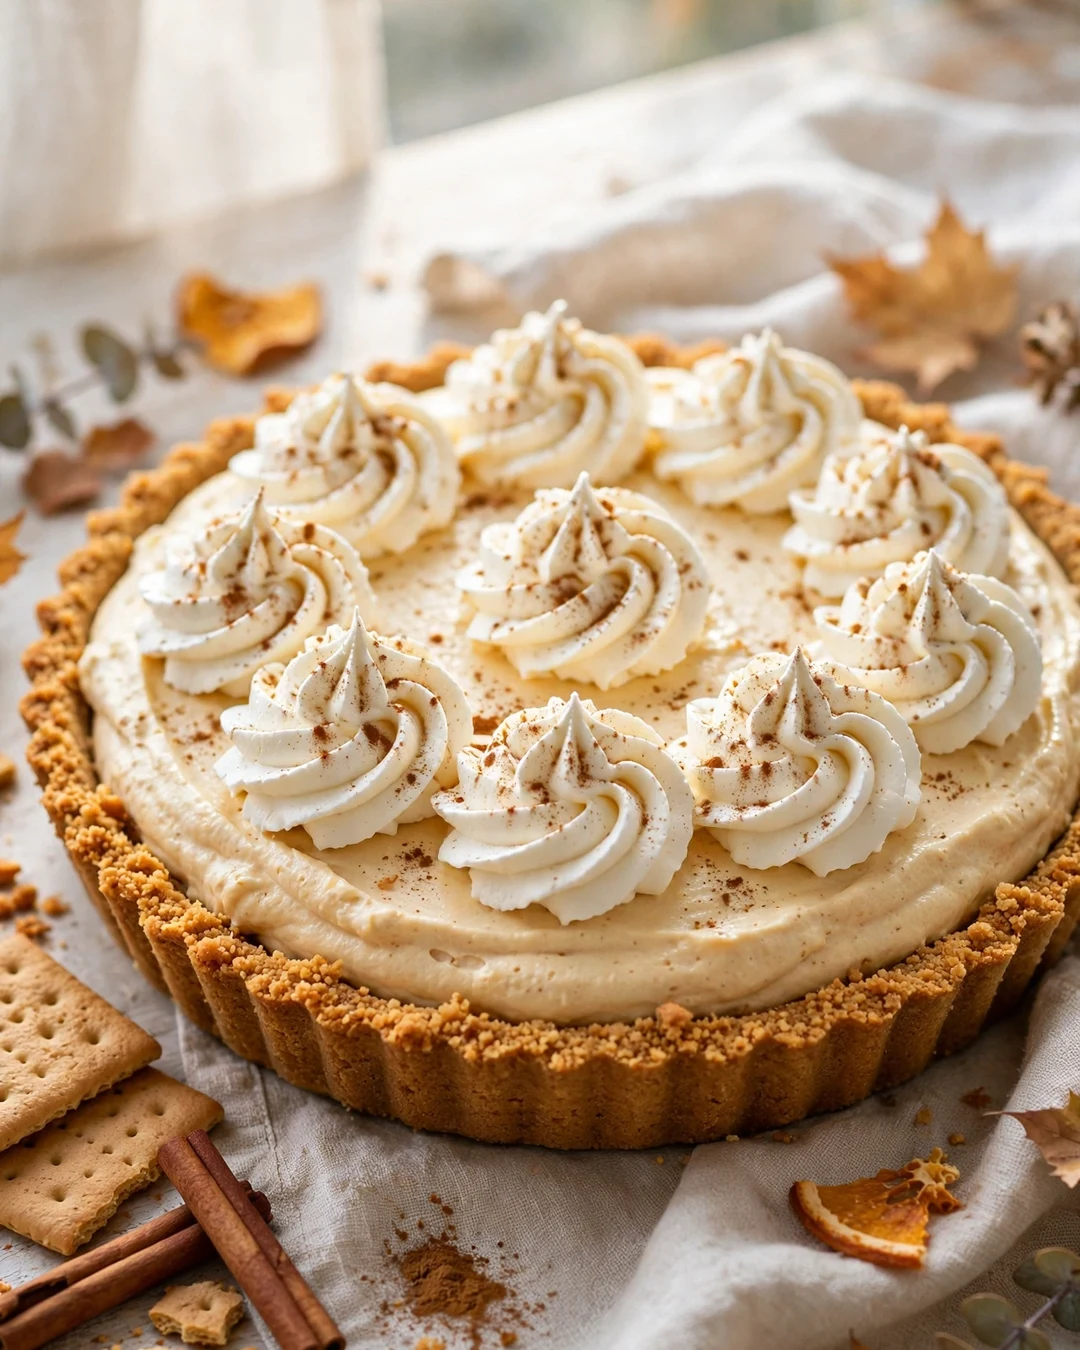
When the oven is full of turkey and casseroles, this pie saves the day. The filling is light and fluffy, almost like a pumpkin mousse, set in the fridge instead of the oven. It tastes like the classic but eats like a cloud, and it comes together in about twenty minutes of actual work.
Beat cream cheese with pumpkin puree, brown sugar, and spices until smooth. Bloom a little gelatin in warm milk, whisk it in, then gently fold in softly whipped cream until the mixture is pale and airy. Spoon it into a graham cracker crust, smooth the top, and chill at least four hours, or overnight for the cleanest slices.
Pro Tips
The folding step decides the texture, so use a big spatula and a light hand to keep all that whipped air in the filling. Make sure the gelatin is fully melted and smooth before it goes in, or you will find rubbery bits in the finished pie. A chilled knife gives the neatest slices.
- Fold the whipped cream in gently to keep it airy
- Melt the gelatin completely for a smooth set
- Chill at least 4 hours, overnight is better
- Use a chilled knife for clean slices
Serving Suggestions
Pipe on extra whipped cream swirls and a dusting of cinnamon right before serving. This is the pie to bring when the host says the oven is spoken for. For more easy fall sweets, these apple recipes for fall are full of simple winners.
Pan Size Guide
| Pan | Serves | Bake Time |
|---|---|---|
| 9 inch round pie | 8 | 50 to 60 minutes |
| 9 inch deep dish | 10 | 55 to 65 minutes |
| Half sheet slab | 24 | 35 to 45 minutes |
Whipped cream upgrade: fold two tablespoons of softened cream cheese into your whipped cream before topping the pie. It holds its peaks for hours instead of melting into a puddle, tastes like a light cheesecake cloud, and makes those pretty piped swirls stay picture perfect from fridge to table without any fuss.
10. Vegan Coconut Pumpkin Pie
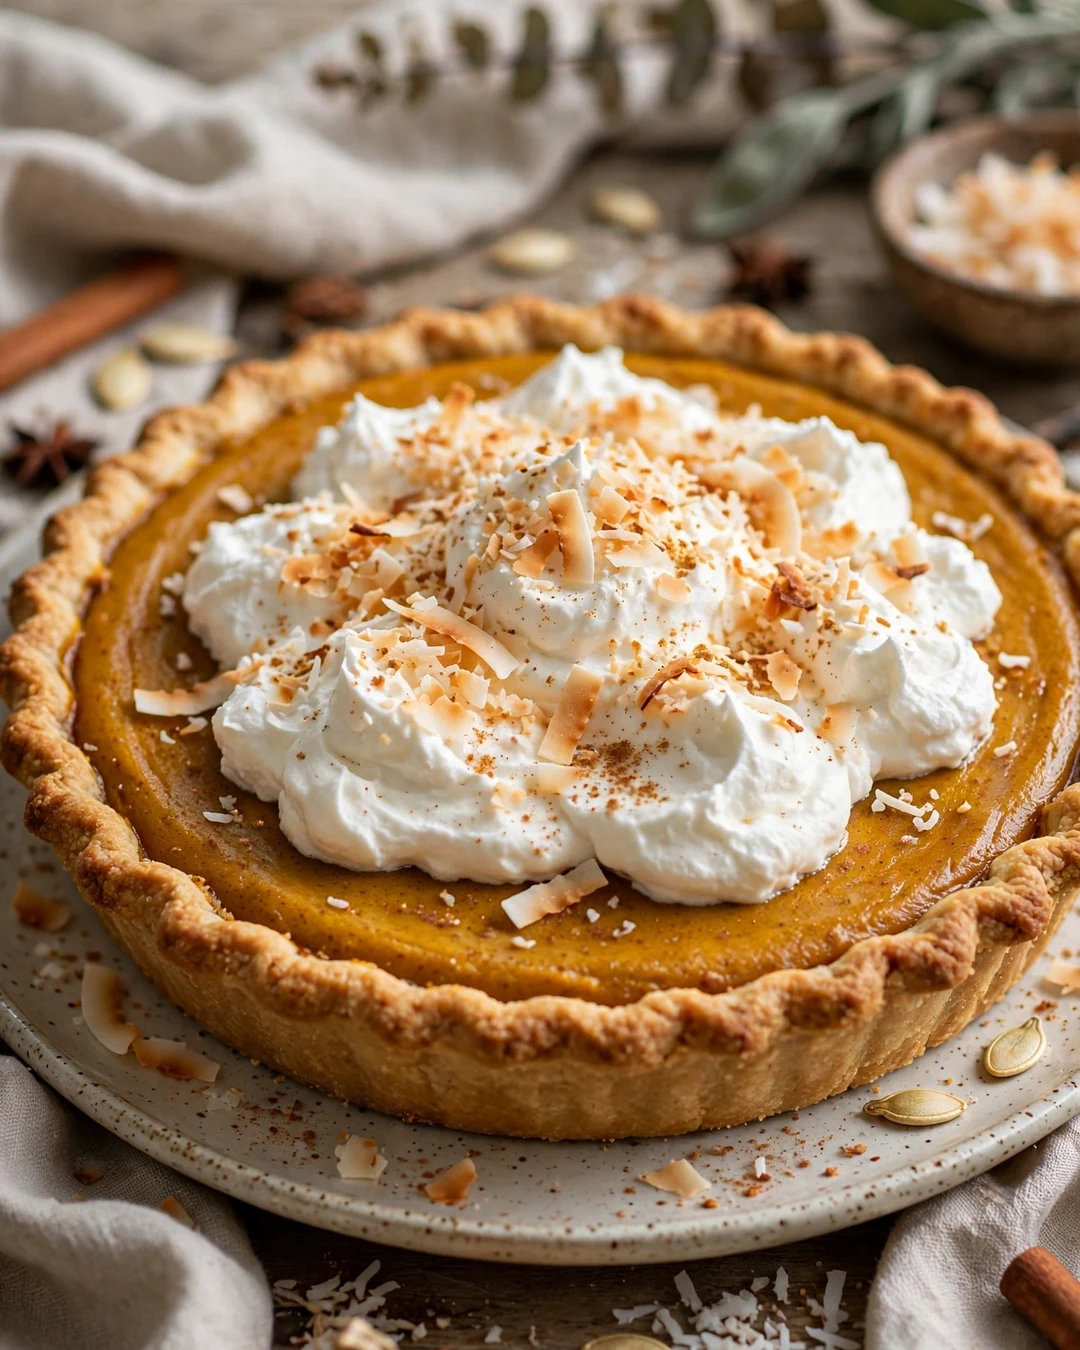
Nobody should miss out on pumpkin pie, and with coconut cream doing the heavy lifting, this vegan version loses nothing at all. The filling is rich and silky, the spices are warm, and the coconut stays politely in the background, adding body instead of taking over the flavor.
Full fat coconut milk is non negotiable here; the light kind will not set properly. Whisk the pumpkin with coconut milk, brown sugar, spices, and a cornstarch slurry, then pour it into a dairy free crust and bake until the edges are set and the center jiggles softly. It firms up beautifully as it chills overnight in the fridge.
Pro Tips
Bump the spices up slightly compared to a classic pie, since coconut can mellow them. A dairy free graham style crust made with coconut oil works beautifully and keeps the whole pie plant based. Toasted coconut flakes on top add crunch and a pretty finish.
- Full fat coconut milk only; lite will not set
- Cornstarch slurry gives the filling its set
- Chill overnight for the cleanest slices
- Chill cans overnight for whipped coconut cream
Serving Suggestions
Top with softly whipped coconut cream and a shower of toasted coconut. Serve this pie proudly next to the classic; in our experience, everyone takes a slice of both, and the vegan one often finishes first.
Coconut cream confidence: if your canned coconut cream refuses to whip, chill the whole bowl and beaters for fifteen minutes and try again. Cold is everything with coconut. A teaspoon of cornstarch beaten in at the end also helps it hold soft peaks long enough to slice, serve, and accept compliments gracefully.
11. Pumpkin Cheesecake Layered Pie
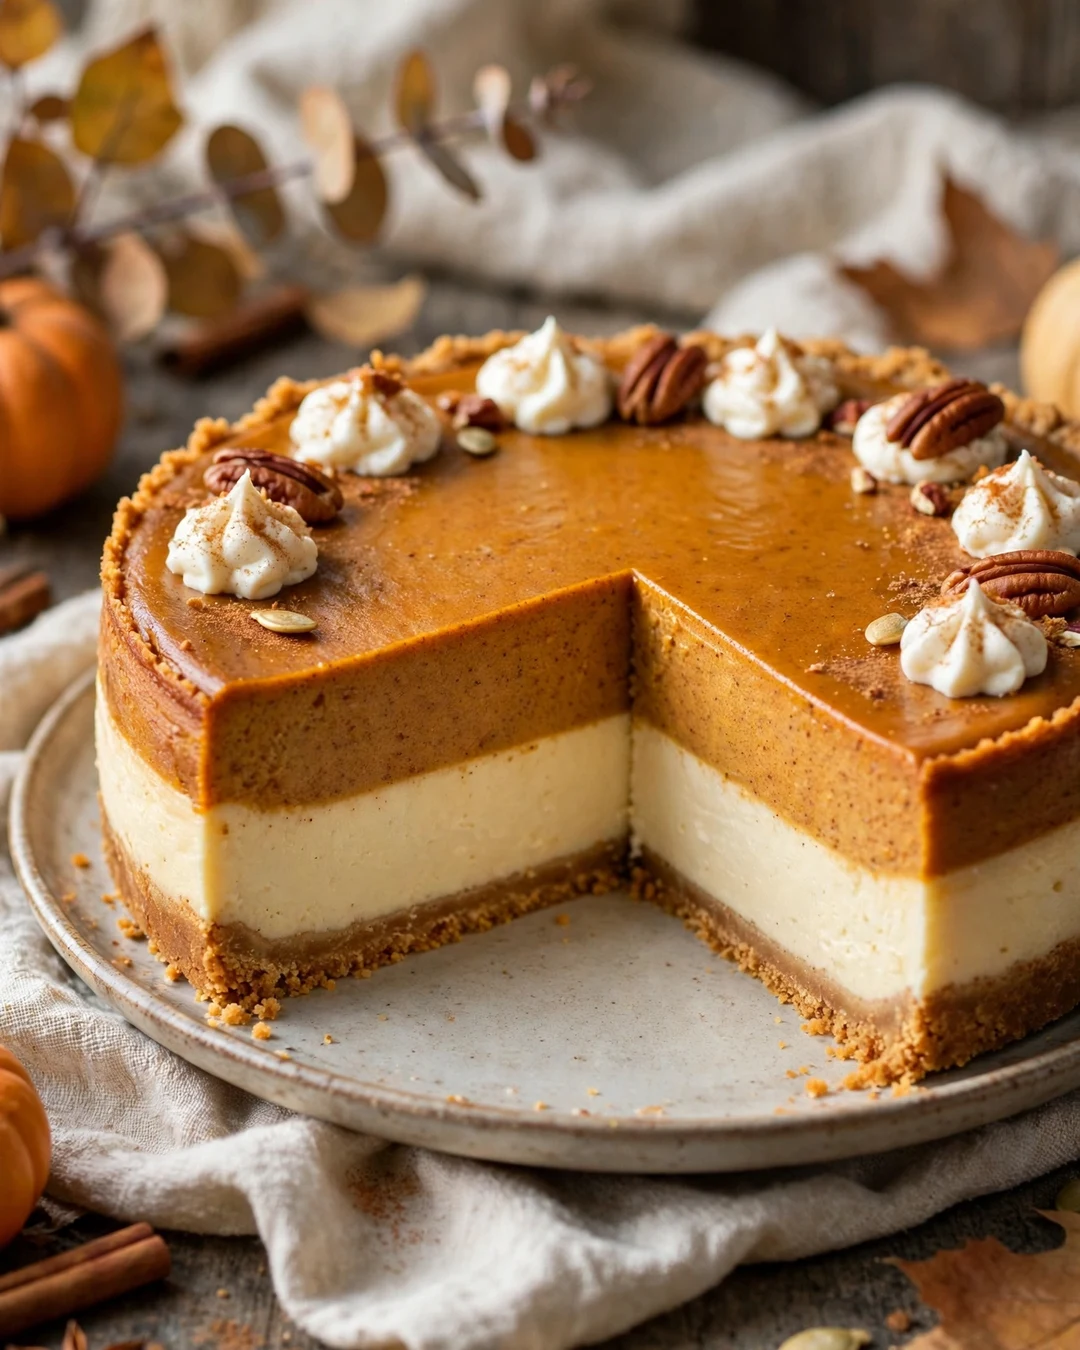
Why choose between pumpkin pie and cheesecake when one pie can be both? A tangy, creamy cheesecake layer hides under the spiced pumpkin, so every slice shows two clean layers and every bite tastes like two desserts holding hands. It looks impressive, tastes incredible, and is honestly no harder than a regular pie.
Spread a simple cheesecake batter, cream cheese, sugar, one egg, and vanilla, over the bottom of your prepared crust and chill it for twenty minutes. Then pour the pumpkin filling gently over the back of a spoon so it floats on top instead of sinking through. Bake until the center jiggles as one, and cool completely.
Pro Tips
Room temperature cream cheese blends smooth; cold cream cheese leaves lumps that no amount of whisking fixes. Pour the pumpkin layer slowly and low over the spoon to protect the layers. If a little swirling happens where the two meet, call it marbling and accept the compliments.
- Use room temperature cream cheese for a smooth layer
- Chill the cheesecake layer 20 minutes before topping
- Pour pumpkin over a spoon back to keep layers clean
- Cool completely before slicing for sharp layers
Serving Suggestions
A thin drizzle of caramel sauce across each slice plays up both layers. This is the pie to serve when you want a little drama on the dessert table. For more ways to use up that can of pumpkin, these pumpkin dessert recipes keep the season going.
Clean layer secret: chill the cheesecake layer for a full twenty minutes before the pumpkin goes on, and pour the pumpkin over the back of a spoon so it floats gently instead of plunging through. That one patient pause is the difference between muddy swirls and the sharp, pretty layers you want.
Build the Layers
Start with crumbles to catch the custard drips, then custard cubes, then cream. Repeat twice, pressing gently as you go, and save your prettiest cream swirls and crumbs for the very top layer, the one everyone sees.
12. Spiced Chai Pumpkin Pie
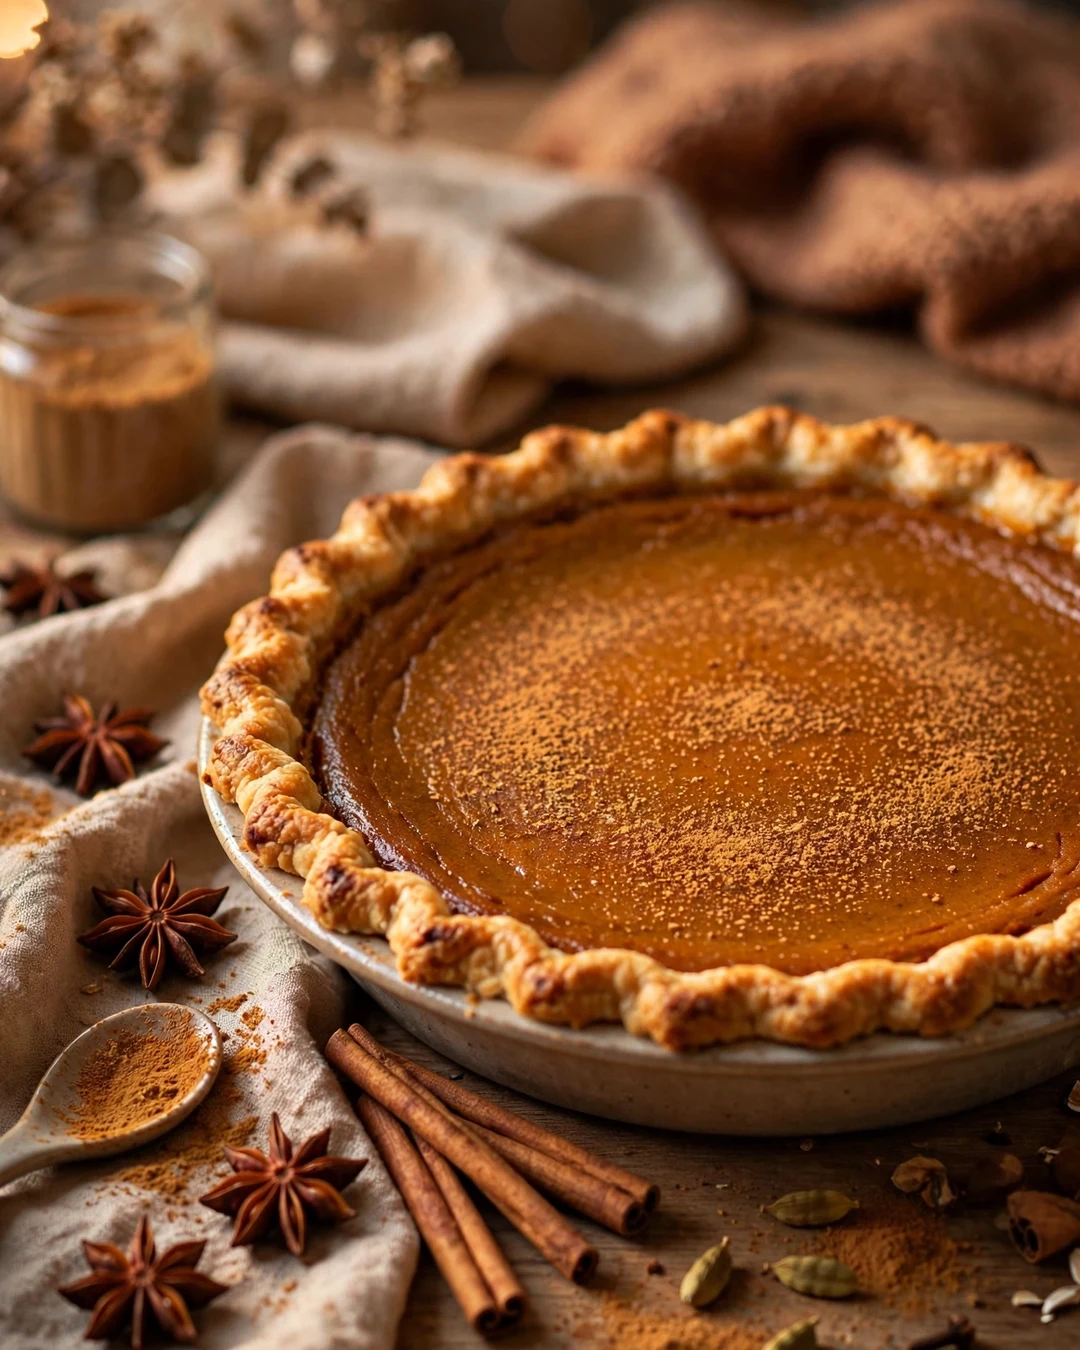
If classic pumpkin spice feels a little predictable, chai spices will wake it right up. Cardamom, black pepper, cloves, and a hint of star anise join the usual cinnamon and ginger, giving this pie a warmer, more aromatic flavor that lingers in the best way. It tastes like your favorite chai latte decided to become dessert.
Build it on the classic custard base and adjust the spice blend: keep the cinnamon, add ground cardamom, a pinch of finely ground black pepper, and a whisper of cloves. The pepper is not there for heat; it blooms against the warm spices and makes the whole filling taste more alive. Bake until just set, exactly like the classic.
Pro Tips
Freshly ground cardamom is worth the tiny effort, since the pre ground kind loses its perfume quickly. Go easy on the cloves, because a little too much turns the pie medicinal. A pinch of black pepper is the quiet trick that makes guests ask what is different this year.
- Add cardamom, black pepper, and a whisper of cloves
- Fresh ground cardamom has the best aroma
- Easy on the cloves; they take over fast
- Bake just until set, like the classic
Serving Suggestions
Serve with actual chai or strong coffee and let the spices echo each other. Whipped cream with a pinch of cardamom whisked in is a lovely touch. This is the pie for the friend who orders the spiciest, most interesting thing on every menu.
Chai shortcut that works: instead of grinding a custom blend, steep two strong chai tea bags in the warm evaporated milk for ten minutes, squeeze them dry, and use the milk as your liquid. You get every warm note of the spice route with zero extra measuring, grinding, or pantry archaeology required.
13. Graham Crust Pumpkin Pie
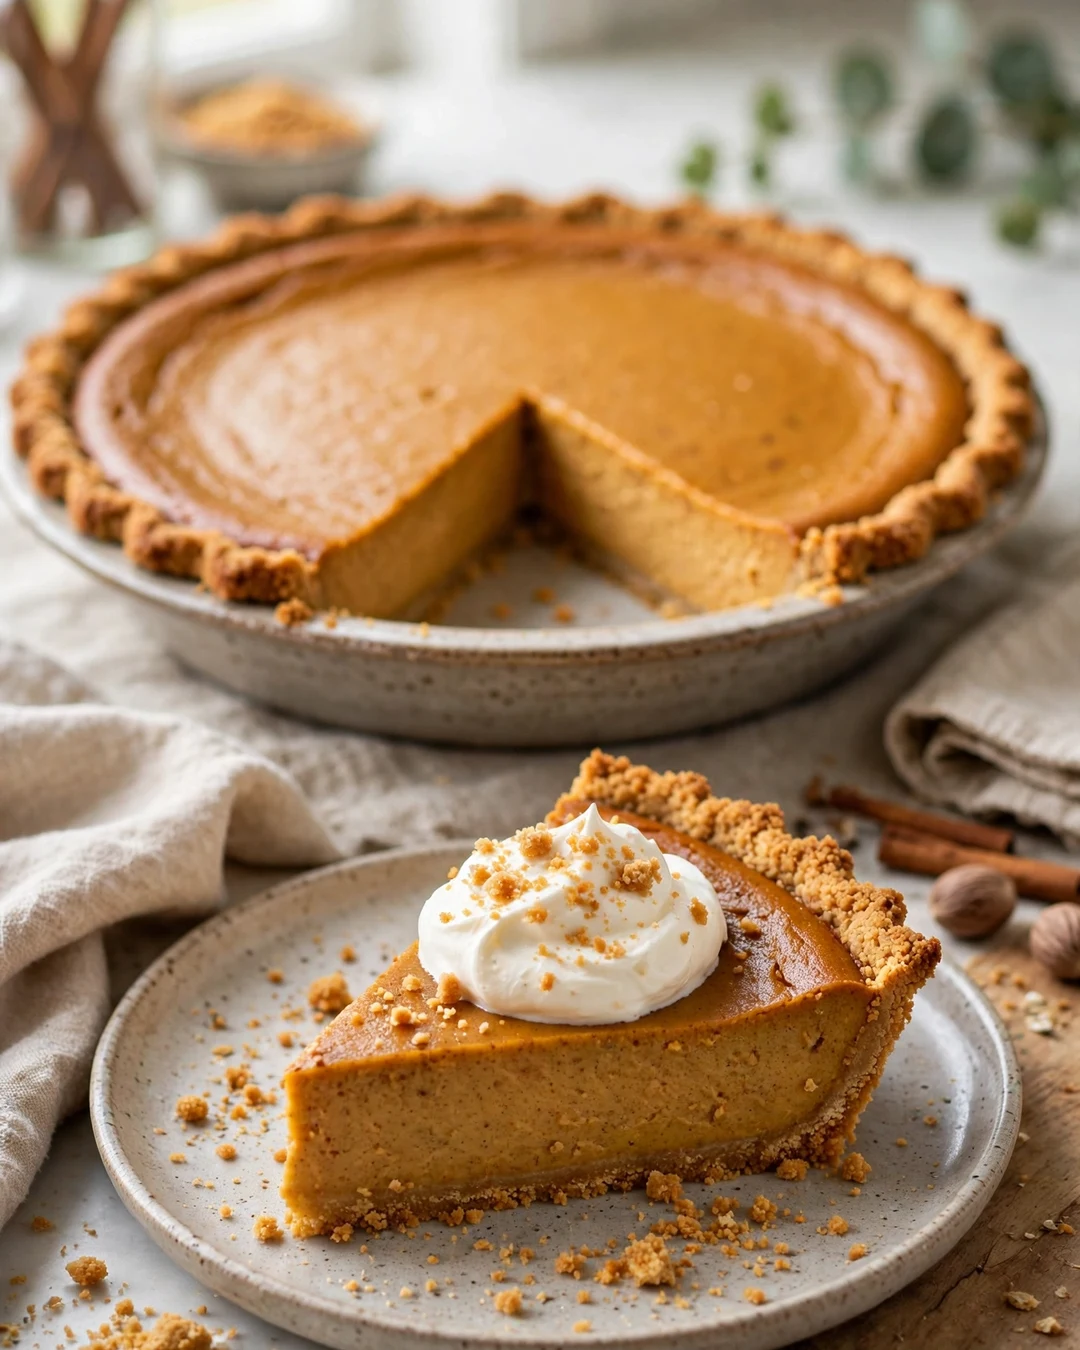
Sometimes the simplest crust is the best crust. Buttery graham cracker crumbs pressed into a pie plate give you a sweet, toasty base that needs no rolling pin, no chilling, and no stress about shrinkage. It is the crust that gets nervous first time bakers into the pumpkin pie game, and plenty of veterans never go back.
Stir fine graham crumbs with melted butter, a spoonful of sugar, and a pinch of cinnamon until the mixture looks like wet sand. Press it firmly into the plate, bake for eight to ten minutes until fragrant, then pour in your favorite pumpkin filling and bake until set. The edges toast up like the best part of a cheesecake crust.
Crustless Do’s and Don’ts
Do butter the dish generously, all the way up the sides. Do bake on a sheet pan for easy handling. Do let it cool fully before slicing. Do not try to unmold it; serve straight from the dish. Do not open the oven door early, because the custard can fall.
Pro Tips
Fine crumbs and a firm press are what keep a crumb crust from falling apart at slicing time. A pinch of cinnamon in the crumbs ties the crust to the spiced filling. For a little crunch contrast, leave a few crumbs slightly coarser and sprinkle them on top of the finished pie.
- Fine crumbs plus a firm press equal clean slices
- Add cinnamon to the crumbs for warmth
- Bake the crust until fragrant before filling
- Chill the finished pie for the neatest cuts
Serving Suggestions
This is the weeknight friendly pumpkin pie, easy enough for a Tuesday and good enough for the holiday table. A drizzle of honey over the whipped cream nods to the honey graham flavor in every bite.
Slice insurance for crumb crusts: run a thin knife under hot tap water and wipe it dry between every single cut. The warm blade glides through the custard without dragging, the crumb edge stays intact, and every slice lands on the plate looking like it came from a bakery box instead of a home kitchen.
14. Brûlée Top Pumpkin Pie

This is pumpkin pie with a grand finale. The pie itself is a classic, baked and chilled until firm, and then a thin layer of sugar gets torched into a shattering amber shell, just like the top of a crème brûlée. The crack of the spoon through the caramel, followed by silky spiced custard, is pure dessert theater.
The 10-Minute Crust
One and a half cups of fine crumbs, six tablespoons of melted butter, two tablespoons of sugar, one firm press with a measuring cup, and ten minutes in a hot oven. That is the whole recipe, and it works for almost any custard or cream pie you will ever make.
The timing is everything. Bake and chill the pie completely, at least four hours, so the surface is cold and firm. Just before serving, blot the top dry, sprinkle on a thin, even layer of fine sugar, and pass a kitchen torch over it in slow circles until the sugar melts and turns deep amber. Rest five minutes so the shell hardens.
Pro Tips
A thin layer of sugar is the secret; thick sugar melts unevenly and tastes burnt. Keep the torch moving at all times, like you are spray painting, and watch the color, not the clock. Do the torching within an hour of serving, because the shell slowly softens in the fridge.
- Chill the pie completely before torching
- Blot the surface dry for an even shell
- Sprinkle a thin, even layer of fine sugar
- Torch within an hour of serving
Serving Suggestions
Crack the shell at the table with the back of a spoon and enjoy the little gasp it earns every time. No whipped cream needed here; the caramel shell is the topping. Serve small slices, since the double finish makes this one rich.
Torch free option: no kitchen torch? Set the chilled pie under a hot broiler for one to two minutes, watching it the entire time like a hawk. The sugar melts and crisps almost as well, though the edges need care. Pull it the second it turns deep amber, because sugar waits for nobody.
15. Slab Pumpkin Pie for a Crowd

When the guest list is long and one round pie will not cut it, slab pie rides to the rescue. Baked in a half sheet pan, this giant pumpkin pie serves about twenty four people, cuts into tidy squares, and gives everyone a generous amount of crust edge in every piece. Potlucks, school events, and big family Thanksgivings are its natural habitat.
Press a double batch of pie dough into a rimmed half sheet pan, letting it come up the sides. Whisk a triple batch of classic pumpkin filling, pour it in, and bake thirty five to forty five minutes, until the center is just set. The shallow filling cooks faster and more evenly than a deep pie, which is exactly why slab pies are so reliable.
Pro Tips
Line the pan with a parchment sling so the first square lifts out cleanly and the rest follow. Rotate the pan halfway through baking, since big pans brown unevenly in home ovens. Let the pie cool fully before cutting, and use a ruler if you want bakery perfect squares.
- Half sheet pan serves about 24 people
- Use a parchment sling for easy lifting
- Rotate the pan halfway through baking
- Cool fully, then cut into tidy squares
Serving Suggestions
Set out the whole pan with a bowl of whipped cream and let everyone serve themselves a square. A little assembly line of toppings, cinnamon, chopped pecans, caramel sauce, turns this into a build your own pie bar that crowds love.
Transport tip for the cook who shares: bake the slab pie in the same disposable foil sheet pan you plan to carry it in. No unmolding, no cracked crust, no drama in the car. Set the whole pan on the serving table, cut squares right where it sits, and let everyone help themselves happily.
16. Pumpkin Pie Bars
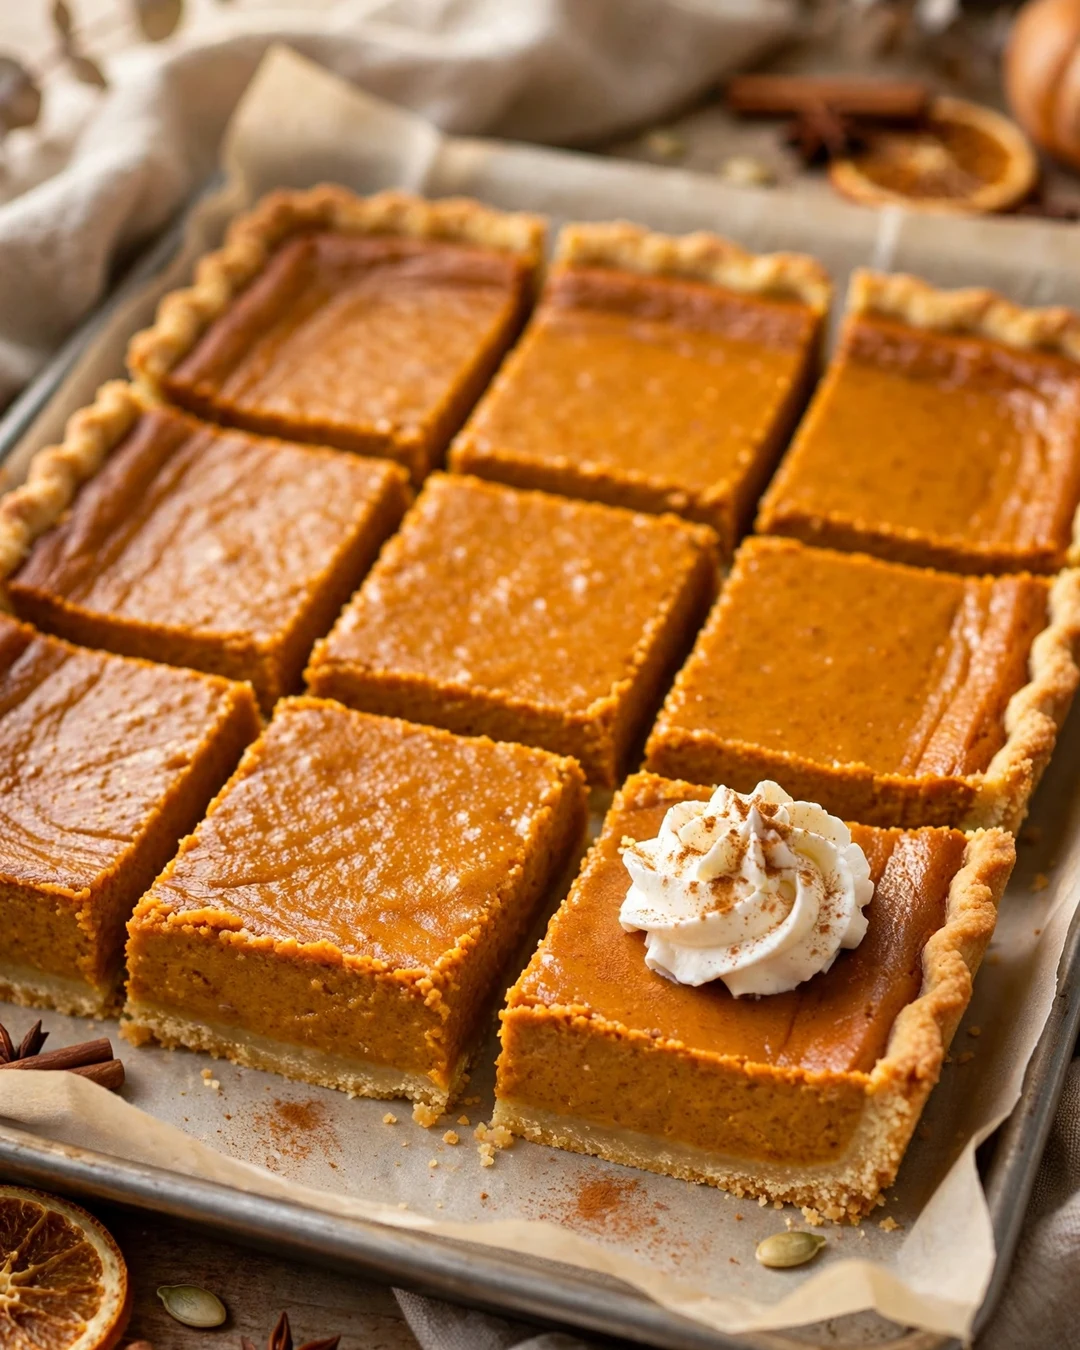
Everything you love about pumpkin pie, in a form that feeds a crowd without a single pie plate. Pumpkin pie bars bake in a rectangular pan, with a thick layer of spiced filling over a buttery press in shortbread crust. They cut into clean, sturdy squares that hold up on a dessert buffet and pack neatly for sharing.
Press the shortbread dough, flour, powdered sugar, butter, and a pinch of salt, evenly into a parchment lined nine by thirteen inch pan and bake it about fifteen minutes, until pale gold. The filling is the classic custard with a little less milk, so it sets up firm enough to slice. Bake thirty to thirty five minutes, until the center barely jiggles, then chill completely.
Pro Tips
The parchment sling is your best friend here, since the whole slab lifts out for cutting on a board. Chill the pan at least four hours, and overnight gives the cleanest edges. Wipe your knife between cuts and the bars look like they came from a bakery case instead of a home kitchen.
- Line the pan with a parchment sling
- Use slightly less milk for a firmer set
- Chill at least 4 hours before cutting
- Wipe the knife clean between every cut
Serving Suggestions
Top each bar with a small rosette of whipped cream and a pinch of cinnamon. Bars are the smart choice for Friendsgiving and office parties, and if you want more pumpkin sweets for the spread, these pumpkin dessert recipes keep the theme going.
Coconut Pie Do’s and Don’ts
Do chill your coconut cream cans overnight for easy whipped topping. Do use full fat coconut milk only. Do let the pie chill completely before slicing. Do not use lite coconut milk. Do not skip the cornstarch, because it is what sets the filling. Do not slice it warm.
Bars travel like a dream: chill the pan overnight, cut the bars with a hot dry knife, and stack them in a single layer tin with parchment between the layers. They hold up on a road trip, survive a potluck table all afternoon, and freeze beautifully for up to a month, so a spare batch is always smart.
17. Crustless Pumpkin Pie

Skip the crust, keep the magic. A crustless pumpkin pie is pure spiced custard, baked right in a greased pie dish until it sets into silky slices with a delicate golden top. It is naturally lighter, weeknight easy, and a kind gift for anyone at the table who avoids gluten or simply loves the filling best.
Whisk pumpkin puree, eggs, sugar, spices, and evaporated milk until completely smooth, exactly like the classic filling. Pour it into a well buttered nine inch pie dish, set the dish on a baking sheet, and bake at a slightly gentler temperature, three hundred and fifty degrees, for forty five to fifty five minutes. The custard puffs a little at the edges and settles as it cools.
Pro Tips
Because there is no crust to hide behind, texture is everything here. Blend the filling for thirty seconds so it is perfectly smooth, and strain it if you want a truly flawless top. Pull the dish when the center still has a soft jiggle and let carryover heat finish the job during a slow, patient cool on the counter.
- Butter the pie dish generously
- Blend the filling smooth and strain if you like
- Bake until the center still jiggles softly
- Serve straight from the dish
Serving Suggestions
A spoonful of whipped cream and a whisper of nutmeg are all it needs. Serve it proudly next to the classic pie; the filling lovers will quietly claim every slice, and the cook gets to skip rolling, crimping, and blind baking entirely.
Storage note for crustless success: this pie is at its best after a full night in the fridge, when the custard firms into clean, confident slices. Cover it loosely so the top stays smooth, keep it chilled, and serve within three days. Leftovers make a very fine breakfast with coffee, and nobody needs to know.
18. Pumpkin Meringue Pie
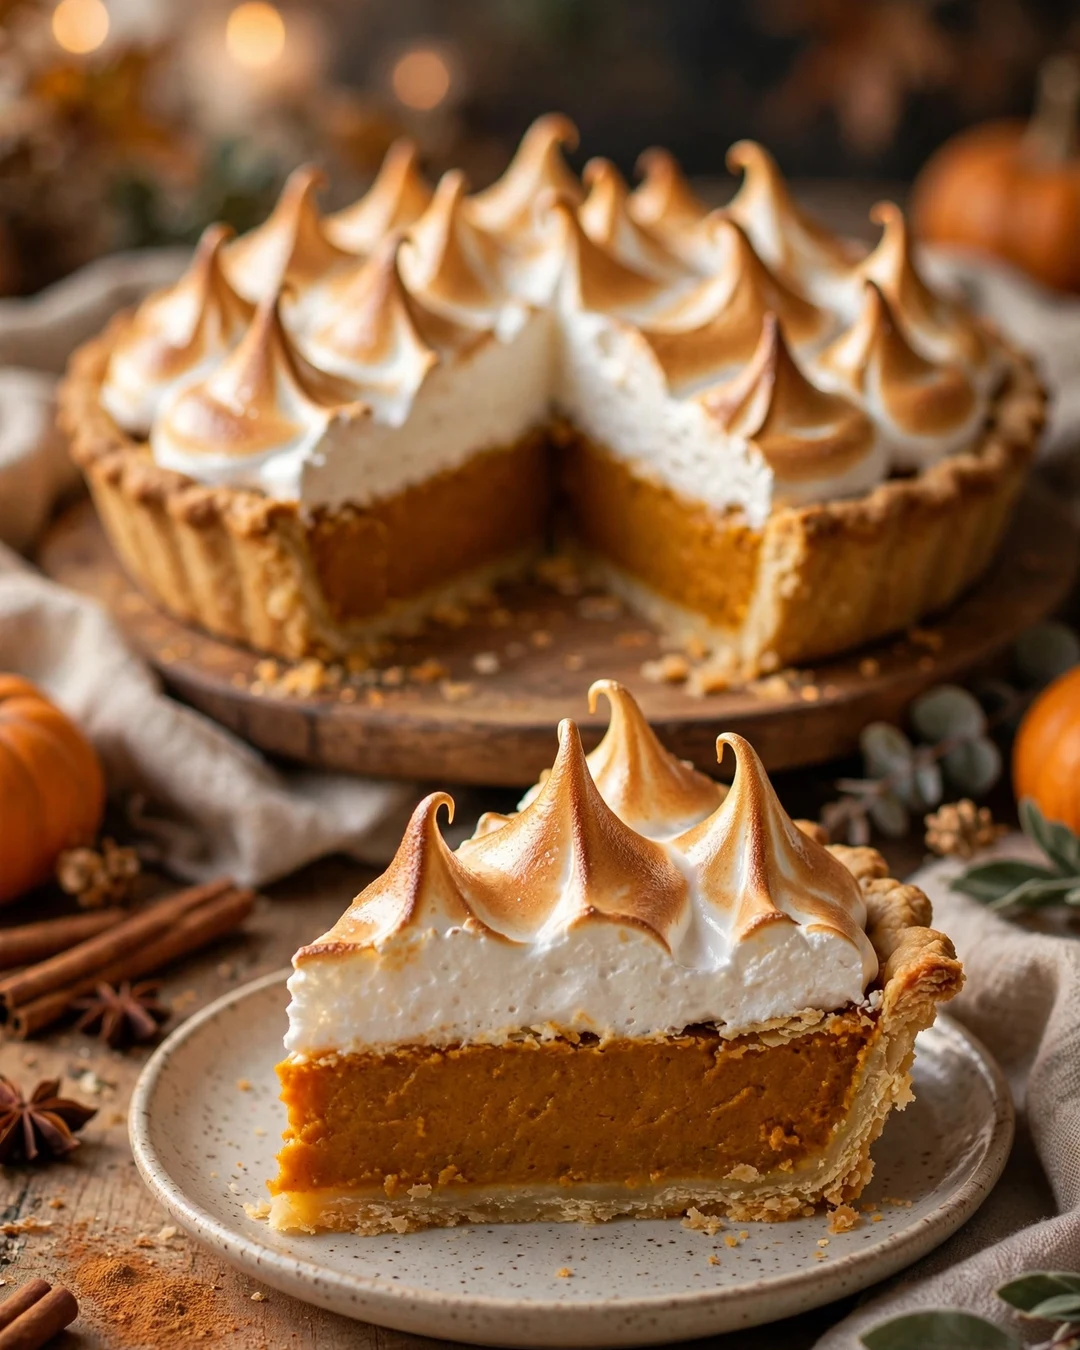
Lemon meringue gets all the glory, but pumpkin wears a cloud of toasted meringue just as beautifully. Under the billowy top sits a darker, more intensely spiced pumpkin filling, and the contrast of warm spice, silky custard, and sweet marshmallowy peaks makes this the most elegant pie in the whole collection.
Bake a classic pumpkin pie and let it cool just until warm, not hot. For the topping, whisk egg whites and sugar over simmering water until the sugar dissolves and the mixture feels hot, then whip it to glossy, stiff peaks with a pinch of cream of tartar. Pile the meringue onto the warm pie, swirl it into peaks with the back of a spoon, and torch it or slide it under the broiler for a minute or two.
Pro Tips
Warm filling is the secret to meringue that stays put, because the heat starts cooking the underside and helps it grip. Spread the meringue all the way to the crust edge so it seals; gaps invite shrinking and weeping. Work quickly and confidently, since meringue waits for no one once it is whipped.
- Use warm, not hot, filling under the meringue
- Seal the meringue to the crust edge
- Cream of tartar keeps the peaks stable
- Torch or broil just until the tips turn golden
Serving Suggestions
Serve this pie the same day, ideally within a few hours of toasting, while the peaks are crisp at the tips and soft underneath. It needs no whipped cream at all, just a sharp knife, a steady hand, and a table full of people who appreciate a little drama.
Make the meringue work for you: pile it onto the pie while the filling is still warm from a short return to the oven, and seal it all the way to the crust edge. That warm contact plus a sealed edge means no shrinking, no weeping, and tall toasted peaks that slice cleanly for every single serving.
19. Salted Caramel Pumpkin Pie
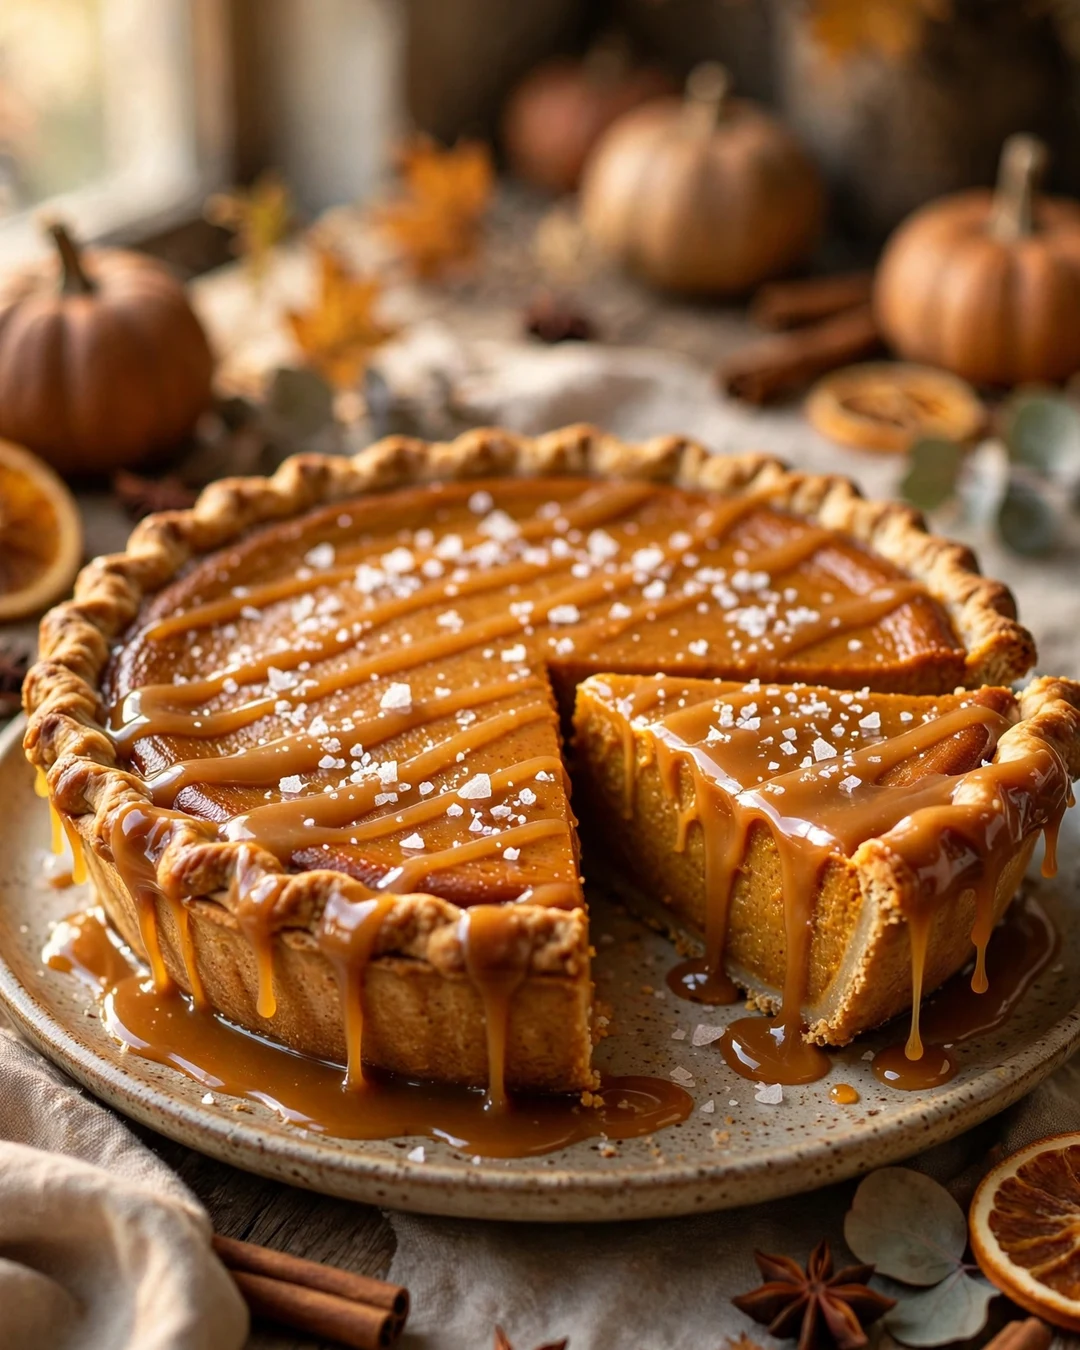
A hidden river of caramel under the filling and a glossy drizzle over the top: this pie is for the caramel faithful. The pumpkin custard bakes up a touch sweeter and deeper than the classic, and a final sprinkle of flaky sea salt makes every flavor in the pan taste more like itself.
Spread a generous layer of thick caramel sauce over the bottom of your blind baked crust and chill it for ten minutes so it firms up. Pour the classic filling gently over the top and bake as usual. The caramel stays in a distinct layer at the bottom, so each slice delivers a surprise ribbon of toffee flavor under the spice.
Pro Tips
Use a thick caramel, the spoonable kind from a jar, because thin ice cream topping melts away into the filling. Hold back a little of the sugar in the custard to balance the caramel sweetness. Add the flaky salt at the table, never before chilling, so the flakes stay distinct and crunchy.
- Choose thick, spoonable caramel sauce
- Chill the caramel layer before filling
- Reduce the custard sugar slightly
- Sprinkle flaky salt at serving time
Serving Suggestions
Warm the extra caramel and let guests drizzle their own. If caramel season is in full swing at your house, these caramel apple desserts belong on the same menu.
Caramel confidence trick: warm store bought caramel sauce for fifteen seconds so it pours and spreads without tearing the crust, and keep the flaky salt off until the moment you serve. Salt dissolves into the drizzle over time, so that last second sprinkle is what gives you the little sparkle in every bite.
20. Pumpkin Pie with Oat Crust
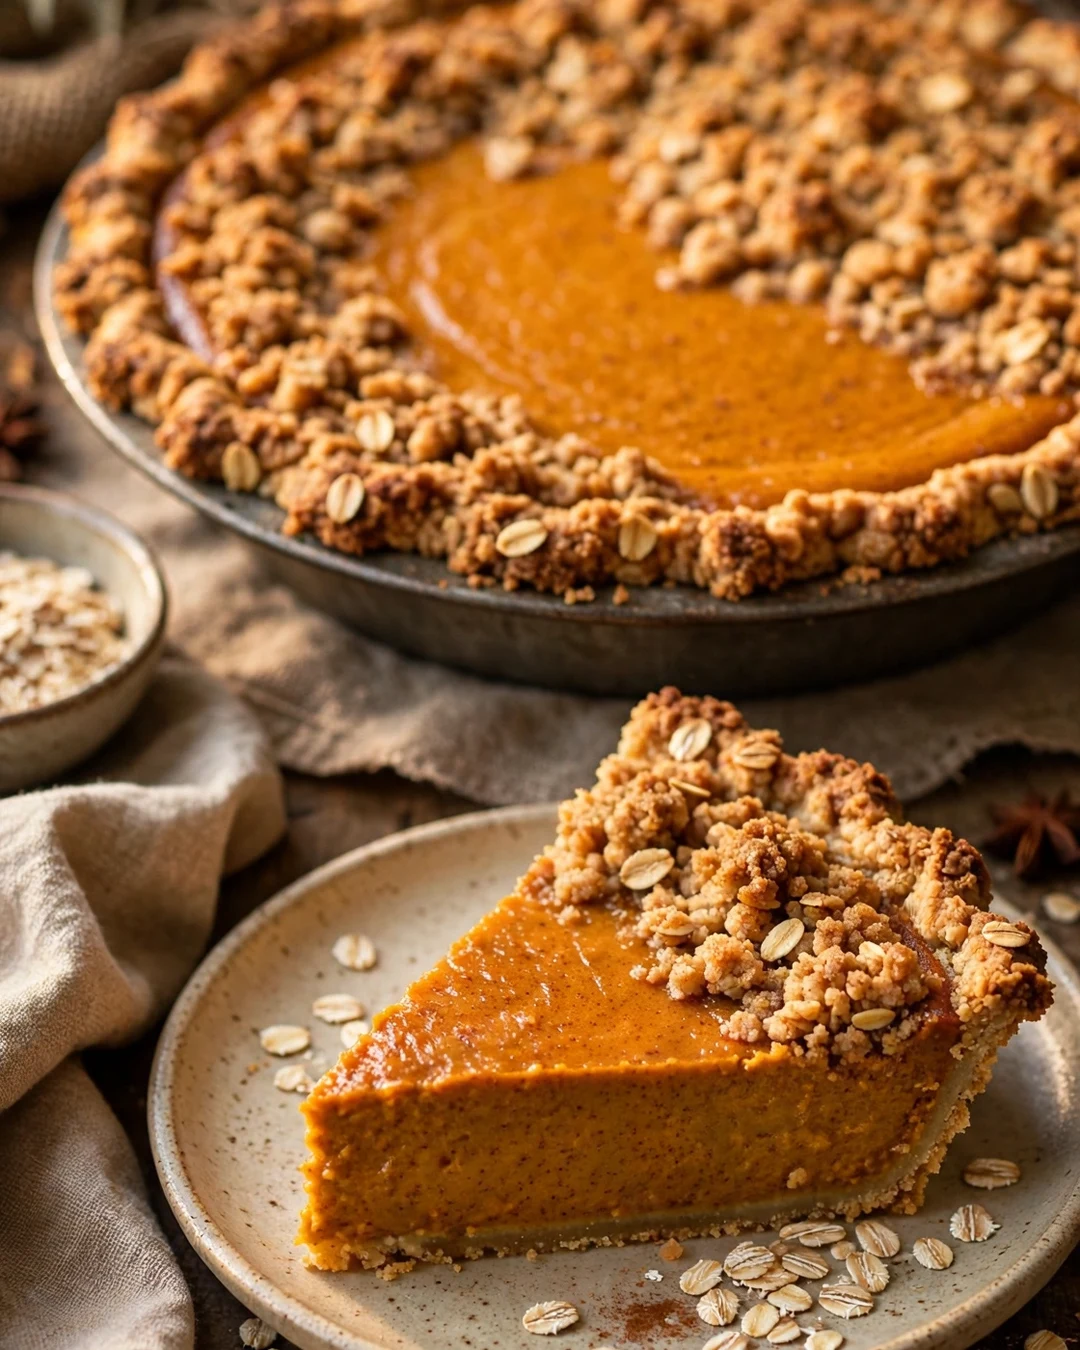
This crust tastes like the best part of an apple crisp wandered over to the pie plate. Ground oats, brown sugar, and butter press into a hearty, nutty shell that stands up to the creamy filling and adds a gentle chew at the edge of every bite. It is wholesome tasting without being remotely virtuous.
Pulse rolled oats with flour, brown sugar, cinnamon, and salt until the oats break into a coarse meal, then work in melted butter until the mixture clumps. Press it firmly into the pie plate, bake ten minutes until it smells like oatmeal cookies, and cool briefly. Fill with the classic custard and bake until just set.
Pro Tips
Do not grind the oats to dust; a little texture left in the meal is what makes the crust interesting. Press a second, smaller pie plate down onto the crust to compact it evenly before baking. A pinch of extra salt in the crust keeps the oats tasting toasted instead of bland.
- Leave a little texture in the ground oats
- Compact the crust with a second pie plate
- Bake the crust until it smells like cookies
- Extra pinch of salt keeps it lively
Serving Suggestions
This pie loves a scoop of vanilla ice cream and an extra drizzle of maple syrup. It also makes a quiet star of a brunch table next to strong coffee, where its hearty crust feels right at home among the morning pastries.
Oat crust insurance: if the edges of the crust start browning well before the filling sets, cover them with a loose ring of foil and keep baking. Oats toast faster than pastry, and that small shield keeps the rim golden and nutty instead of dark and bitter, so every slice tastes like the best part of a crisp.
21. Pumpkin Cream Pie
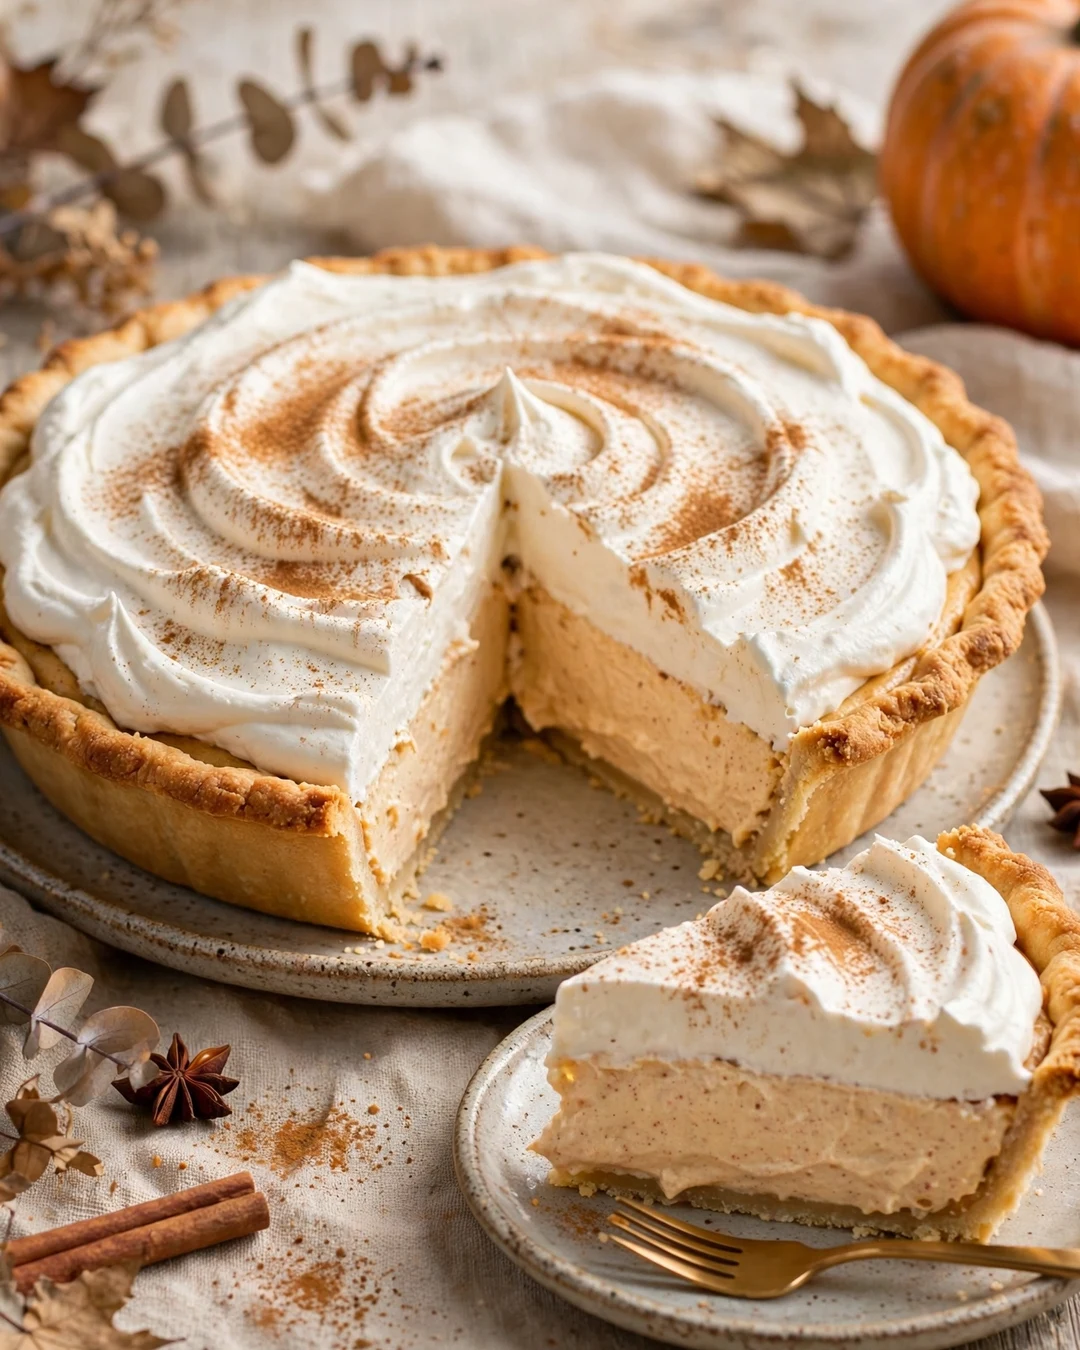
Pumpkin cream pie is the classic’s softer, dreamier cousin. Instead of a dense baked custard, the filling is a spiced pumpkin pudding cooked on the stovetop, lightened with softly whipped cream, and set in a fully baked pastry shell. Every bite is cool, silky, and gentle, with the spices floating through like a whisper.
Simmer pumpkin puree with milk, brown sugar, spices, and cornstarch, whisking constantly, until the mixture thickens and bubbles lazily. Stir in butter and vanilla, press it through a strainer, and chill it until cold. Fold in softly whipped cream, mound the filling into the baked shell, and chill at least four hours until it slices like a cloud with structure.
Pro Tips
Cook the pudding until it truly thickens; a loose base makes a slumping pie no matter how much whipped cream you fold in. Fold with a light hand in two additions, keeping as much air as possible. A fully baked, well browned shell is essential, because it is the only crisp element in the pie.
- Cook the pudding until thick and bubbling
- Strain for the silkiest filling
- Fold the whipped cream in gently, in two additions
- Chill at least 4 hours before slicing
Serving Suggestions
Spread extra whipped cream over the top in soft swirls and finish with a dusting of cinnamon or a few crushed gingersnaps. This is the pie to serve after a heavy holiday dinner, when everyone claims they are full and then somehow finds room.
Slice like a bakery: freeze the finished cream pie for exactly twenty minutes before cutting, just long enough to firm the filling without freezing it solid. Run a long knife under hot water, wipe it dry, and cut with one confident stroke per slice. The layers stay distinct and every piece stands tall on the plate.
22. Pumpkin Pie Trifle Style
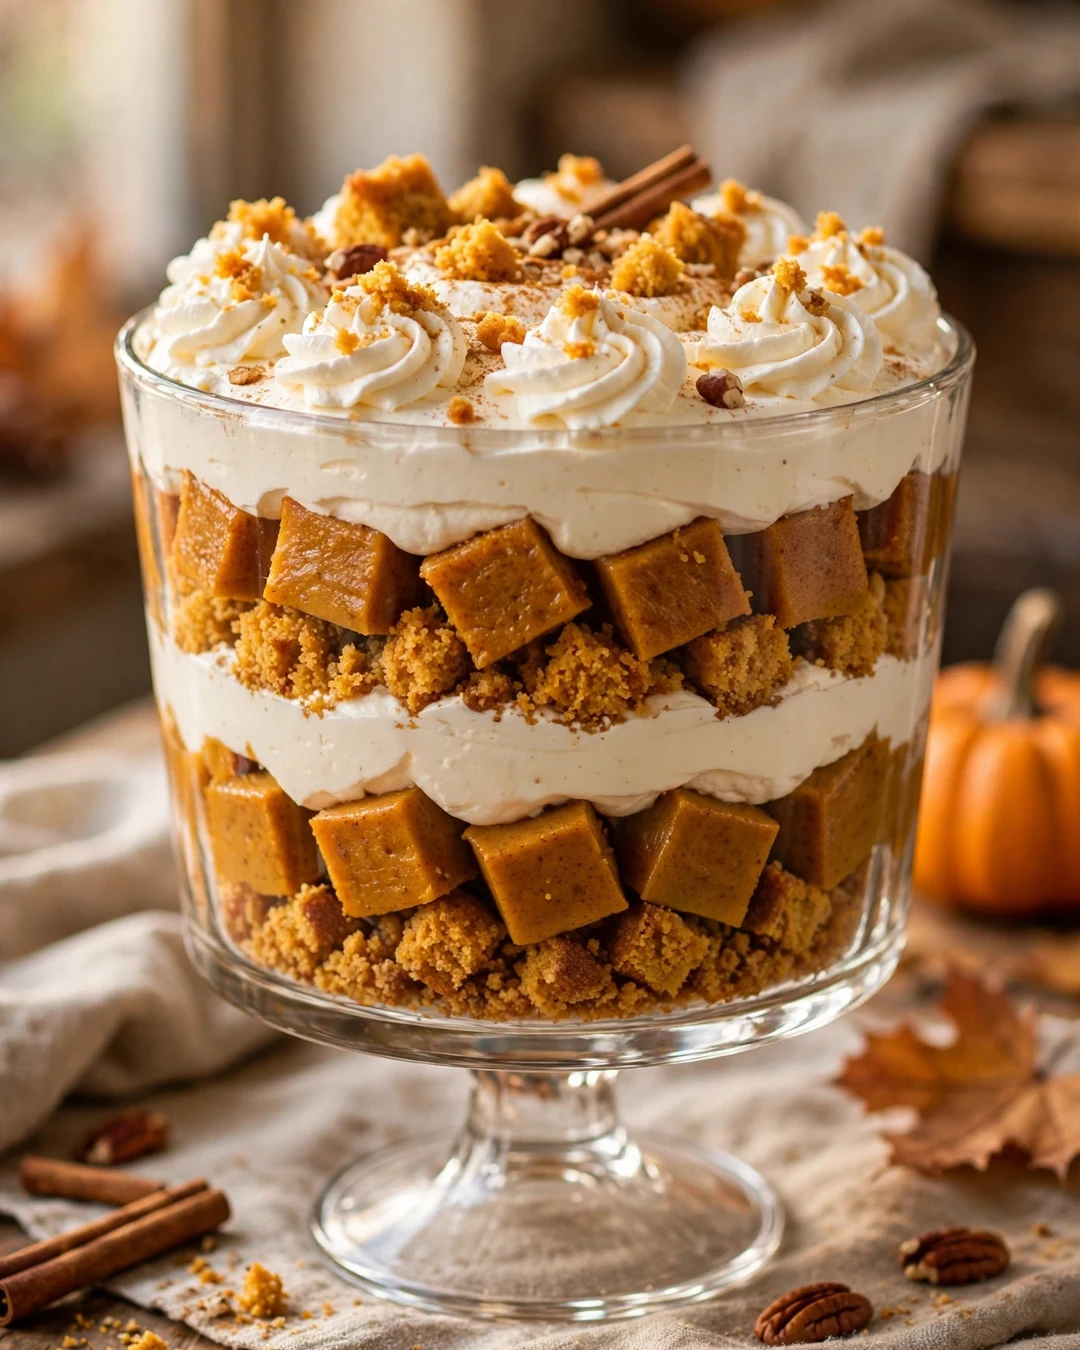
When a pie cracks, slumps, or simply needs a second life, the trifle bowl saves dessert. Pumpkin pie trifle layers cubes of baked pumpkin custard, or spoonfuls of leftover pie, with billows of whipped cream and crumbles of gingerbread or spice cake. It looks like a centerpiece and tastes like the best parts of the pie, remixed.
Bake a crustless pumpkin custard in a square pan and chill it until firm, then cut it into bite sized cubes. Whip cream with a little sugar and vanilla. In a clear glass bowl, layer custard cubes, cream, and crumbles, repeating until the bowl is full, and finish with a thick cap of cream and a sprinkle of crumbs.
Pro Tips
Keep the layers distinct by chilling the custard until it is truly firm before cubing. A trifle assembled too early with warm custard slumps into soup, while a properly chilled one stands in stripes you can see through the glass. Clear glass is half the point, so choose your prettiest bowl.
- Chill the custard firm before cubing
- Use a clear glass bowl to show the layers
- Gingerbread or spice cake crumbles work best
- Finish with cream and a sprinkle of crumbs
Serving Suggestions
Serve with a long spoon and zero apologies; trifles are meant to be scooped, not sliced. It is also the happiest ending for leftover pie after the holiday, and a fine companion to the rest of these thanksgiving dessert recipes on a big spread.
Trifle timing makes the magic: assemble it at least four hours ahead, and overnight is even better. The resting time lets the crumbles soak up a little custard and soften into cake like layers, while the whipped cream stays billowy on top. Carry the bowl in a snug box so it rides flat and arrives party ready.
23. Mini Pumpkin Pie Bites
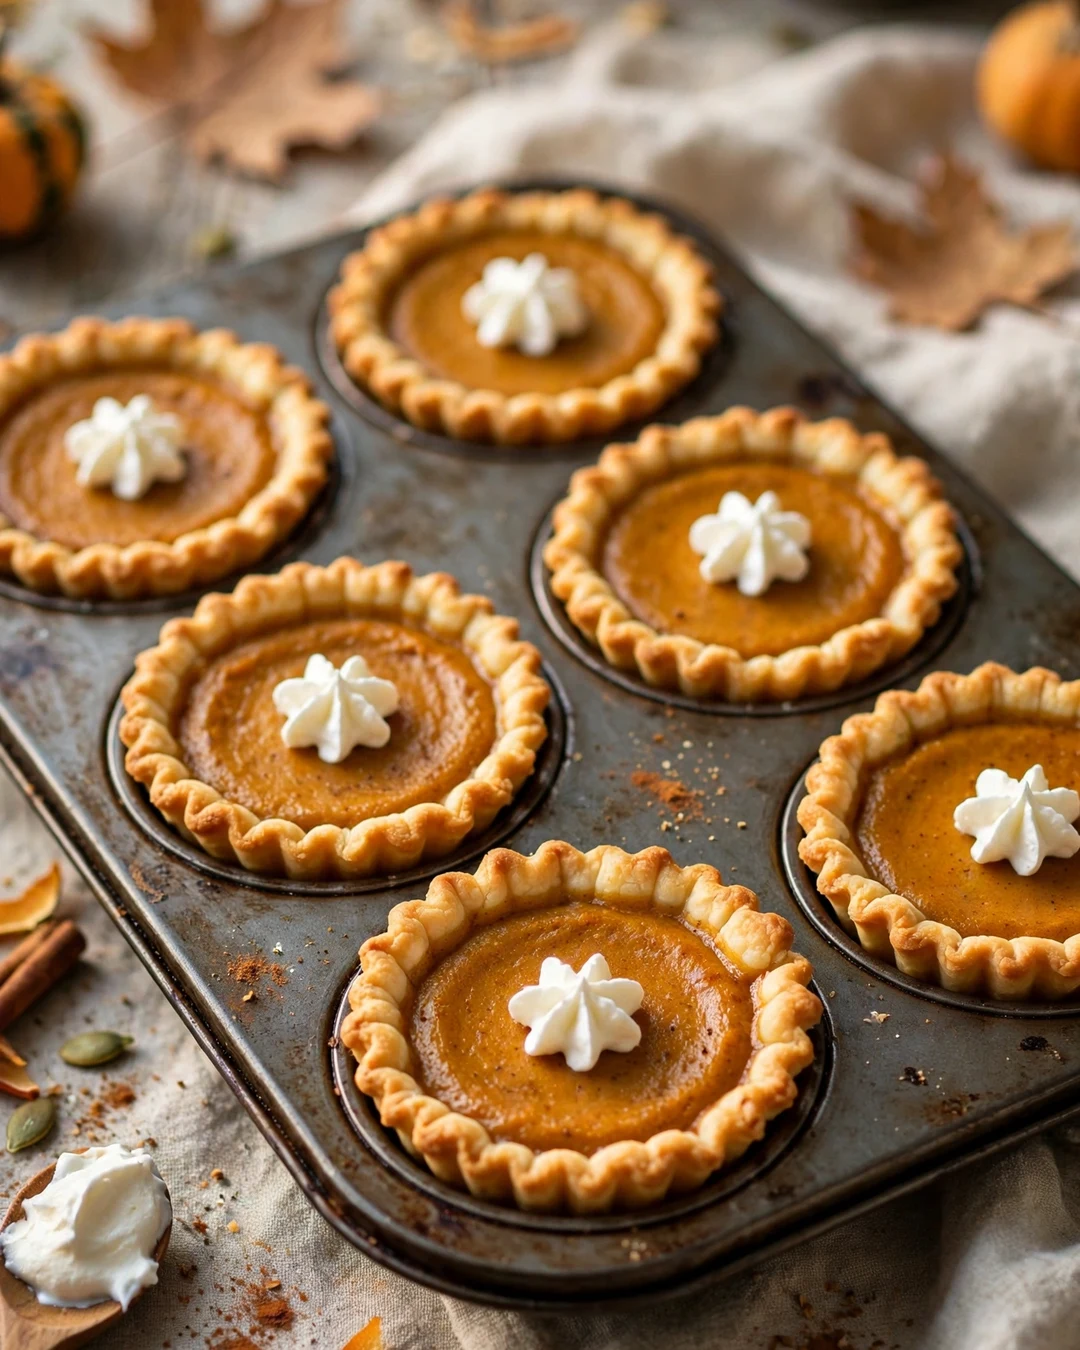
Not hand pies, not a full slice: these two bite pumpkin pies live in a muffin tin, each one a tiny fluted cup of pastry holding a few spoonfuls of spiced filling. They are portion controlled in theory and dangerously poppable in practice, which makes them perfect for parties, classrooms, and bake sales.
Cut pie dough into rounds and press them into a standard muffin tin, letting the edges pleat naturally. Fill each cup about three quarters full with classic pumpkin filling; they need less than you think, since the custard puffs slightly as it bakes. Bake twenty to twenty five minutes, until the filling is set and the pastry is golden, then cool in the tin.
Pro Tips
A quick chill of the filled tin, ten minutes in the fridge, keeps the pastry flaky and the edges sharp. Do not overfill, because puffed custard that spills onto the tin bakes into glue. A small cookie scoop makes filling the cups fast, even, and almost mess free.
- Press dough rounds into a muffin tin
- Fill cups three quarters full, no more
- Chill the filled tin 10 minutes before baking
- Cool in the tin so the cups hold their shape
Serving Suggestions
Pipe a tiny star of whipped cream onto each bite and add one small pecan or a dusting of spice. Set them out on a tiered stand and they look like they came from a bakery, though they take less than an hour from start to finish.
Party prep shortcut: bake the bites a day ahead, cool them completely, and store them in a single layer container in the fridge. Add the tiny whipped cream stars at the very last moment so they stay perky. Cold bites straight from the fridge are firm and neat, while ten minutes on the counter softens them perfectly.
24. Pumpkin Spice Latte Pie

Your favorite fall coffee order, in pie form. A shot’s worth of espresso melts into the pumpkin filling, deepening the spice and adding that gentle coffee warmth, and the whole pie gets capped with coffee whipped cream. It tastes like the coffee shop and the pie shop shook hands.
Dissolve two teaspoons of instant espresso powder in the warm evaporated milk before whisking it into the pumpkin, eggs, sugar, and spices; the filling bakes up a shade darker than the classic. Bake until just set and chill completely. Whip cream with powdered sugar, a splash of vanilla, and another teaspoon of espresso powder dissolved in a spoonful of hot water and cooled.
Pro Tips
Instant espresso powder is the right tool here; brewed coffee waters the custard down and dulls the flavor. Keep the coffee balanced, since the pumpkin and spice should still lead. Chill the pie thoroughly before topping, because warm custard melts whipped cream into a puddle within minutes.
- Use instant espresso powder, not brewed coffee
- Two teaspoons in the filling is the sweet spot
- Chill the pie fully before adding the cream
- Dissolve espresso for the cream in hot water first
Serving Suggestions
Serve slices with actual lattes for the full theme, or after dinner with small cups of strong coffee. A light cocoa dusting over the cream makes it look like the drink it is named after, and coffee lovers will claim this pie as their own.
Coffee lover’s garnish guide: save a small spoonful of the dry spice mix and dust it over the coffee whipped cream in a light snowfall, then set three coffee beans in the center of each slice. It looks like a latte art moment, tastes like your favorite fall drink, and takes less than a minute to finish.
Pumpkin Pie FAQs
Can I use fresh pumpkin instead of canned puree?
Yes. Roast a sugar pumpkin until tender, scoop out the flesh, and blend it smooth, then let it drain in a fine strainer for about an hour to remove extra water. Fresh puree is a little looser and milder than canned, so the draining step matters for a filling that sets properly.
Why did my pumpkin pie crack on top?
Cracks almost always mean the pie baked a little too long or cooled too fast. Pull the pie when the center still jiggles gently, and let it cool slowly at room temperature instead of moving it straight into the fridge. Small cracks are purely cosmetic, and a swirl of whipped cream covers them completely.
How do I keep the crust from getting soggy?
Blind bake a pastry crust for about ten minutes before adding the filling, and bake the pie on a preheated baking sheet set on the lowest oven rack. For crumb crusts, bake them until fragrant and firm before filling. A light brush of beaten egg white on a hot blind baked crust seals it even further.
How long does pumpkin pie need to cool before slicing?
Give it at least two hours at room temperature so the custard can finish setting, and chill it for a few hours after that if you like your slices extra clean. Cutting too early is the main reason slices slump. Most pumpkin pies actually taste better the next day.
Does pumpkin pie need to be refrigerated?
Yes. Because the filling is an egg and milk custard, pumpkin pie should go into the fridge within two hours of baking and keeps well for three to four days, loosely covered. The exceptions are the brûlée topped pie, which should be torched and eaten the same day, and hand pies, which keep fine in an airtight container.
Can I freeze pumpkin pie?
Absolutely. Bake and cool the pie completely, wrap it tightly in plastic wrap and then foil, and freeze for up to one month. Thaw it overnight in the fridge and let it sit at room temperature for about thirty minutes before serving. The texture stays remarkably silky.
Final Thought
Whether you go classic or try a chocolate swirl, a crunchy streusel top, or a slab pie for the whole family, these pumpkin pie recipes guarantee a dessert worth saving room for. Bake one this week, and do not be surprised when it becomes the pie everyone requests by name every single year.