
15 Spooky Halloween Snack Boards
Halloween parties call for food that looks as fun as it tastes. These halloween snack boards turn ordinary cheese, fruit, candy, and dips into spooky centerpieces that guests photograph before they touch. Whether you are hosting a costume party or a quiet movie night, a themed board sets the mood instantly. Round out the menu with our easy halloween appetizers for savory bites your guests will love.
The best part is how simple they are. Most of these 15 boards come together in under 30 minutes with store bought ingredients and a few clever tricks. Pick one showstopper for the center of the table, or make two or three smaller boards and scatter them around the party. For even more sweet inspiration, browse our spooky halloween treats and caramel apple desserts collections.
1. Skeleton Charcuterie Board
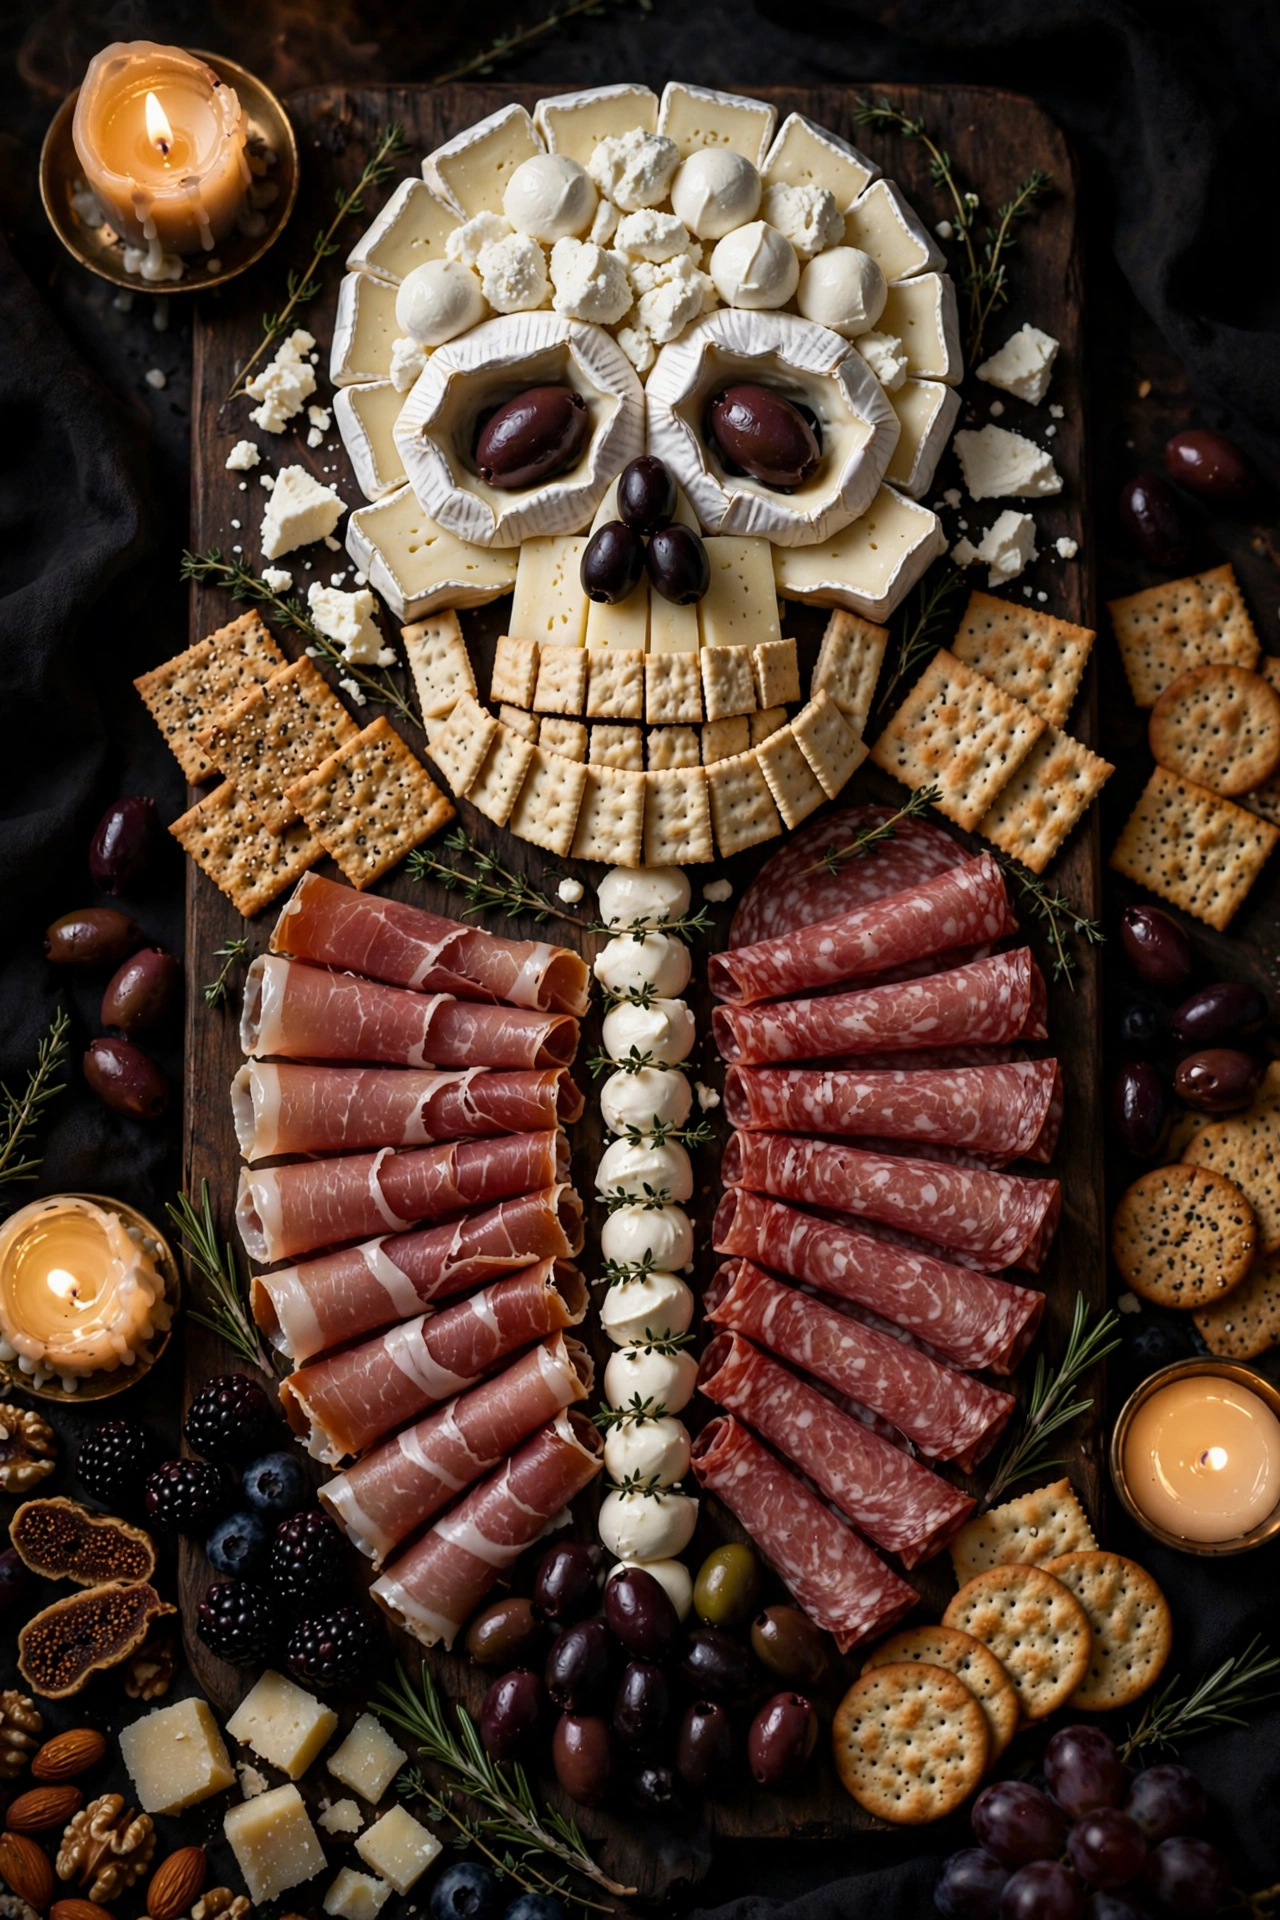
A plastic skeleton becomes the star of your table when you arrange cured meats, cheeses, and olives around and across its bones. The contrast of dark salami, pale mozzarella, and glossy black olives against the white skeleton makes this board look like a haunted masterpiece. Guests love picking at the ribs and skull while they mingle, and the whole thing takes less than thirty minutes to assemble from store bought ingredients.
Start with a large wooden board or a sheet pan lined with parchment. Place the skeleton in the center, then fan out folded salami roses, rolled prosciutto, and cubes of cheddar and gouda around the frame. Fill gaps with marinated olives, cornichons, and dried apricots for color. Add crackers and breadsticks along the edges so every bite has a crunchy vehicle.
The beauty of this board is how forgiving it is. There is no wrong way to drape meat over plastic ribs, and the messier it looks, the spookier it gets. Choose a mix of textures so guests get creamy cheese, chewy meat, and briny olives in every handful. A small bowl of grainy mustard or fig jam tucked near the skull gives people a sweet and tangy option.
Flavor wise, this is classic charcuterie with a Halloween costume. The saltiness of the cured meats plays against the richness of the cheese, while the pickled elements cut through the fat. It feeds a crowd easily and looks far more impressive than the effort required. Set it out as the centerpiece and watch it disappear before the party games even start.
Pro tip: buy the skeleton from a dollar store or party shop in early October before they sell out. Wipe it down with a damp cloth, and if you want it food safe, lay parchment under any food that touches the plastic directly.
If you love a showpiece platter, our easy fall appetizers collection is packed with more crowd pleasing ideas, and the game day appetizer recipes work just as well for a Halloween crowd.
Why You’ll Love This Board
A skeleton charcuterie board looks like a professional caterer made it, but it is really just smart arranging. The bones do the decorating for you, so even a simple mix of salami and cheddar looks dramatic. It is also endlessly flexible, which makes it perfect for picky eaters and last minute guest counts.
What to Pair With It
- Set the board in the center of the table with small plates nearby so guests can build their own bites.
- Pair the salty meats with something sweet like fig jam or honey for balance.
- Add a bowl of mixed nuts for guests who want a quick handful between conversations.
- Keep a stack of napkins close, since charcuterie is deliciously hands on.
- Refill crackers in waves so the board looks full all night long.
Pro Tips for a Spooky Spread
Fold salami into quarters and overlap the pieces so they look like ruffles, which fills space fast. Chill the board for 20 minutes before serving if your kitchen is warm, so the cheese stays firm. And leave a few gaps on purpose, since a packed board photographs better than a sparse one.
2. Pumpkin Cheese Board
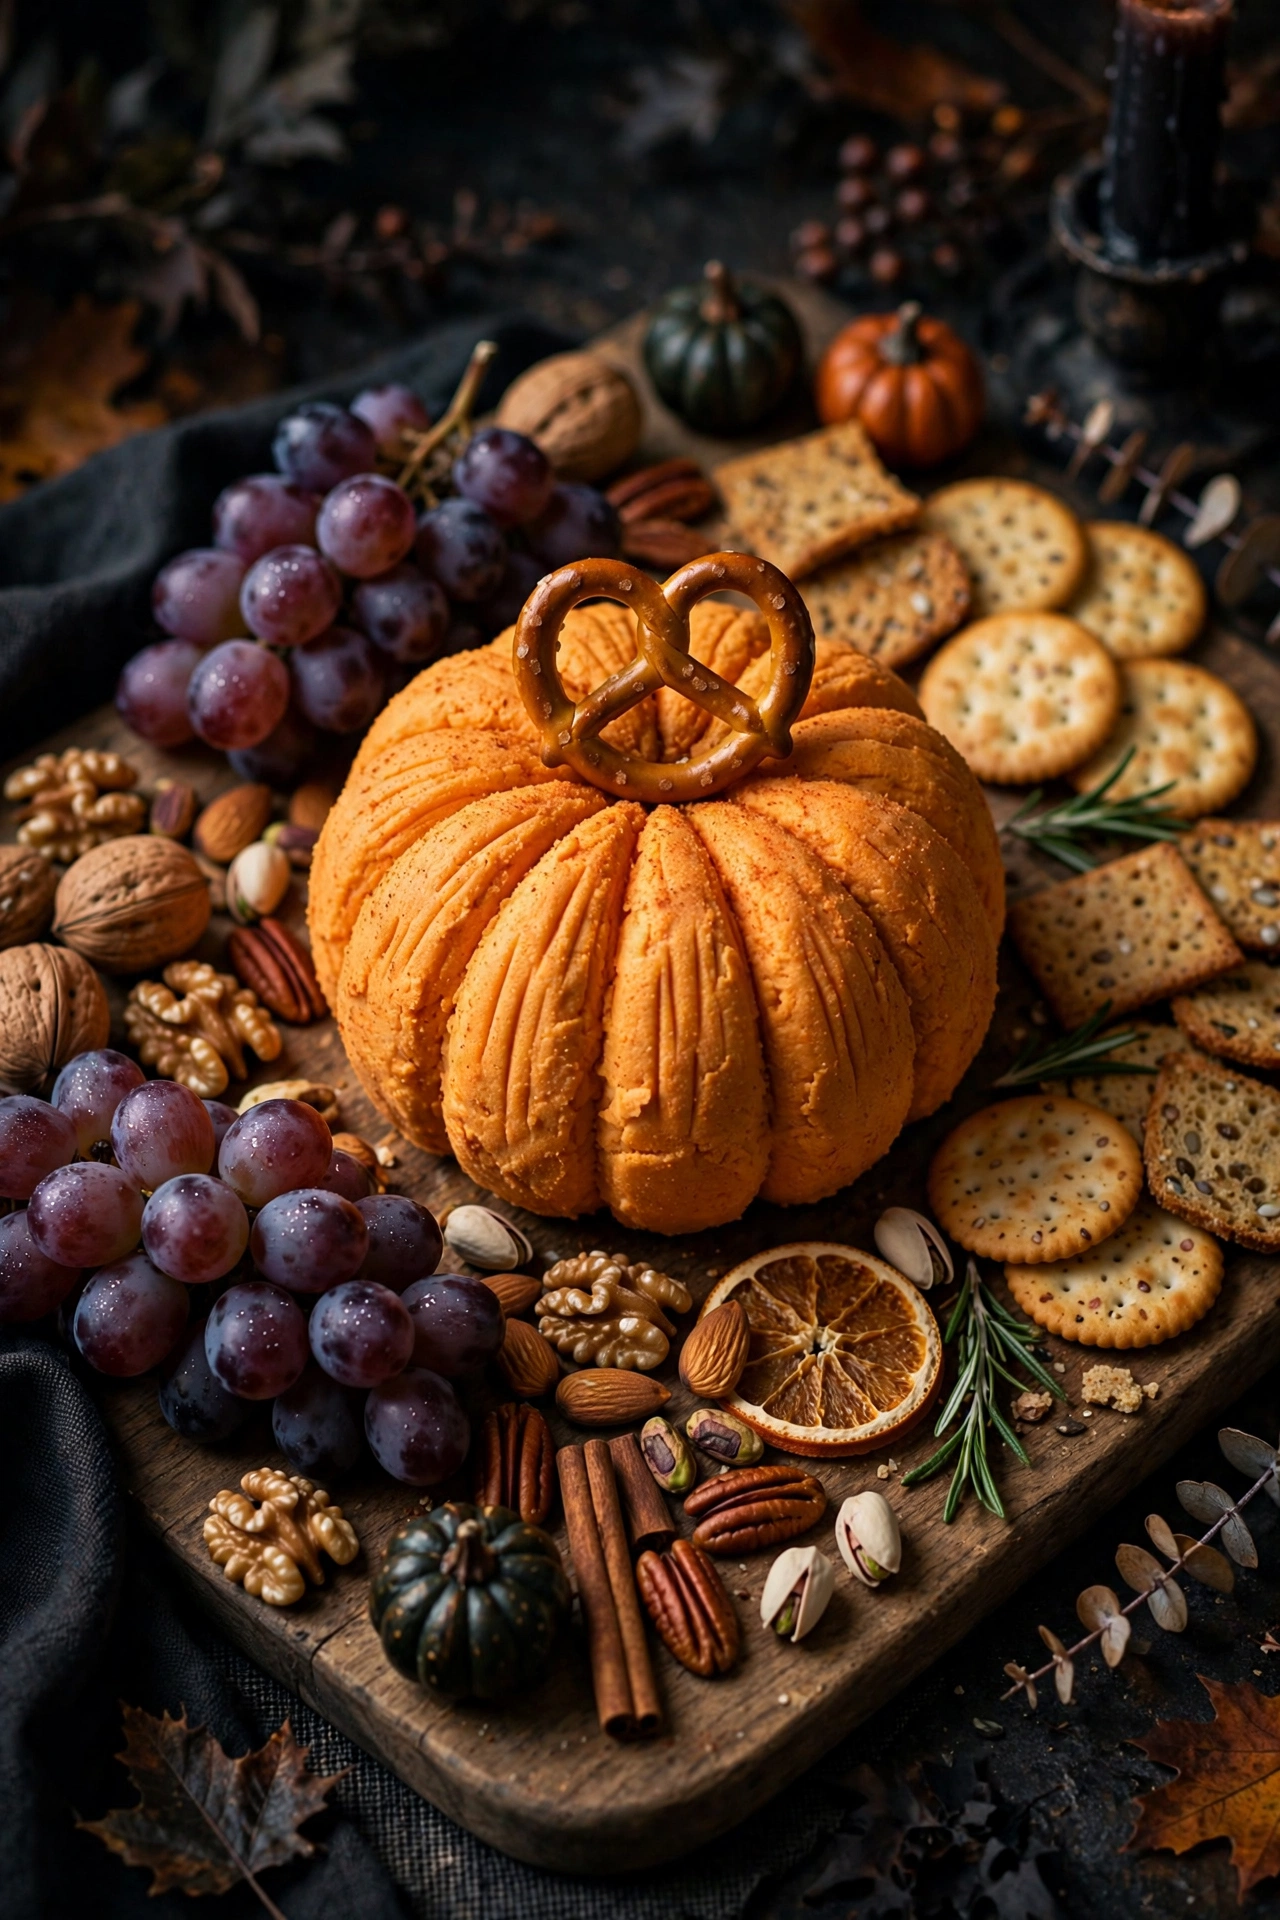
A hollowed out pumpkin becomes an edible serving bowl for warm, melty cheese in this fall favorite. The pumpkin keeps the cheese warm while adding a festive orange glow to the table. Fill it with baked brie or a hot cheese dip, then surround it with crackers, apple slices, and pretzels for scooping up every last bit.
Choose a small pie pumpkin with a flat bottom so it sits steady. Cut off the top, scoop out the seeds, and brush the inside lightly with oil before filling. Bake the filled pumpkin until the cheese bubbles, about 20 minutes. The pumpkin flesh softens and can be scooped out along with the cheese for an extra treat.
The flavor combination is pure autumn. Sweet roasted pumpkin pairs beautifully with creamy, salty cheese, especially when you add a drizzle of honey or a sprinkle of toasted pecans on top. Apple slices add crunch and freshness that balance the richness. This board works as an appetizer or the centerpiece of a grazing table.
What makes this board special is the presentation. Guests always gasp when they see cheese bubbling inside a real pumpkin. It looks like you spent hours, but the pumpkin does all the visual work for you. Keep extra crackers nearby because the cheese goes fast once people start dipping.
Serving idea: pair with a crisp apple cider or a light white wine. The acidity cuts through the rich cheese and keeps the board feeling fresh rather than heavy.
Warm cheese boards are a fall entertaining staple, so browse our easy fall appetizers for more cozy starters. The apple slices on this board also pair beautifully with the ideas in our caramel apple desserts roundup if you want a sweet finish.
Hosting Highlight
A bubbling cheese pumpkin doubles as your table centerpiece, so you can skip extra decorations and let the food do the talking.
Make-Ahead and Storage
Hollow the pumpkin and prep the cheese filling up to a day ahead, storing both separately in the fridge. Assemble and bake right before guests arrive so the cheese is bubbly. Leftover pumpkin flesh and cheese keep for three days in an airtight container and reheat well.
What to Serve Alongside
- Sliced baguette and seeded crackers for scooping.
- Crisp apple slices and pear wedges for a fresh contrast.
- Toasted pecans or walnuts sprinkled over the top.
- A drizzle of hot honey for guests who like sweet heat.
- Cornichons or pickled onions to cut the richness.
Fun Twists to Try
Swap the brie for a smoky gouda or a sharp white cheddar for a different mood. Stir roasted garlic into the cheese before baking for extra depth. For a sweet version, fill the pumpkin with a warm cinnamon cream cheese dip instead.
3. Monster Cookie Board
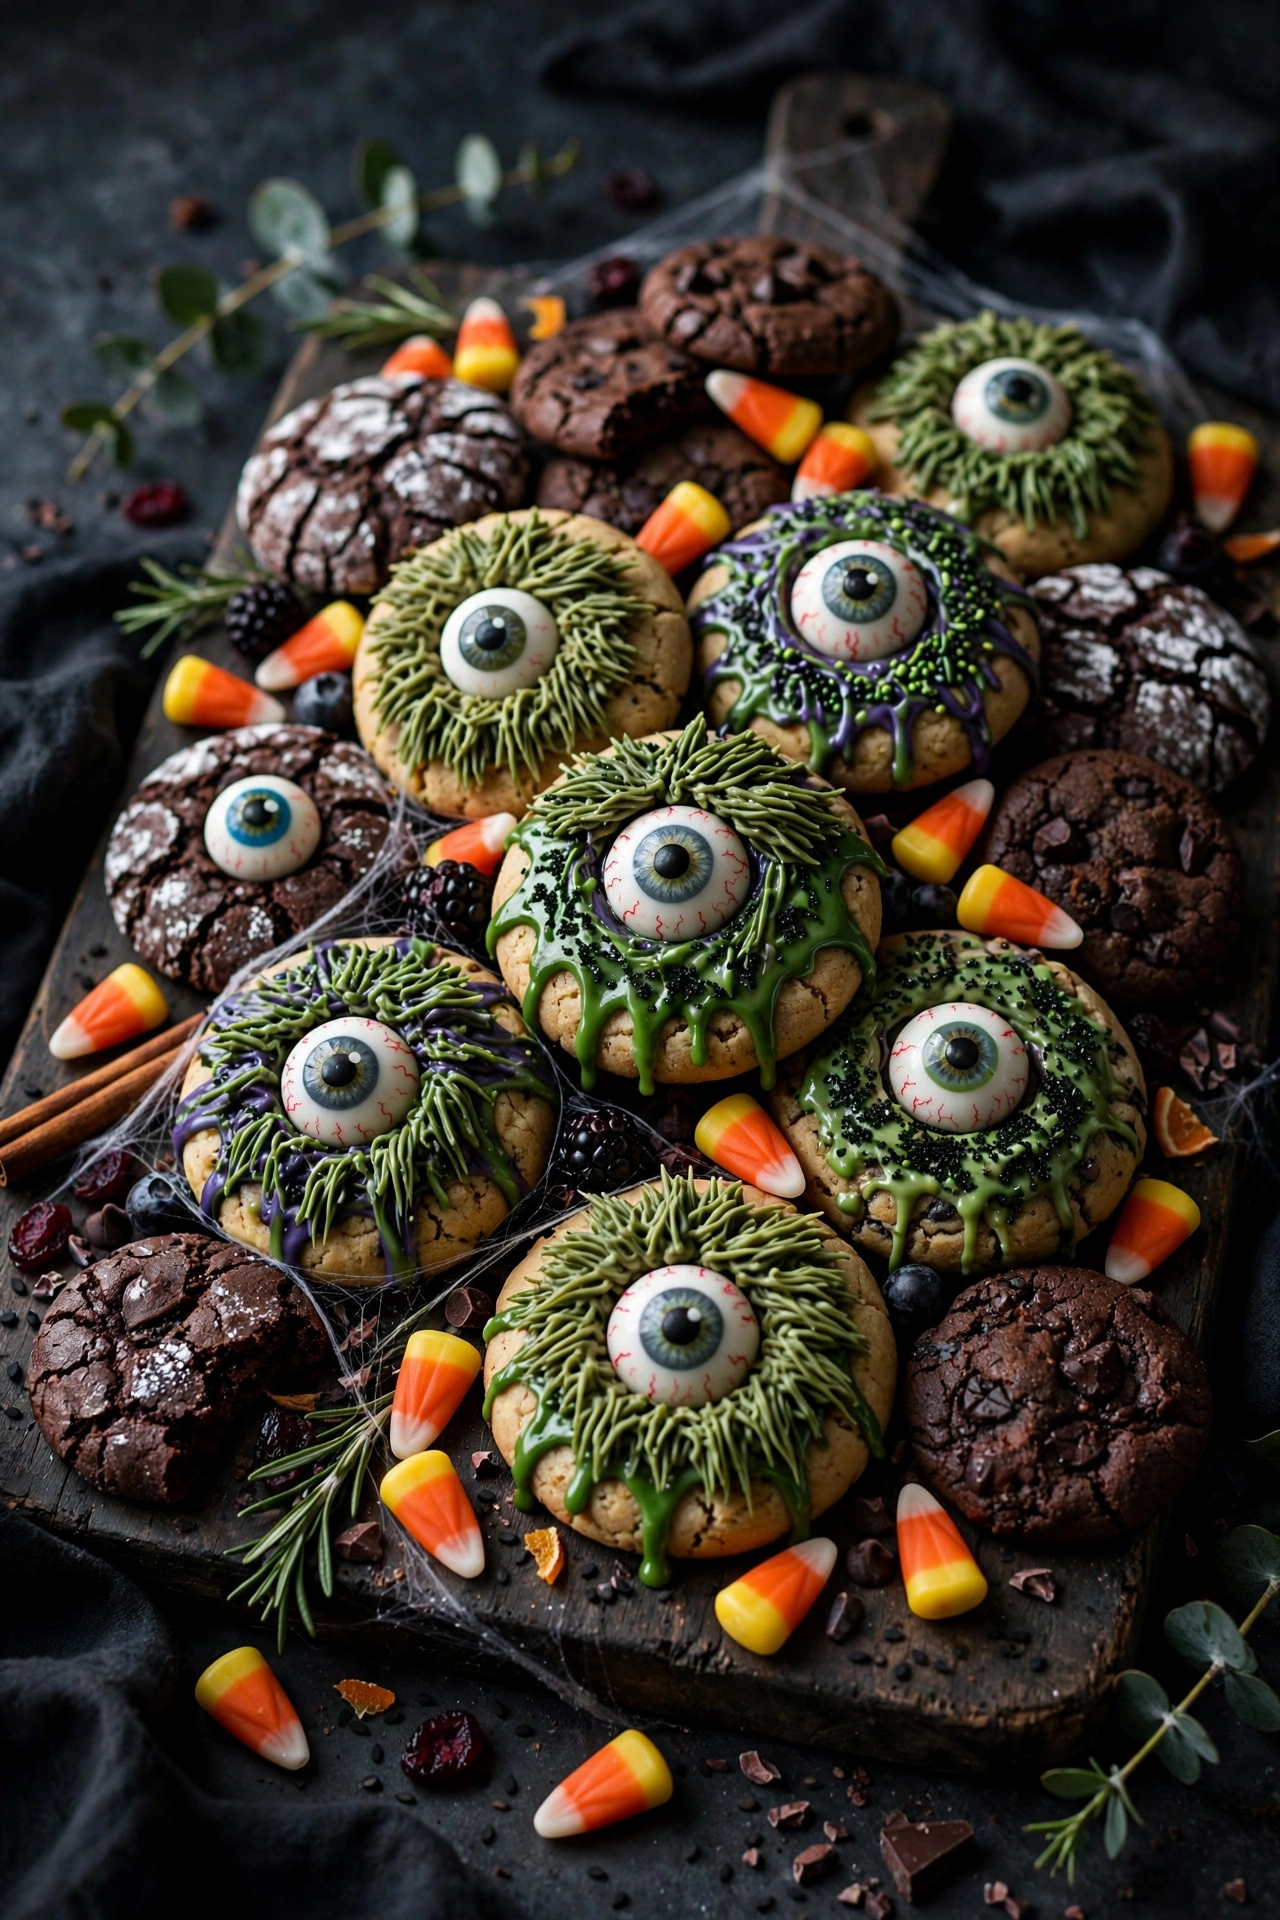
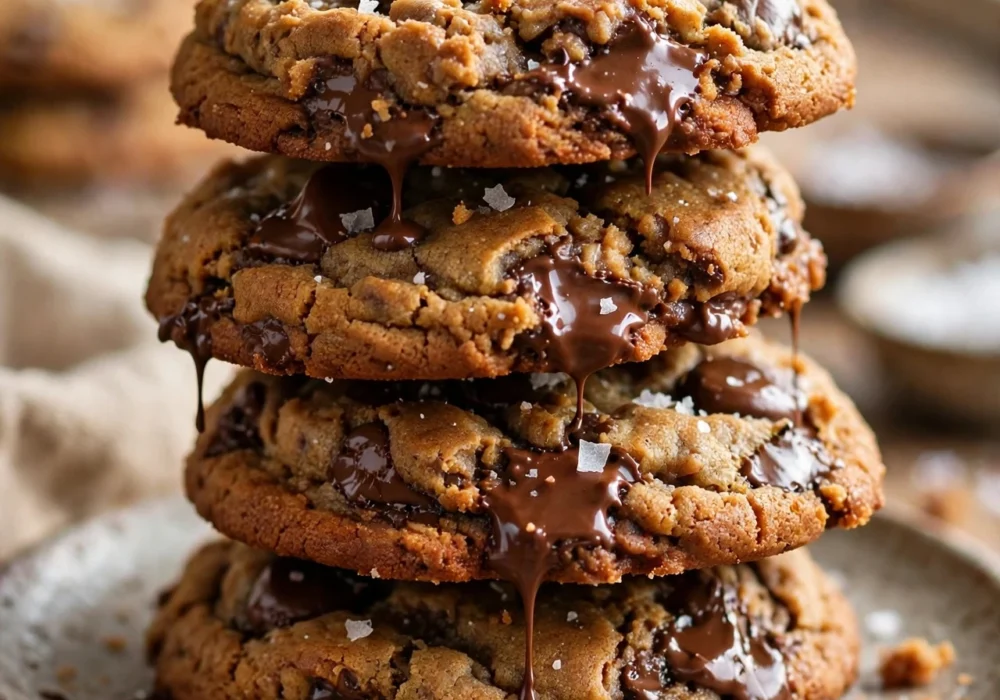
Big, chewy monster cookies loaded with candy pieces and chocolate chips become the heroes of this playful dessert board. Stack them high in the center, then fill the spaces with bowls of candy corn, gummy eyeballs, and mini chocolate bars. Kids go wild for this one, and adults sneak pieces when no one is looking.
Tip Callout
Chill the dough for 30 minutes before baking. Cold dough spreads less, giving you thick, bakery style cookies with gooey centers.
Bake the cookies slightly underdone so the centers stay soft and gooey. Use a mix of add ins like M and Ms in Halloween colors, chopped peanut butter cups, and pretzel pieces for salty crunch. Arrange the cookies in overlapping rows on a dark board or black parchment so the colors pop dramatically.
The textures here are what make it irresistible. Crisp edges give way to chewy middles studded with melty chocolate and crunchy candy shells. Every bite is different depending on which mix ins you hit. Serve with small glasses of cold milk for dunking, and watch the whole board vanish in minutes.
This board is perfect for classroom parties or trick or treat nights because everything is handheld and mess free. You can bake the cookies two days ahead and store them in an airtight container. Assemble the board right before guests arrive so the candy looks fresh and glossy.
Variation: swap the monster cookies for brownie bites or blondies cut into coffin shapes with a cookie cutter. The board works with any chunky bar cookie as the base.
This board fits right into a bigger dessert spread, so check our spooky halloween treats for more sweet ideas. Chopped peanut butter cups are a star mix in here, and our peanut butter dessert recipes have plenty more ways to use them.
Serving Suggestions
Serve the cookies slightly warm with small glasses of cold milk for dunking. A scoop of vanilla ice cream on the side turns the board into a full dessert station. Keep extra napkins handy, because gooey centers are gloriously messy.
Smart Storage Tips
- Bake cookies up to two days ahead and store airtight at room temperature.
- Freeze baked cookies for up to a month, thawing at room temperature before serving.
- Keep candy toppings in sealed bags so they stay glossy and fresh.
- Assemble the board no more than an hour before the party.
- Store leftovers in layers separated by parchment to protect the candy faces.
Pro Tips
Use a cookie scoop so every cookie bakes evenly and looks uniform on the board. Press a few extra candy pieces onto the tops right after baking while the cookies are still soft, so they stick without sinking.
4. Candy Corn Board
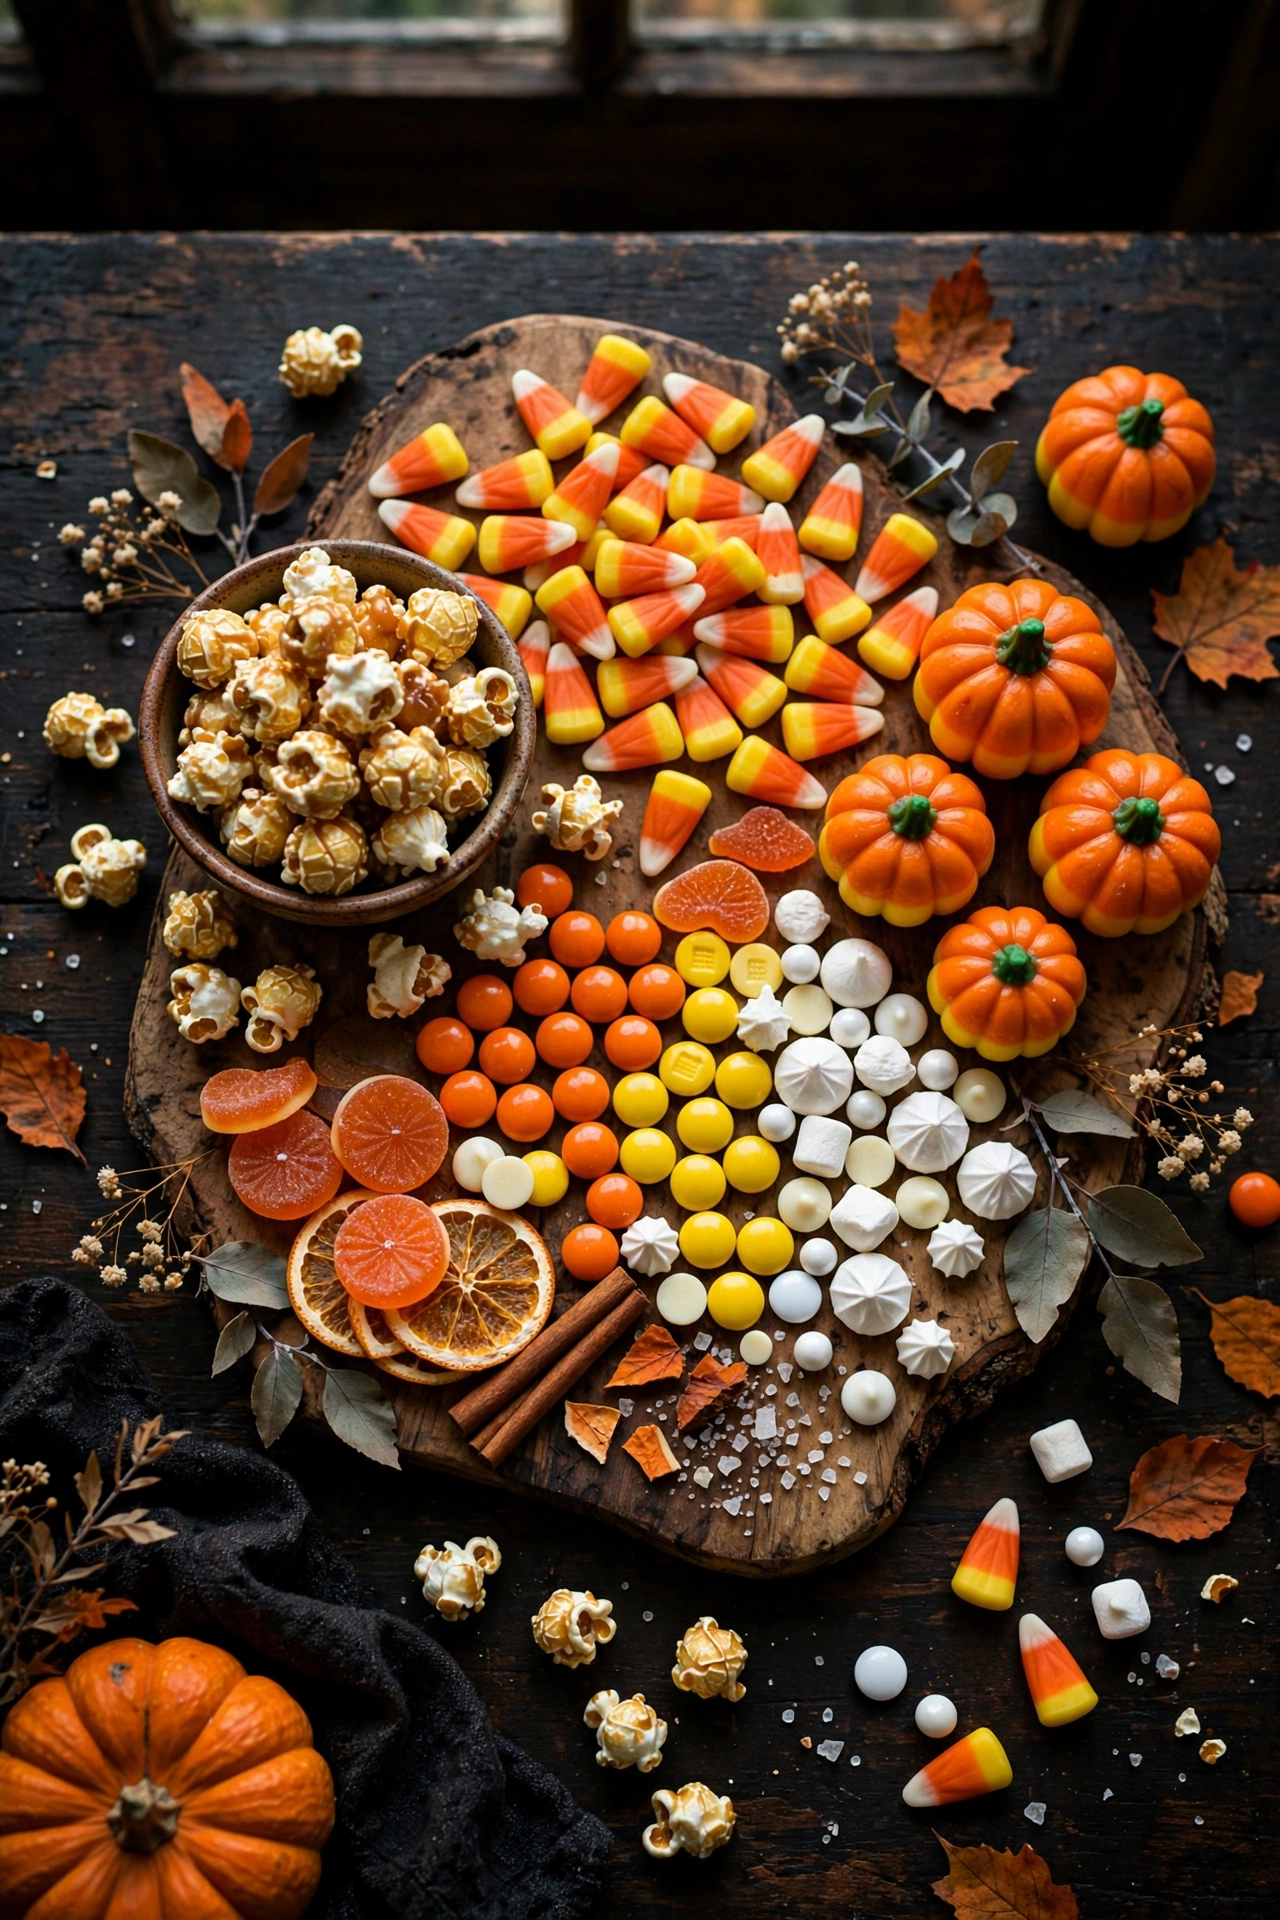
Love it or hate it, candy corn is the icon of Halloween, and this board celebrates it in style. Arrange candy corn in stripes and patterns across the board, then surround it with white chocolate covered pretzels, orange dried apricots, and yellow cheese cubes that echo the candy corn color scheme.
The trick is leaning into the yellow, orange, and white palette for the whole board. Add banana chips, popcorn, marshmallows, and vanilla fudge to build out the white section. Orange elements can include cheddar cubes, dried mango, and clementine segments. It looks incredibly festive with almost no effort.
Flavor wise, this is a sweet and salty mix that keeps people grazing. The sugary candy corn pairs surprisingly well with salty pretzels and sharp cheddar. It is more about the visual theme than gourmet flavor, but guests love the creativity and the nostalgia of the classic Halloween candy.
This board costs very little to make since candy corn and popcorn are cheap in October. It is ideal for office parties or school events where you need to feed a crowd on a budget. The bold color blocking photographs beautifully for social media too.
Pro tip: use small bowls or ramekins to separate sticky candies from fresh fruit. It keeps everything tidy and makes the board easier to refill during the party.
Color blocked boards are a hit at group gatherings, and our fall potluck dishes roundup has more budget friendly crowd pleasers. For extra sweets to fill the gaps, our spooky halloween treats collection has plenty of options.
Why It Works
This is the lowest effort board on the list with the highest visual payoff. The strict color palette makes even cheap candy look intentional and styled. It is also the most affordable option, since the star ingredients cost very little in October.
Quick Assembly Tips
- Sort snacks by color before you start arranging.
- Use small bowls for loose candy to keep colors crisp.
- Build from the center outward in stripes or wedges.
- Fill gaps with popcorn, which is cheap and photogenic.
- Step back and check the color balance as you go.
Budget Party Tips
Buy candy corn in bulk bags to save money, and mix in a few chocolate pieces for guests who are not fans. A black board or black parchment underneath makes the yellow, orange, and white pop even harder.
5. Mummy Brie Board
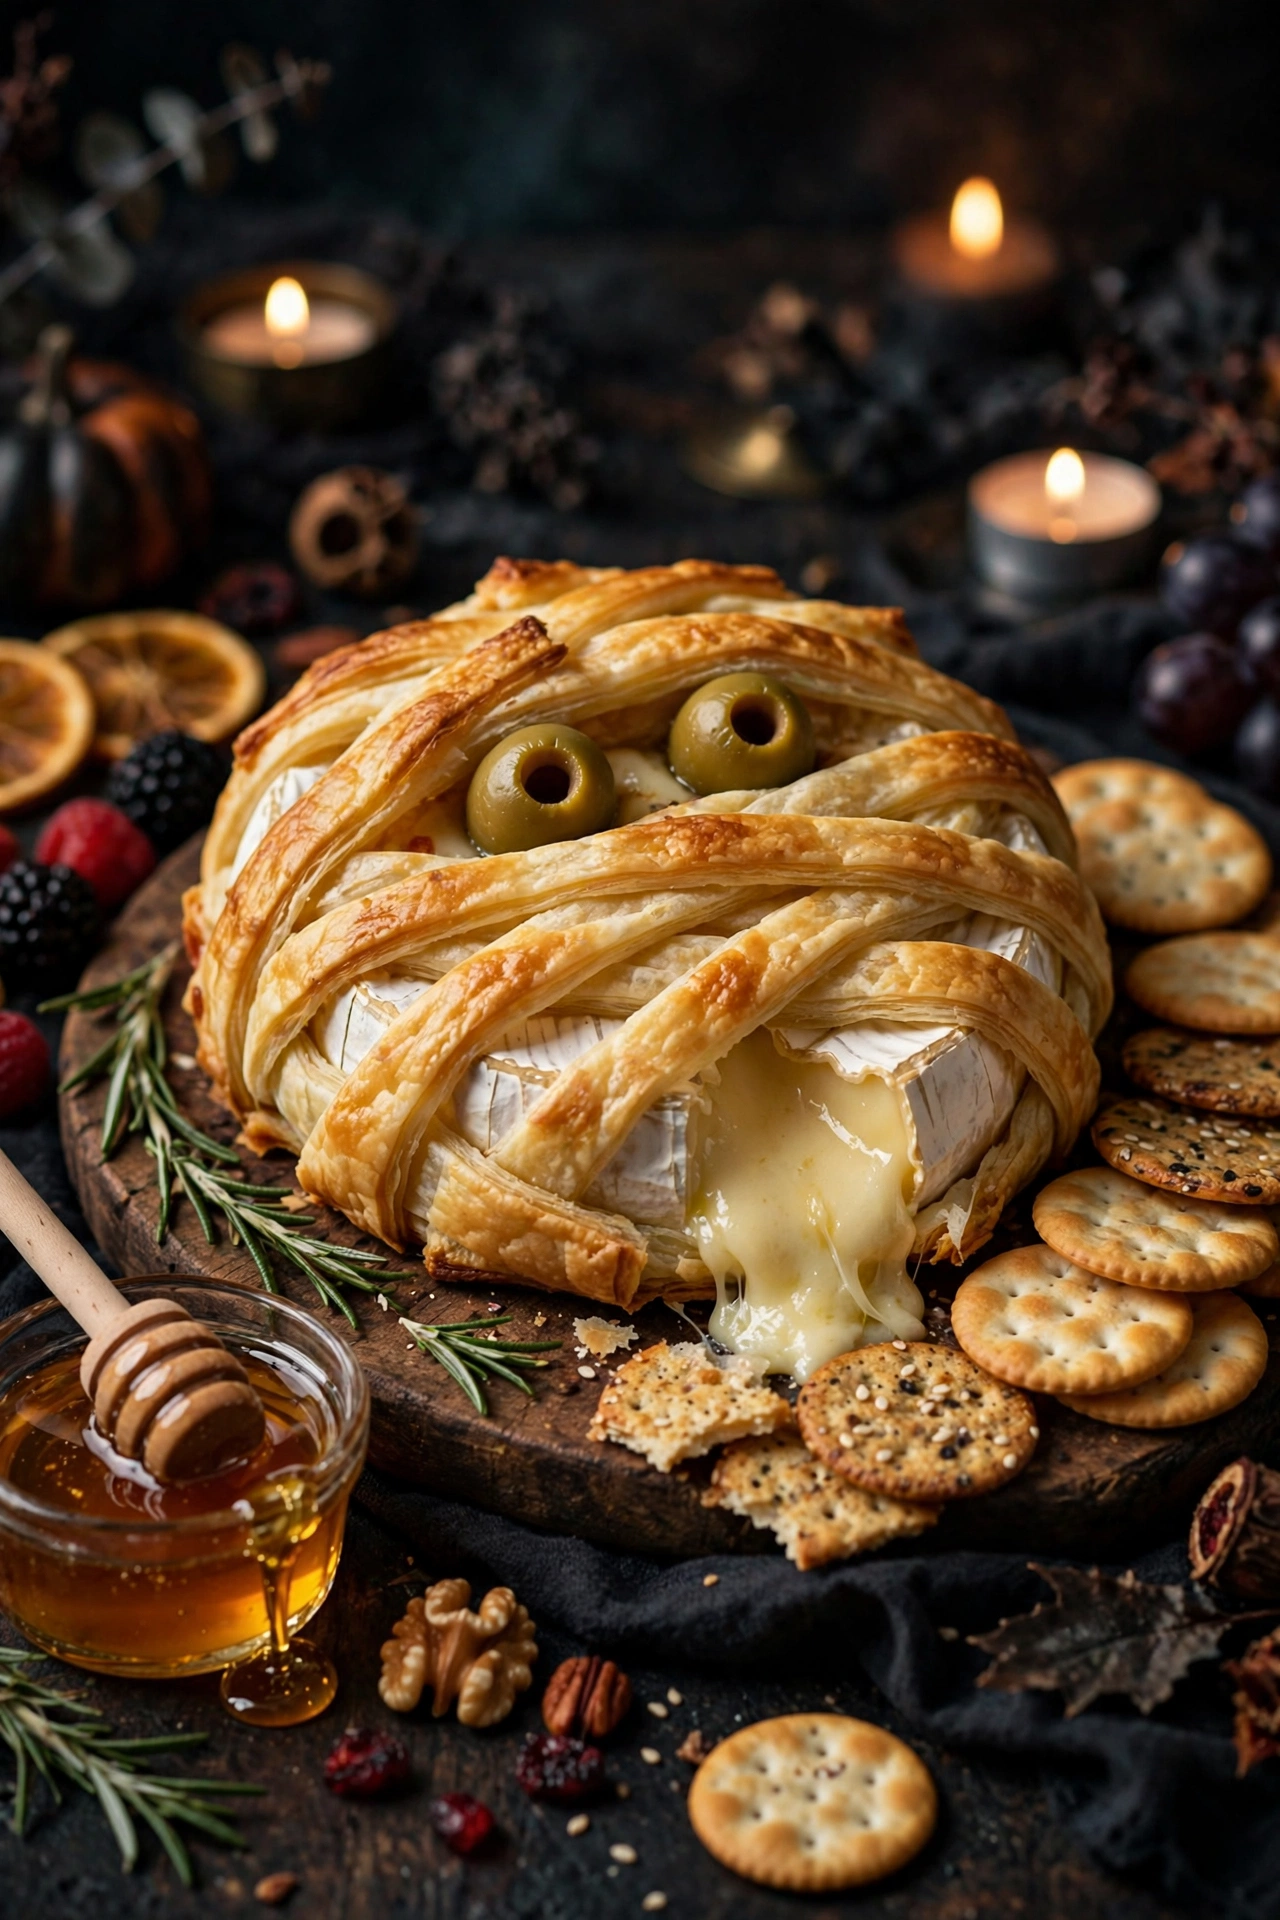
A wheel of brie wrapped in strips of puff pastry looks exactly like a tiny mummy, complete with candy eyes peeking through the bandages. Bake until the pastry turns golden and the cheese inside goes molten. When guests cut in, the creamy brie oozes out in the most satisfying way.
Cut the puff pastry into thin strips and wrap them loosely around the brie, leaving a gap near the top for the eyes. Brush with beaten egg for a glossy finish. Bake at 400 degrees for about 20 minutes until deeply golden. Press two candy eyes into the gap while it is still warm.
The contrast of flaky, buttery pastry and rich, creamy brie is pure comfort. Add a spoonful of fig jam or cranberry sauce on the side for a sweet tart counterpoint. Serve with sliced baguette and apple wedges that are sturdy enough to scoop up the molten cheese.
This board always gets a reaction because it is equal parts cute and creepy. It works for both Halloween parties and fall gatherings since mummies read as festive without being gory. Make two if you have a big crowd because one wheel disappears fast.
Serving idea: surround the mummy brie with dark grapes, candied pecans, and rosemary sprigs for a moody, elegant look that balances the playful centerpiece.
Baked cheese is always a party win, and our easy fall appetizers include more warm starters for chilly nights. If you are planning a full themed menu, our easy halloween appetizers roundup has savory bites to serve before the sweets.
Switch It Up
- Swap brie for camembert for a slightly earthier flavor.
- Add a layer of cranberry sauce under the pastry for a festive twist.
- Use crescent dough instead of puff pastry for a softer wrap.
- Sprinkle everything bagel seasoning on the egg wash before baking.
- Make minis with small brie bites for individual servings.
How to Serve It
Serve the mummy straight from the oven while the cheese is molten, with a cheese knife for the first dramatic cut. Surround it with sturdy dippers like baguette slices, apple wedges, and pretzel rods that can handle the gooey center.
Prep Ahead Tips
Wrap the brie in pastry up to a day ahead and refrigerate unbaked. Add ten minutes to the bake time if going straight from the fridge. Leftovers reheat in a hot oven, though the pastry is best the day it is baked.
6. Spider Web Dip Board
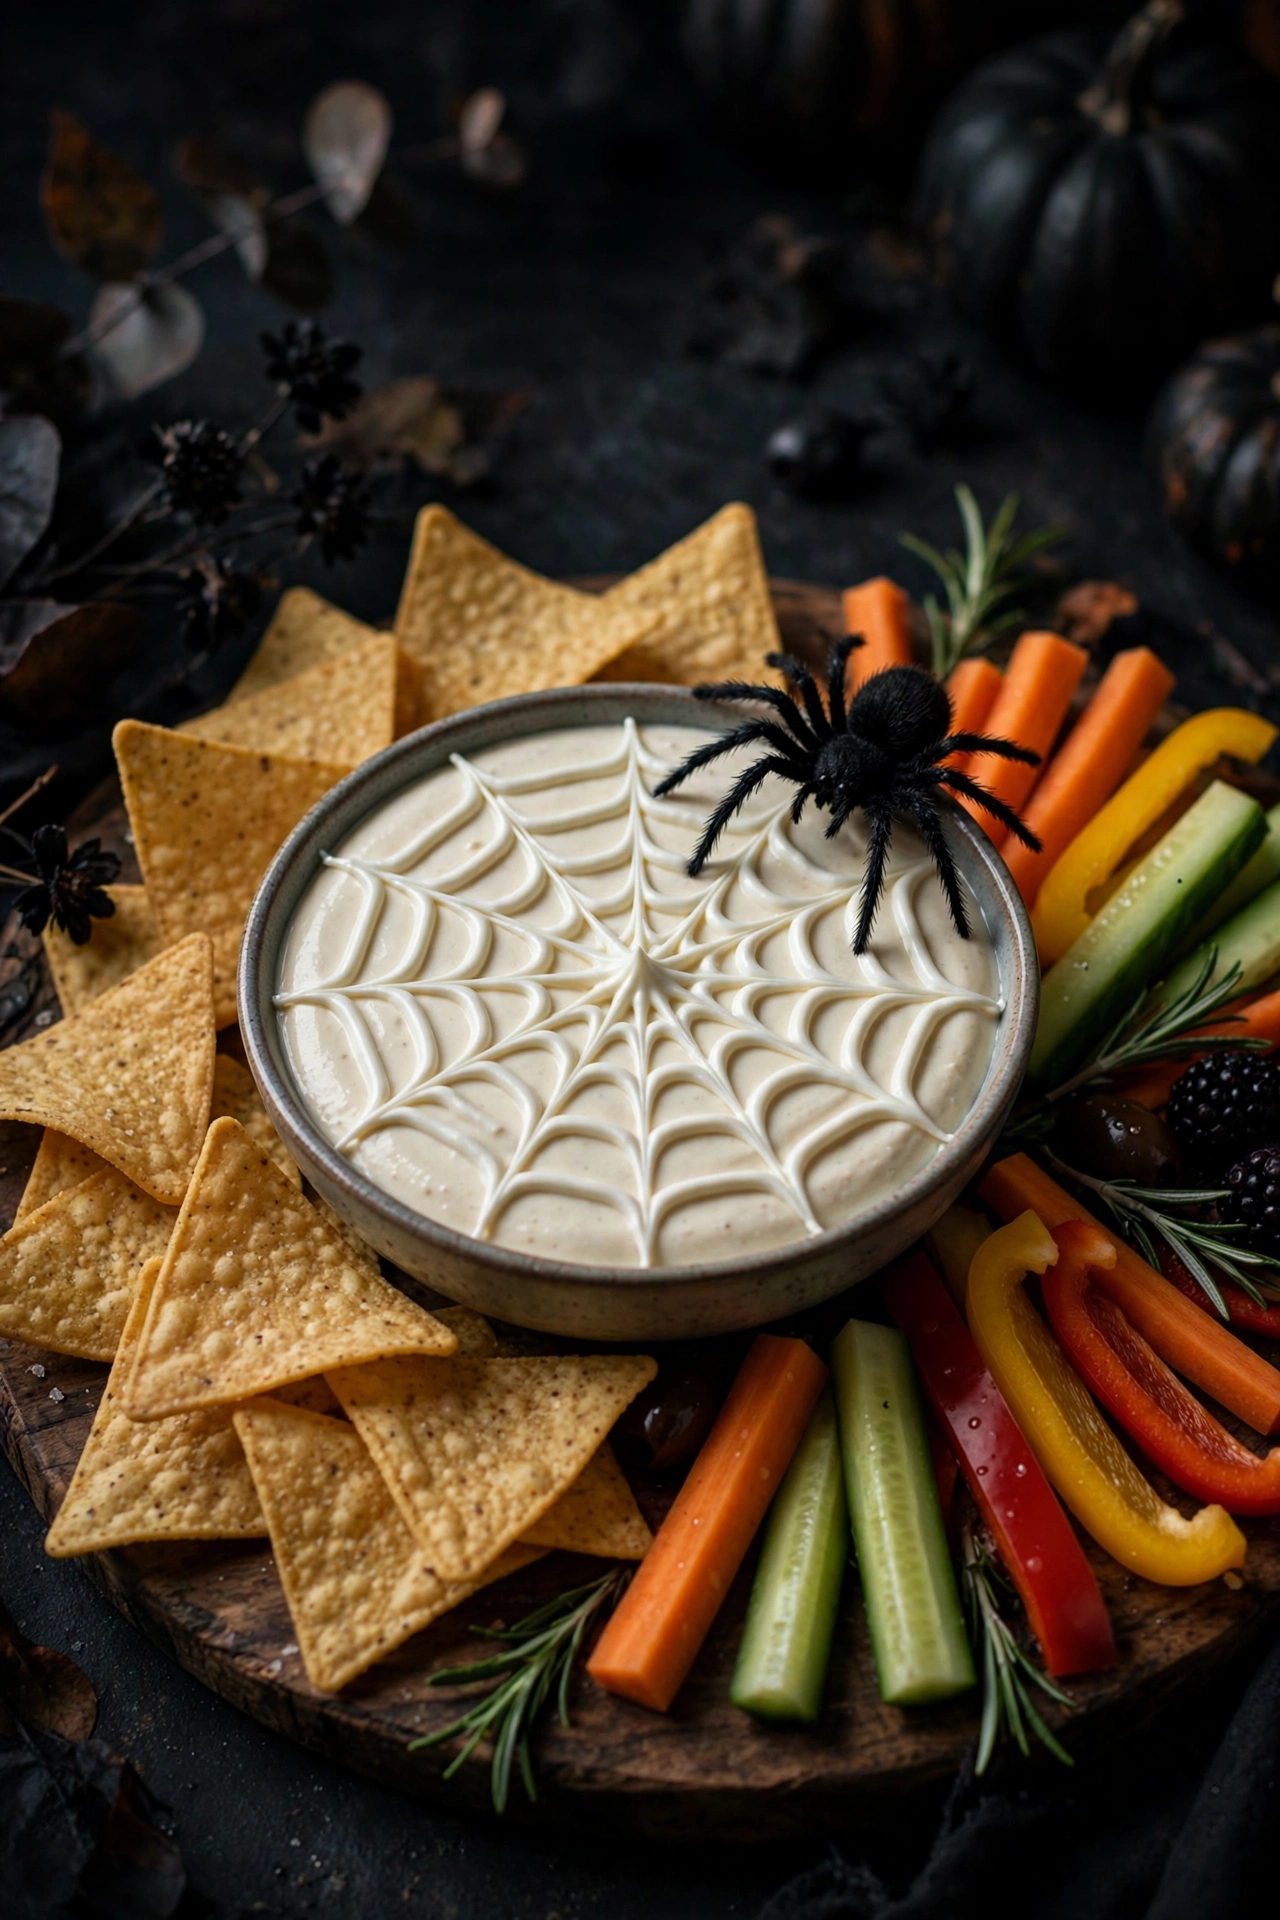
A bowl of creamy spinach artichoke dip becomes a spider web with a simple piping trick. Spread the dip smooth, then pipe concentric circles of sour cream and drag a toothpick through them to create the web effect. Top with a plastic spider for a fright that is all fun.
Any thick, light colored dip works as the base. Spinach artichoke, buffalo chicken dip, or even hummus all take the web design well. Use a squeeze bottle or zip top bag with the corner snipped for the sour cream lines. The toothpick drag is what transforms circles into a web, so do not skip that step.
The dip itself is rich and savory, loaded with cheese and artichokes in every bite. Surround it with black tortilla chips, pita wedges, and vegetable sticks arranged like they are caught in the web. The dark chips against the white web make the design stand out even more.
Kids love helping with this one since piping the web is like edible art class. Make the dip a day ahead and add the web design just before serving so the lines stay sharp. It is a guaranteed conversation starter that tastes as good as it looks.
Variation: use chocolate hummus or cookie butter dip as the base and pipe the web with white chocolate for a dessert version that kids devour.
The piping trick works on almost any thick dip, including the ones in our cream cheese dip recipes collection. For a seafood twist at your next party, try a base from our easy crab dip recipes and pipe the same web on top.
Why This One Wins
One simple piping technique turns an ordinary dip into the most talked about dish at the party. It looks impressive but takes about two minutes once the dip is made. Kids and adults both love it, which is rare for a single recipe.
Assembly in Minutes
- Make the dip a day ahead so flavors meld overnight.
- Spread the top perfectly smooth before piping.
- Use a squeeze bottle for the cleanest web lines.
- Drag the toothpick from center to edge in one motion.
- Add the web no more than an hour before serving.
- Place the plastic spider last for maximum effect.
Make It Your Own
Try the web on buffalo chicken dip for a spicy version, or on chocolate hummus with white chocolate lines for dessert. Swap sour cream for Greek yogurt if you want a lighter web that still pipes well.
7. Ghost Fruit Board
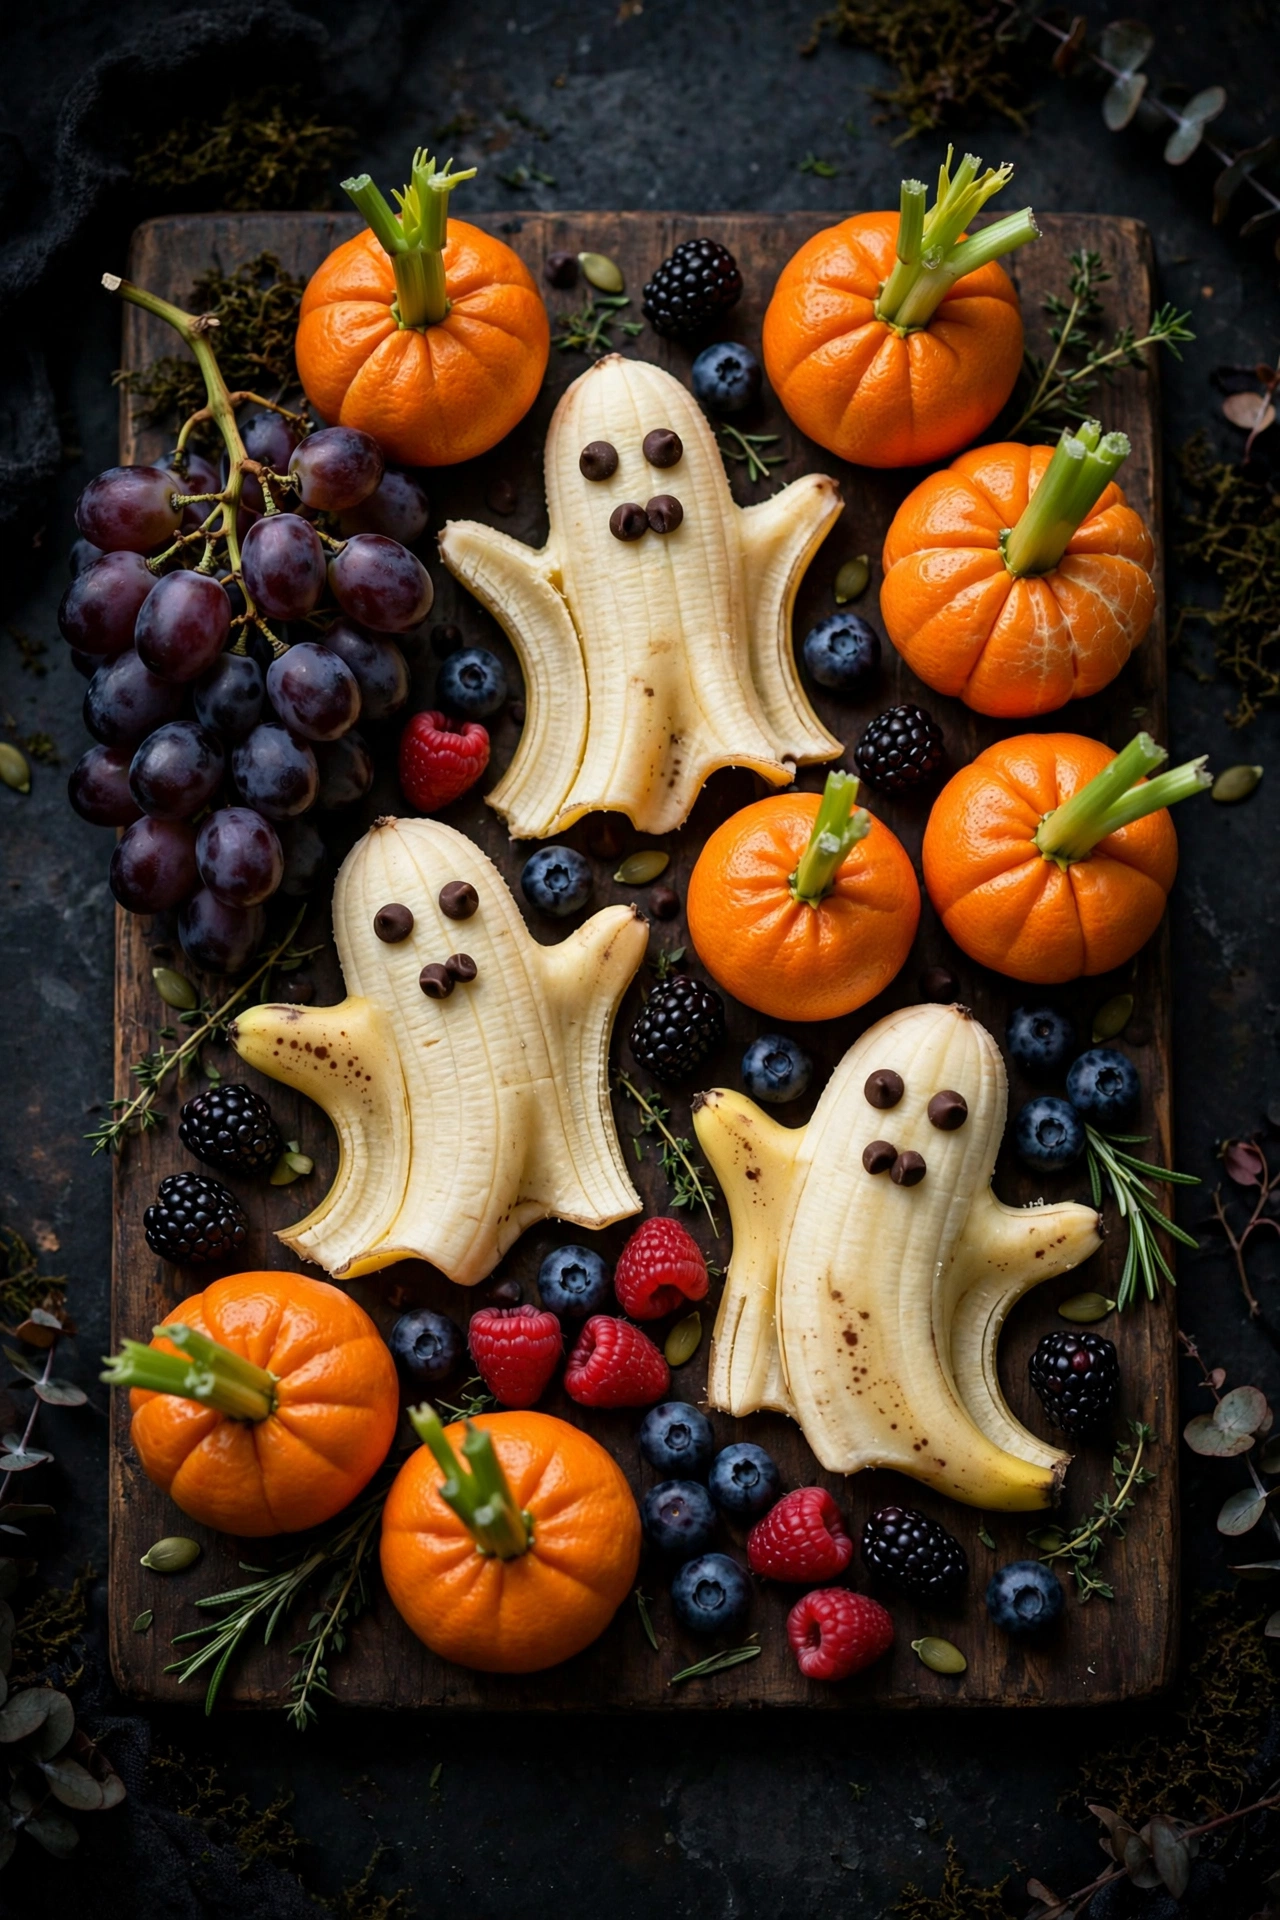
Bananas transform into adorable ghosts with just a few chocolate chip eyes and mouths. Arrange them standing up on a board surrounded by clementine pumpkins with celery stems and ghost shaped meringues. It is the healthy option that kids actually get excited about.
Cut bananas in half and press mini chocolate chips in for the faces. Peel clementines and poke a small piece of celery into the top for a pumpkin stem. Add white chocolate covered strawberries with ghost faces for a sweeter bite. The whole board comes together in about 15 minutes with zero cooking.
This board is refreshingly light among all the Halloween candy. The natural sweetness of the fruit satisfies without the sugar crash, and parents appreciate having a wholesome option on the table. The ghost faces make even plain fruit feel like a treat.
It is perfect for preschool parties or as a pre dinner snack while kids wait for trick or treating. Everything is finger friendly and not too messy. Make the banana ghosts right before serving so they do not brown.
Pro tip: brush cut banana ends with a little lemon juice to keep them looking fresh and white for hours on the party table.
Fresh fruit boards balance out a candy heavy table, and our healthy afternoon snacks roundup has more wholesome ideas. Toss in apple slices too, and browse our apple recipes for fall for ways to use the rest of the bag.
Freshness Checklist
Use firm bananas, unbruised clementines, and fresh berries. Wipe the board dry before arranging so the fruit does not slide around.
Why You’ll Love This
This is the board parents quietly thank you for. It takes 15 minutes, requires zero cooking, and kids genuinely get excited about fruit when it has a face. It also photographs beautifully, which never hurts at a party.
Freshness and Storage
- Prep clementine pumpkins up to a day ahead and refrigerate.
- Cut bananas and add faces right before serving.
- Brush cut fruit with lemon juice to prevent browning.
- Keep the board chilled until guests arrive.
- Store leftovers in an airtight container for up to two days.
Serving Ideas
Set out a small bowl of vanilla yogurt for dipping, which makes the fruit feel more like dessert. This board works perfectly as a pre dinner snack for hungry trick or treaters, or as a light finish after heavier party food.
8. Vampire Fang Board
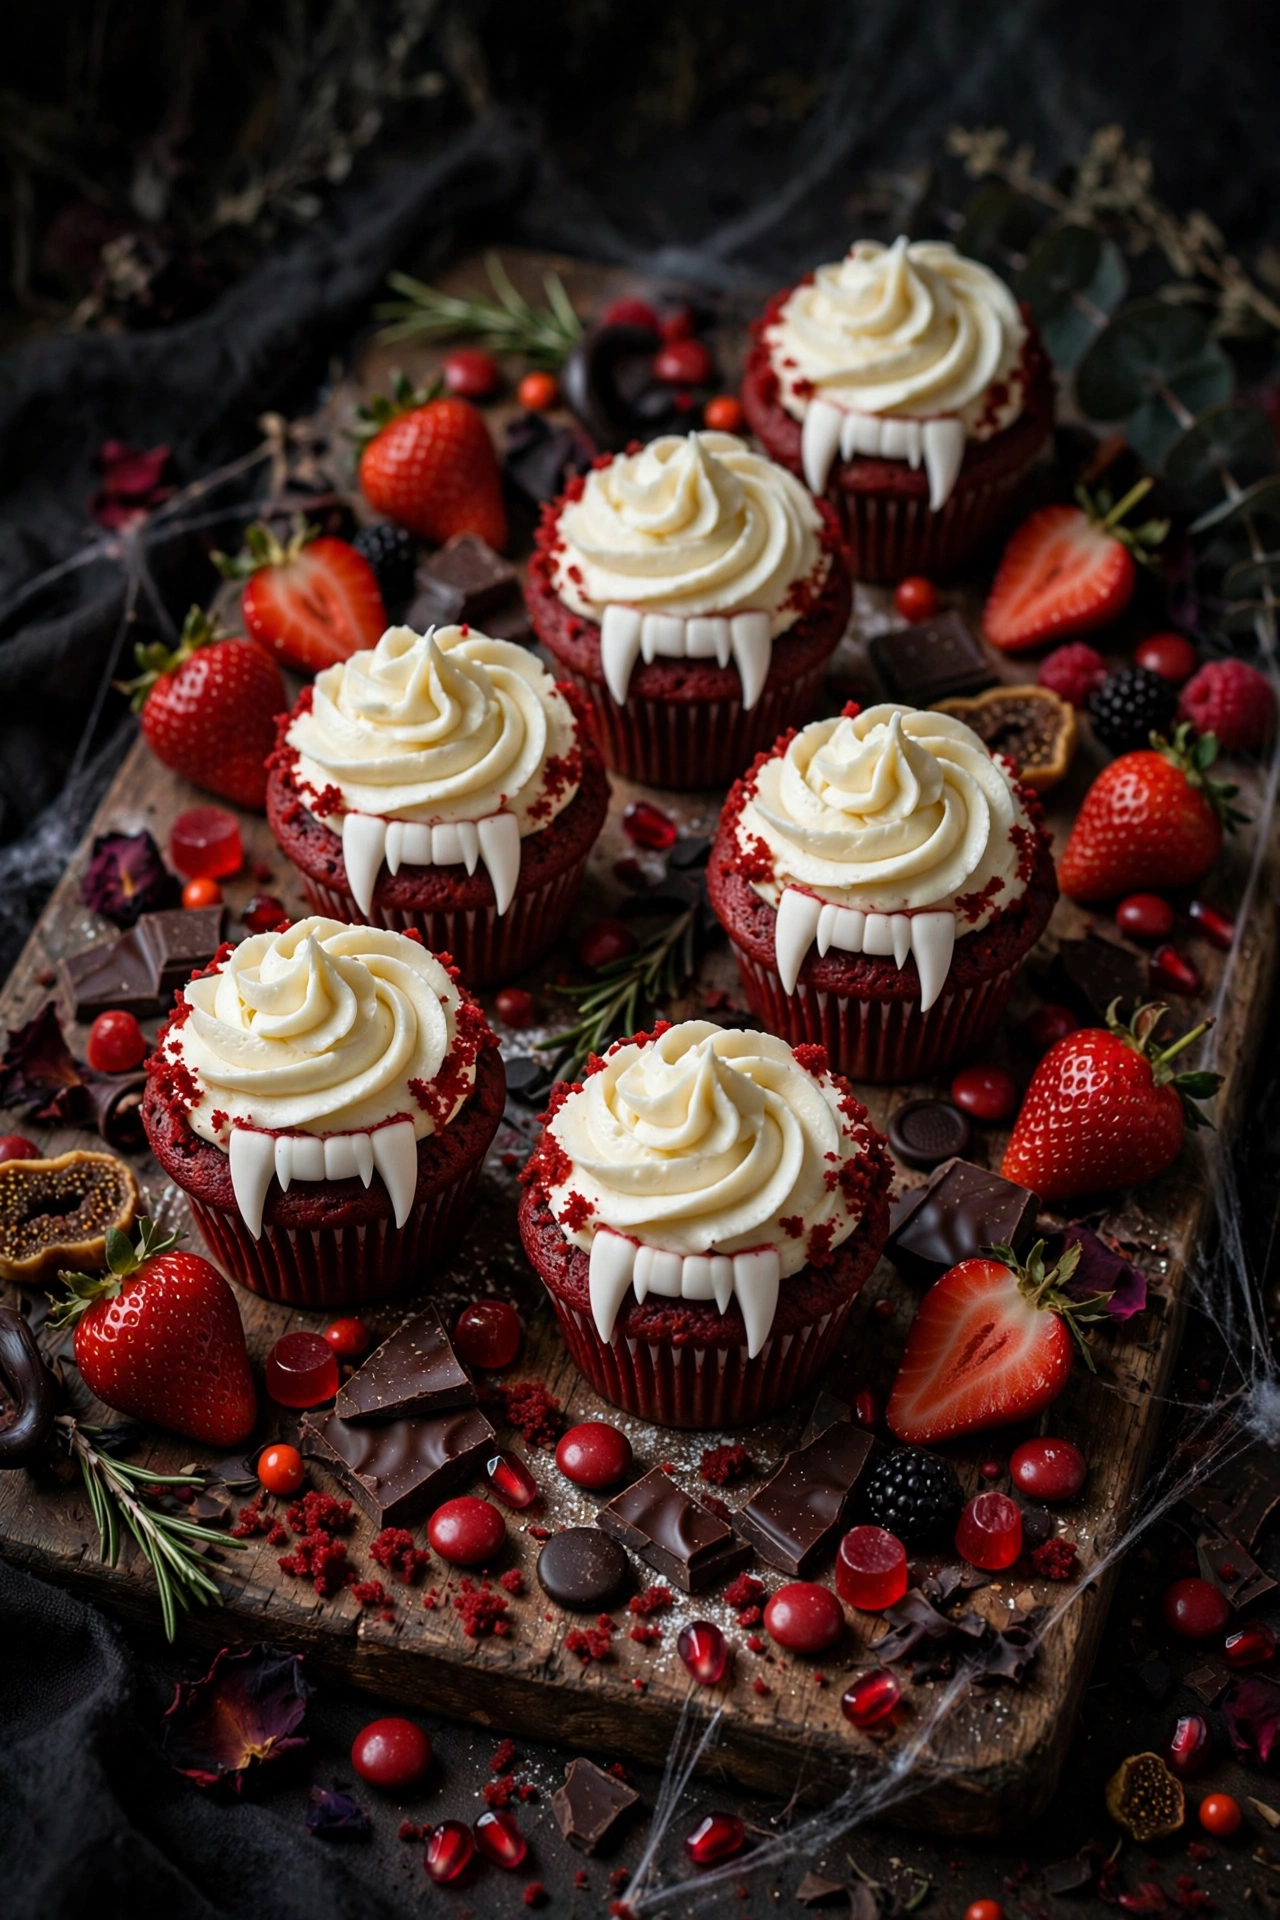
Plastic vampire fangs stuck into blocks of cheese and mini sandwiches turn an ordinary board into something delightfully creepy. The fangs cost almost nothing at party stores, and they instantly theme whatever food you pair them with. Think of it as Halloween decor you can eat around.
Skewer cubes of pepper jack and cheddar with the fangs, or press them into the tops of slider buns and deviled eggs. Add red elements like cherry tomatoes, strawberries, and a bowl of marinara for dipping to play up the vampire theme. A dark red napkin underneath adds drama.
The food itself can be whatever your crowd likes since the fangs do the theming work. Spicy pepper jack, smoky gouda, and mini meatballs all work well. The playful presentation makes familiar snacks feel new and exciting, especially for kids who love the silly factor.
This is one of the easiest boards on the list because there is no special cooking involved. Buy good quality cheese and charcuterie, add the fangs, and you are done. It is ideal when you need something impressive but only have 20 minutes.
Serving idea: add a blood bar with small cups of tomato soup shooters or berry punch. The red drinks complete the vampire theme perfectly.
Plastic fangs theme almost anything, so pair this board with more ideas from our easy halloween appetizers. The hearty snacks here also fit right into our game day appetizer recipes for a sports themed Halloween party.
What to Pair With It
- Arrange red foods together for a dramatic blood zone on the board.
- Offer marinara and berry jam as dipping sauces.
- Include both spicy and mild cheeses for different tastes.
- Add dark napkins and a black board for extra drama.
- Label the fangs as decoration only for younger kids.
Styling Tips
Buy fangs in bulk packs so every guest can wear a pair for photos. Stick them into sturdy foods like cheese blocks and slider buns so they stay upright. A red table runner underneath the board completes the vampire look for almost no cost.
Tasty Twists
Go savory with meatballs, mini sausages, and pepper jack, or lean sweet with strawberries, red velvet bites, and cherry dip. The fang trick works on both, so match the food to your crowd.
9. Witch Hat Board
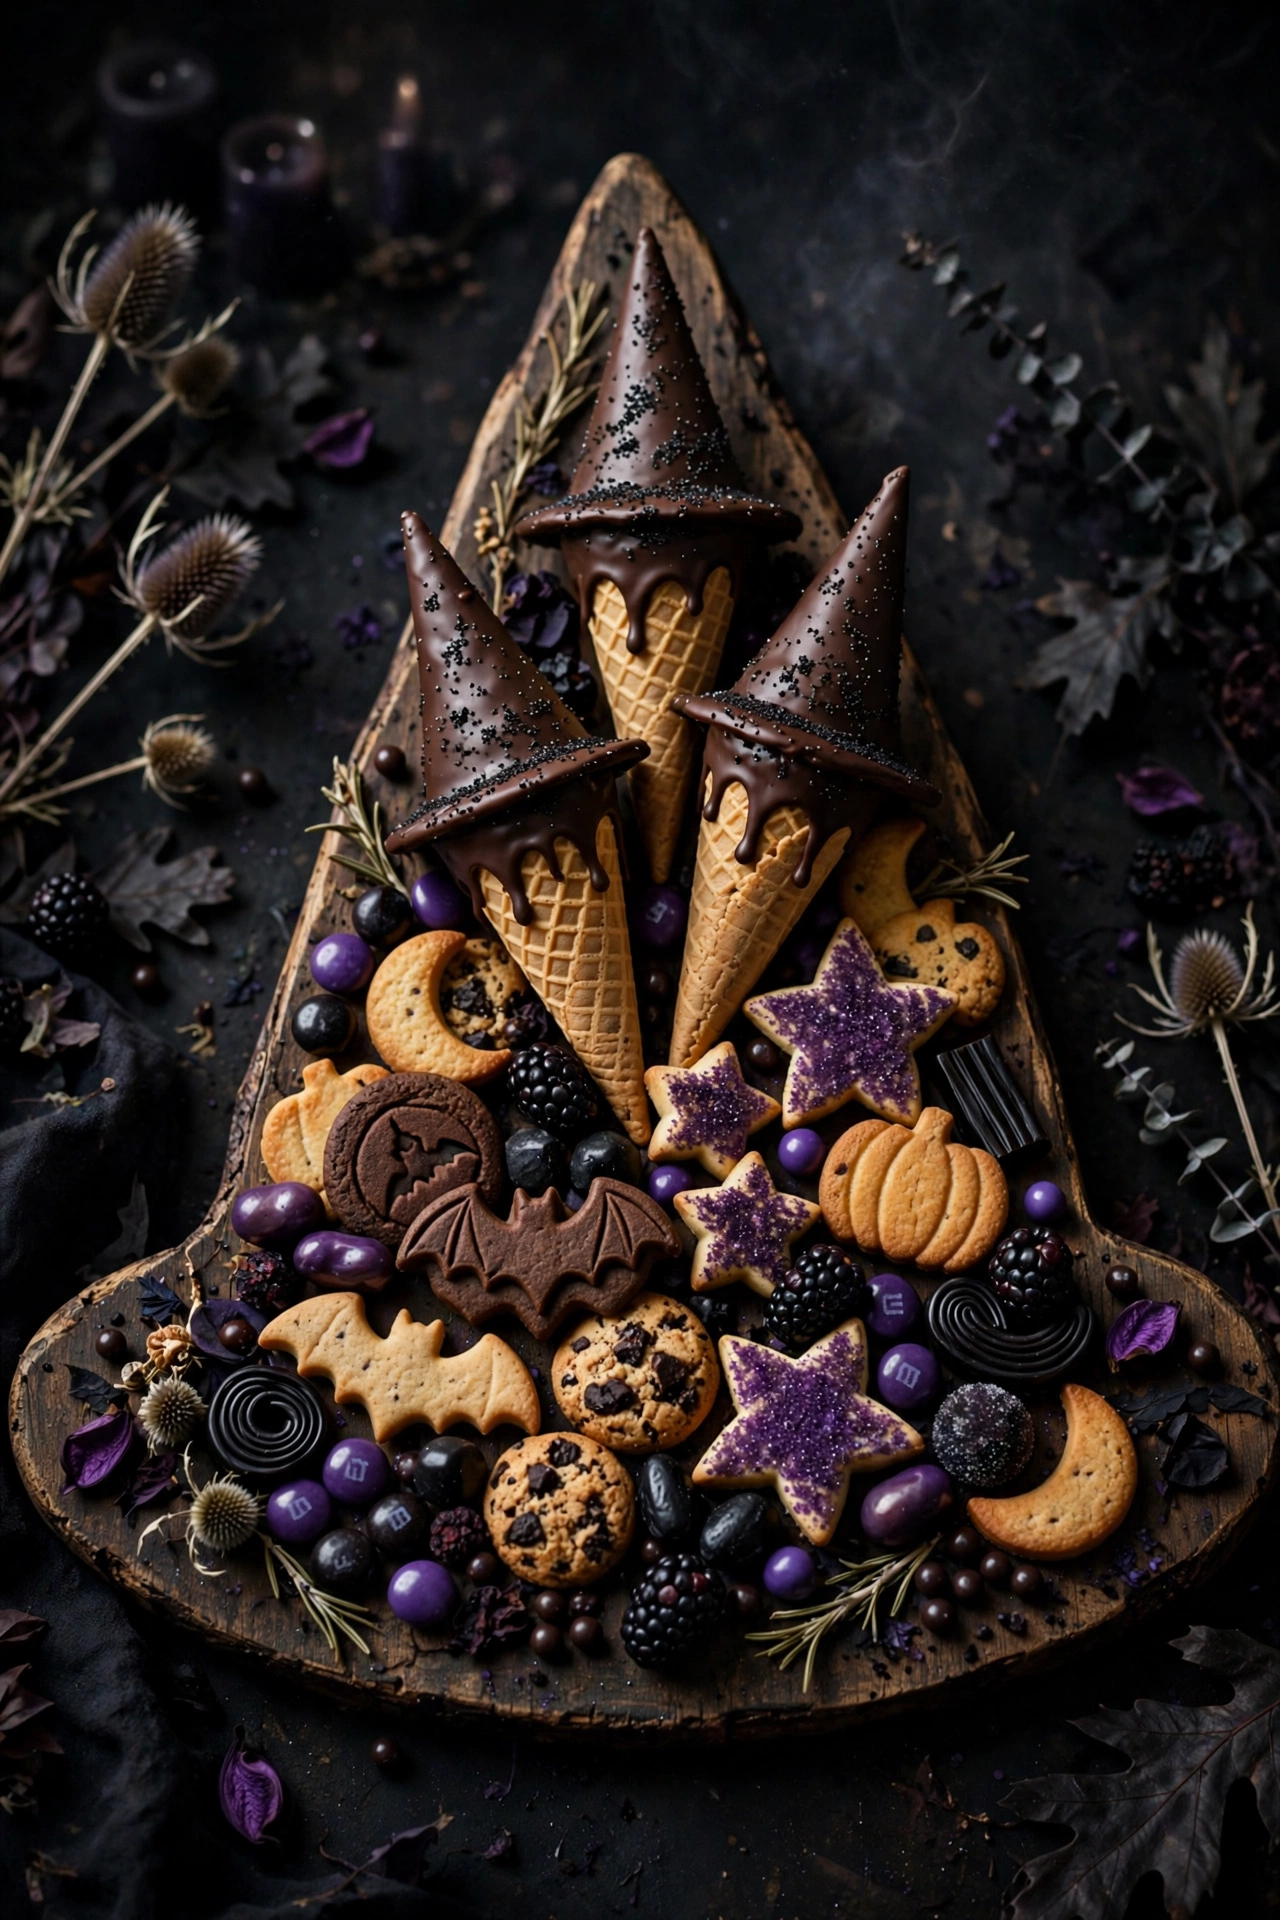
Chocolate dipped cone shaped snacks become witch hats when you add a brim of fudge striped cookies. Arrange them in a circle around a bowl of purple tinted popcorn or green apple dip. It is whimsical, sweet, and completely irresistible to little witches and wizards.
THE ONE THING TO REMEMBER
Work with the chocolate in small batches. Melted chocolate thickens as it cools, so reheat gently to keep your dipping smooth and glossy.
Melt chocolate and dip the pointed snacks, then press them onto the cookie brims while the chocolate is wet. Add a small candy band around the base for detail. The hats stand upright and look adorable clustered together. No baking required, just melting and assembling.
The combination of salty cone snacks, sweet chocolate, and buttery cookies hits every craving at once. Kids love that they can pick up a whole hat and eat it in a few bites. The purple popcorn in the center adds a fun color pop that ties the board together.
This board is best for younger kids parties since it is sweet, simple, and not scary at all. Make the hats a day ahead and store them in a cool spot so the chocolate sets firmly. They also make cute party favors wrapped in cellophane.
Variation: make savory witch hats with cone shaped tortilla chips dipped in cheese sauce on top of round crackers for an appetizer version.
For more no bake sweets to round out the dessert table, our spooky halloween treats collection is full of easy wins. If you make the savory version, pair it with our easy halloween appetizers for a complete spread.
Make It Your Own
- Dip cones in white chocolate and tint it purple or green.
- Use striped cookies or chocolate wafers for the brims.
- Add a candy corn buckle on each hat.
- Make a savory version with tortilla cones and cheese sauce.
- Wrap finished hats in cellophane as party favors.
Prep Ahead Tips
Assemble the hats up to two days ahead and store in a cool, dry place. Chocolate blooms in the fridge, so keep them at room temperature instead. If the party room is warm, set the board out just before serving.
Party Day Tips
Cluster the hats around a central bowl of purple popcorn so guests grab a hat and a handful together. Small tongs keep little hands from touching every hat. This board is sweet enough to double as the party favor station.
10. Graveyard Dessert Board
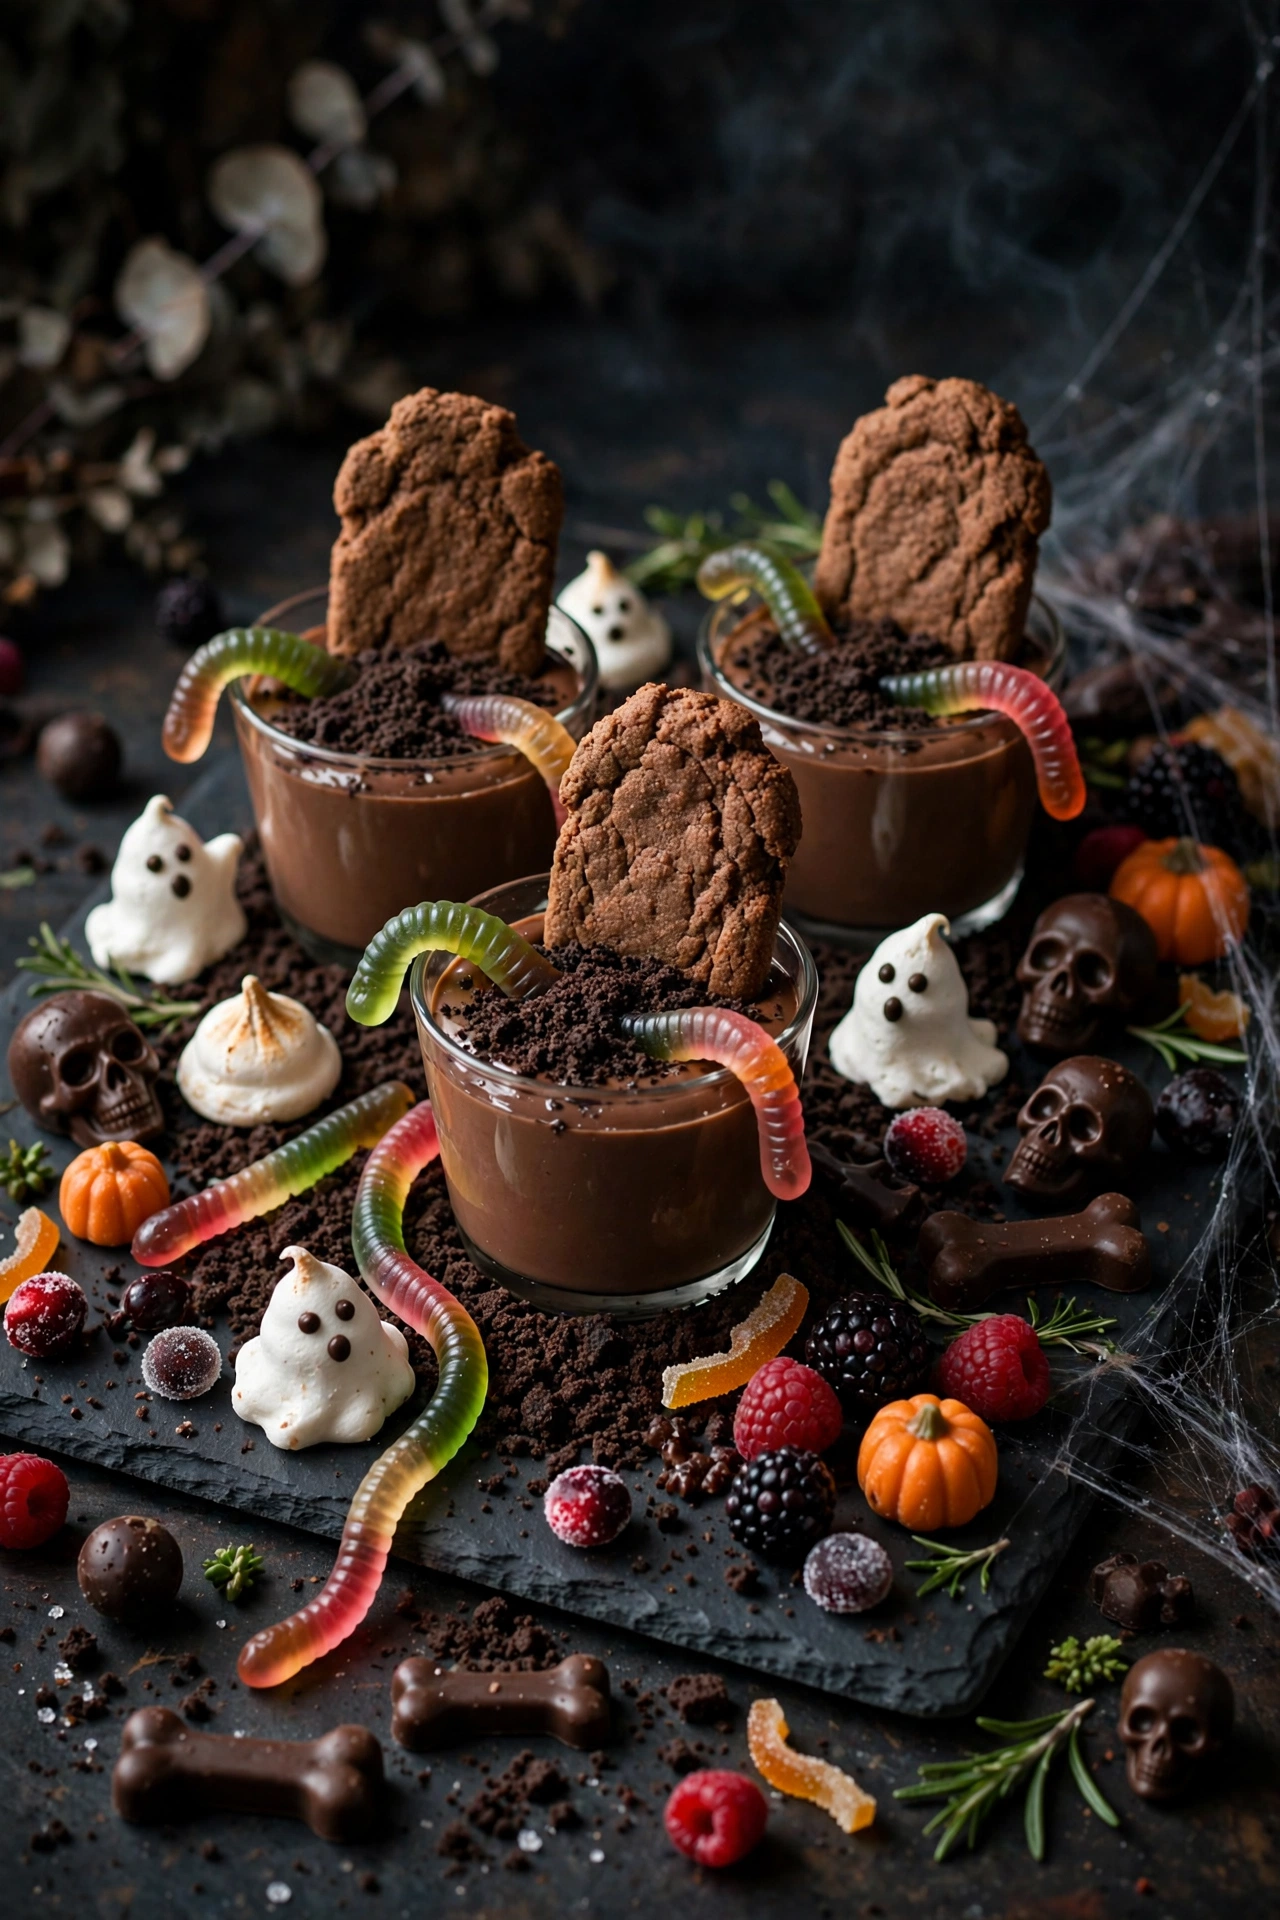
A tray of chocolate pudding dirt topped with cookie tombstones and gummy worms creates an edible graveyard that guests cannot resist digging into. Crushed chocolate sandwich cookies make the perfect dark soil, and oval butter cookies stand up as tombstones with icing epitaphs.
Spread chocolate pudding in a shallow tray and cover thickly with cookie crumbs. Write RIP and silly epitaphs on the cookies with white icing and stick them upright in the pudding. Scatter gummy worms so they look like they are crawling out of the dirt. Chill until serving time.
Every spoonful is rich chocolate heaven with crunchy cookie texture throughout. The pudding stays creamy while the crumbs add contrast. It is nostalgic and playful, reminding adults of the dirt cups they loved as kids, but scaled up for a party.
Make this the day of the party so the cookies stay crisp. Serve with small shovels or spoons so guests can dig their own graves. It doubles as a centerpiece and dessert, which saves table space.
Pro tip: use a clear glass trifle dish instead of a tray. The layers of pudding and crumbs look amazing through the glass and make the graveyard even more dramatic.
Chocolate lovers will also enjoy our pumpkin dessert recipes for a seasonal twist on the dessert table. For more creepy sweets, our spooky halloween treats roundup has plenty of ideas.
Make-Ahead and Storage
Make the pudding and bake the tombstone cookies a day ahead, but assemble the graveyard the day of the party so the cookies stay crisp. Cover and refrigerate leftovers for up to two days, though the cookie dirt will soften.
How to Serve It
- Use a clear trifle dish to show off the layers.
- Provide small shovels or spoons for digging.
- Write funny epitaphs to match your guests.
- Serve chilled for the best pudding texture.
- Pair with coffee to balance the sweetness.
Fun Twists to Try
Swap chocolate pudding for butterscotch to make a sandy graveyard, or use crushed gingersnaps for the dirt. Add gummy brains and candy bones from the Halloween aisle for extra gross out factor.
11. Bat Wing Board
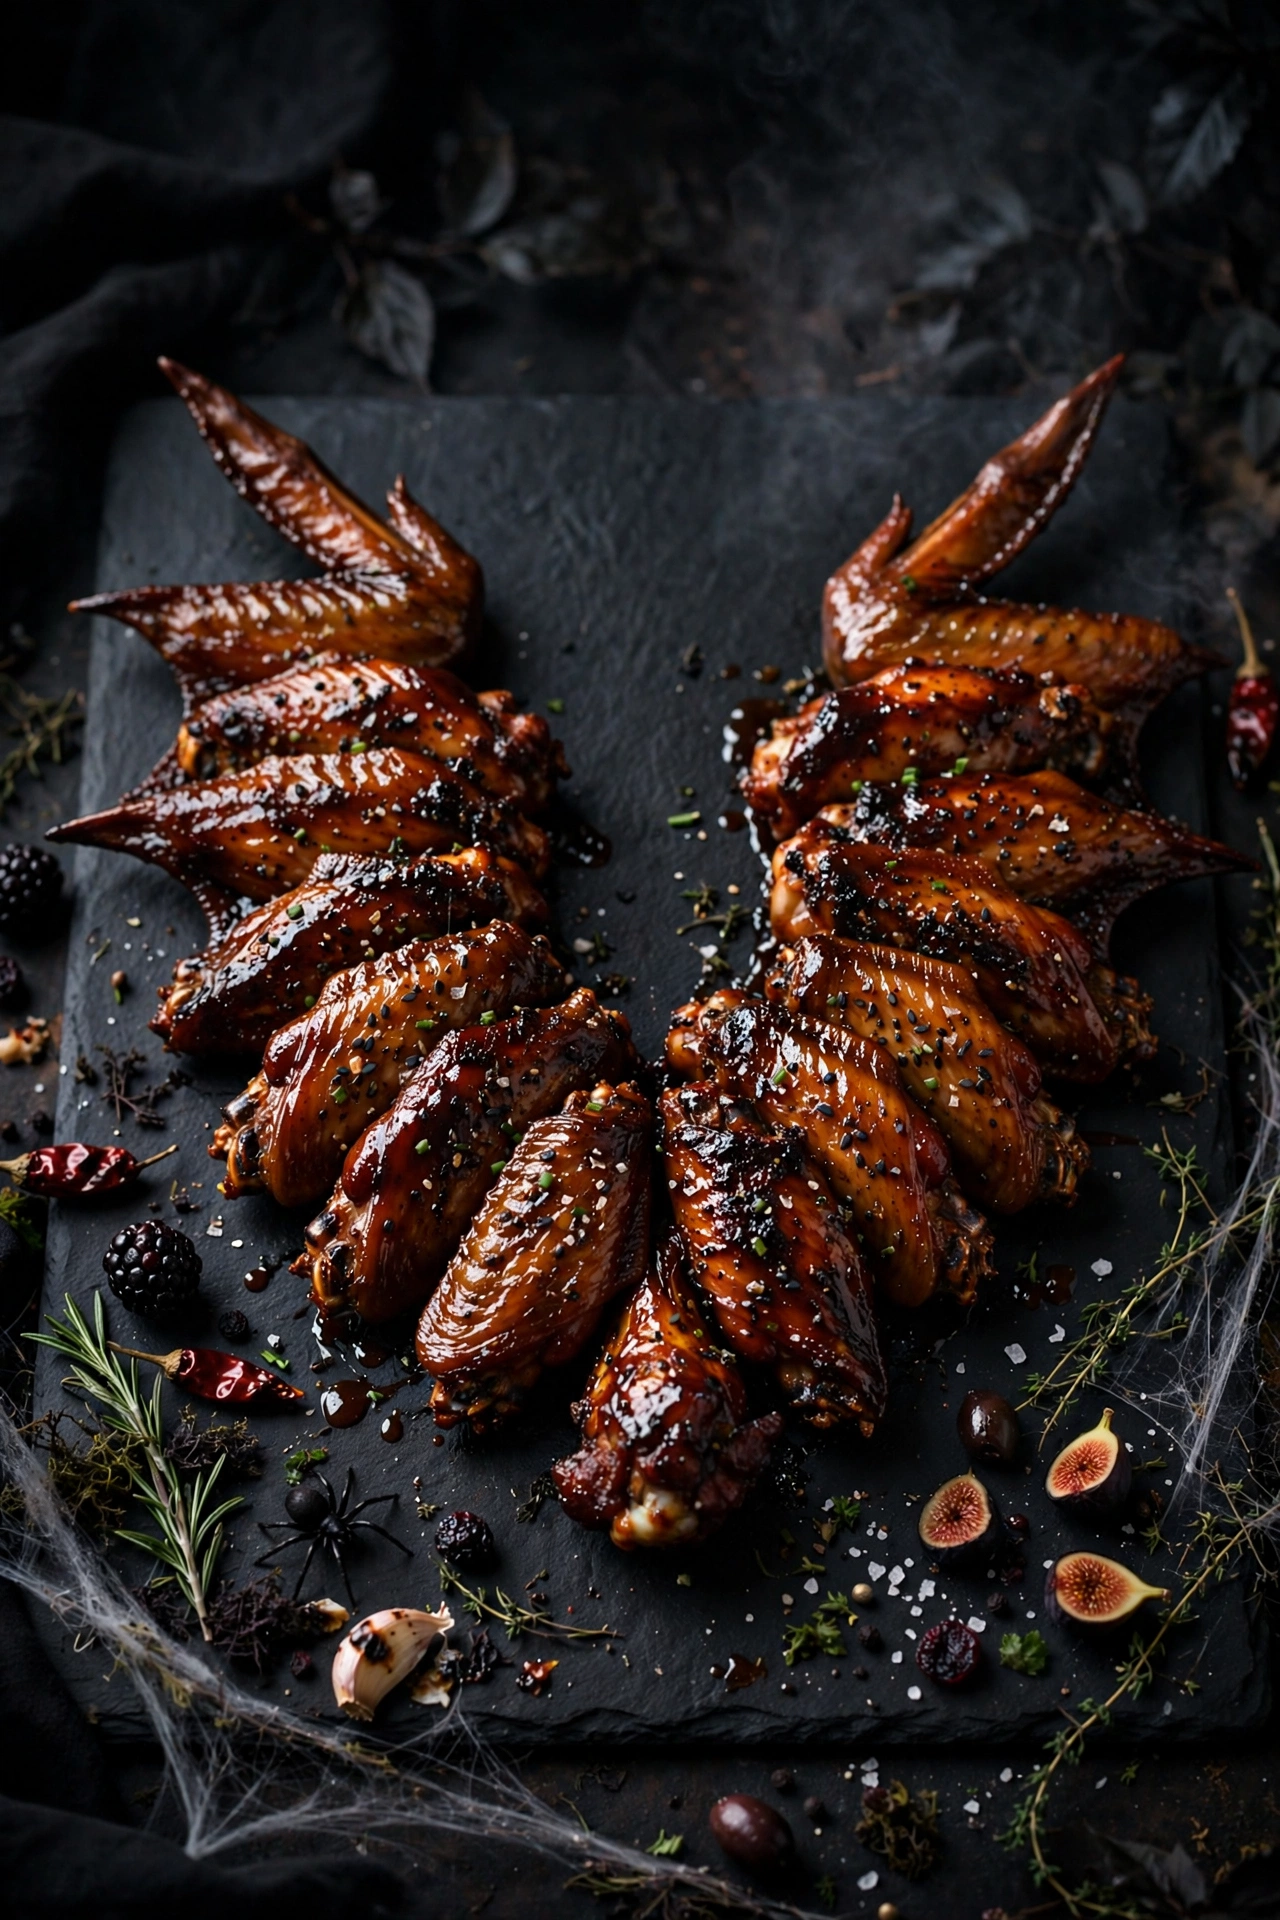
Chicken wings get the Halloween treatment with a sticky blackberry glaze that looks dark and mysterious. The sweet tart glaze caramelizes under the broiler for crispy edges and a glossy finish. Arrange them on a black board with celery sticks and blue cheese for a bat cave vibe.
Toss baked or air fried wings in a reduced blackberry balsamic glaze until fully coated. The berries cook down into a thick, dark sauce that clings to every wing. A quick broil at the end chars the edges slightly for that just flown through fire look.
The flavor is a fantastic mix of sweet, tangy, and savory with a peppery kick if you add cracked black pepper. The fruit glaze is unexpected on wings but completely addictive. They are messy in the best way, so provide plenty of napkins.
This is the hearty option for guests who want real food among the sweets. Make a big batch because wings disappear faster than candy. They can be kept warm in a slow cooker set to low during the party.
Variation: use the same blackberry glaze on meatballs or cocktail sausages for a less messy finger food that still fits the dark theme.
Wings are a party staple, and our game day appetizer recipes have more finger foods for hungry crowds. For a full autumn spread, browse our easy fall appetizers too.
Glaze Do’s and Don’ts
Do toss the wings while the glaze is hot so it clings evenly. Do not skip the final broil, since those charred edges are what sell the bat wing look.
Why You’ll Love This
This is the substantial, savory anchor your Halloween table needs. The dark glaze looks dramatic but the flavor is pure crowd pleaser, sweet, tangy, and a little peppery. It proves Halloween food can be grown up and delicious.
Pro Tips
- Reduce the glaze until it coats a spoon before tossing.
- Broil the glazed wings for charred, crispy edges.
- Keep wings warm in a slow cooker on low.
- Provide plenty of napkins, these are gloriously messy.
- Taste the glaze and adjust sweetness before coating.
Switch It Up
Use the same glaze on meatballs or cocktail sausages for a tidier finger food. Add a pinch of cayenne for heat, or swap blackberry for cherry preserves when berries are out of season.
12. Pumpkin Patch Board
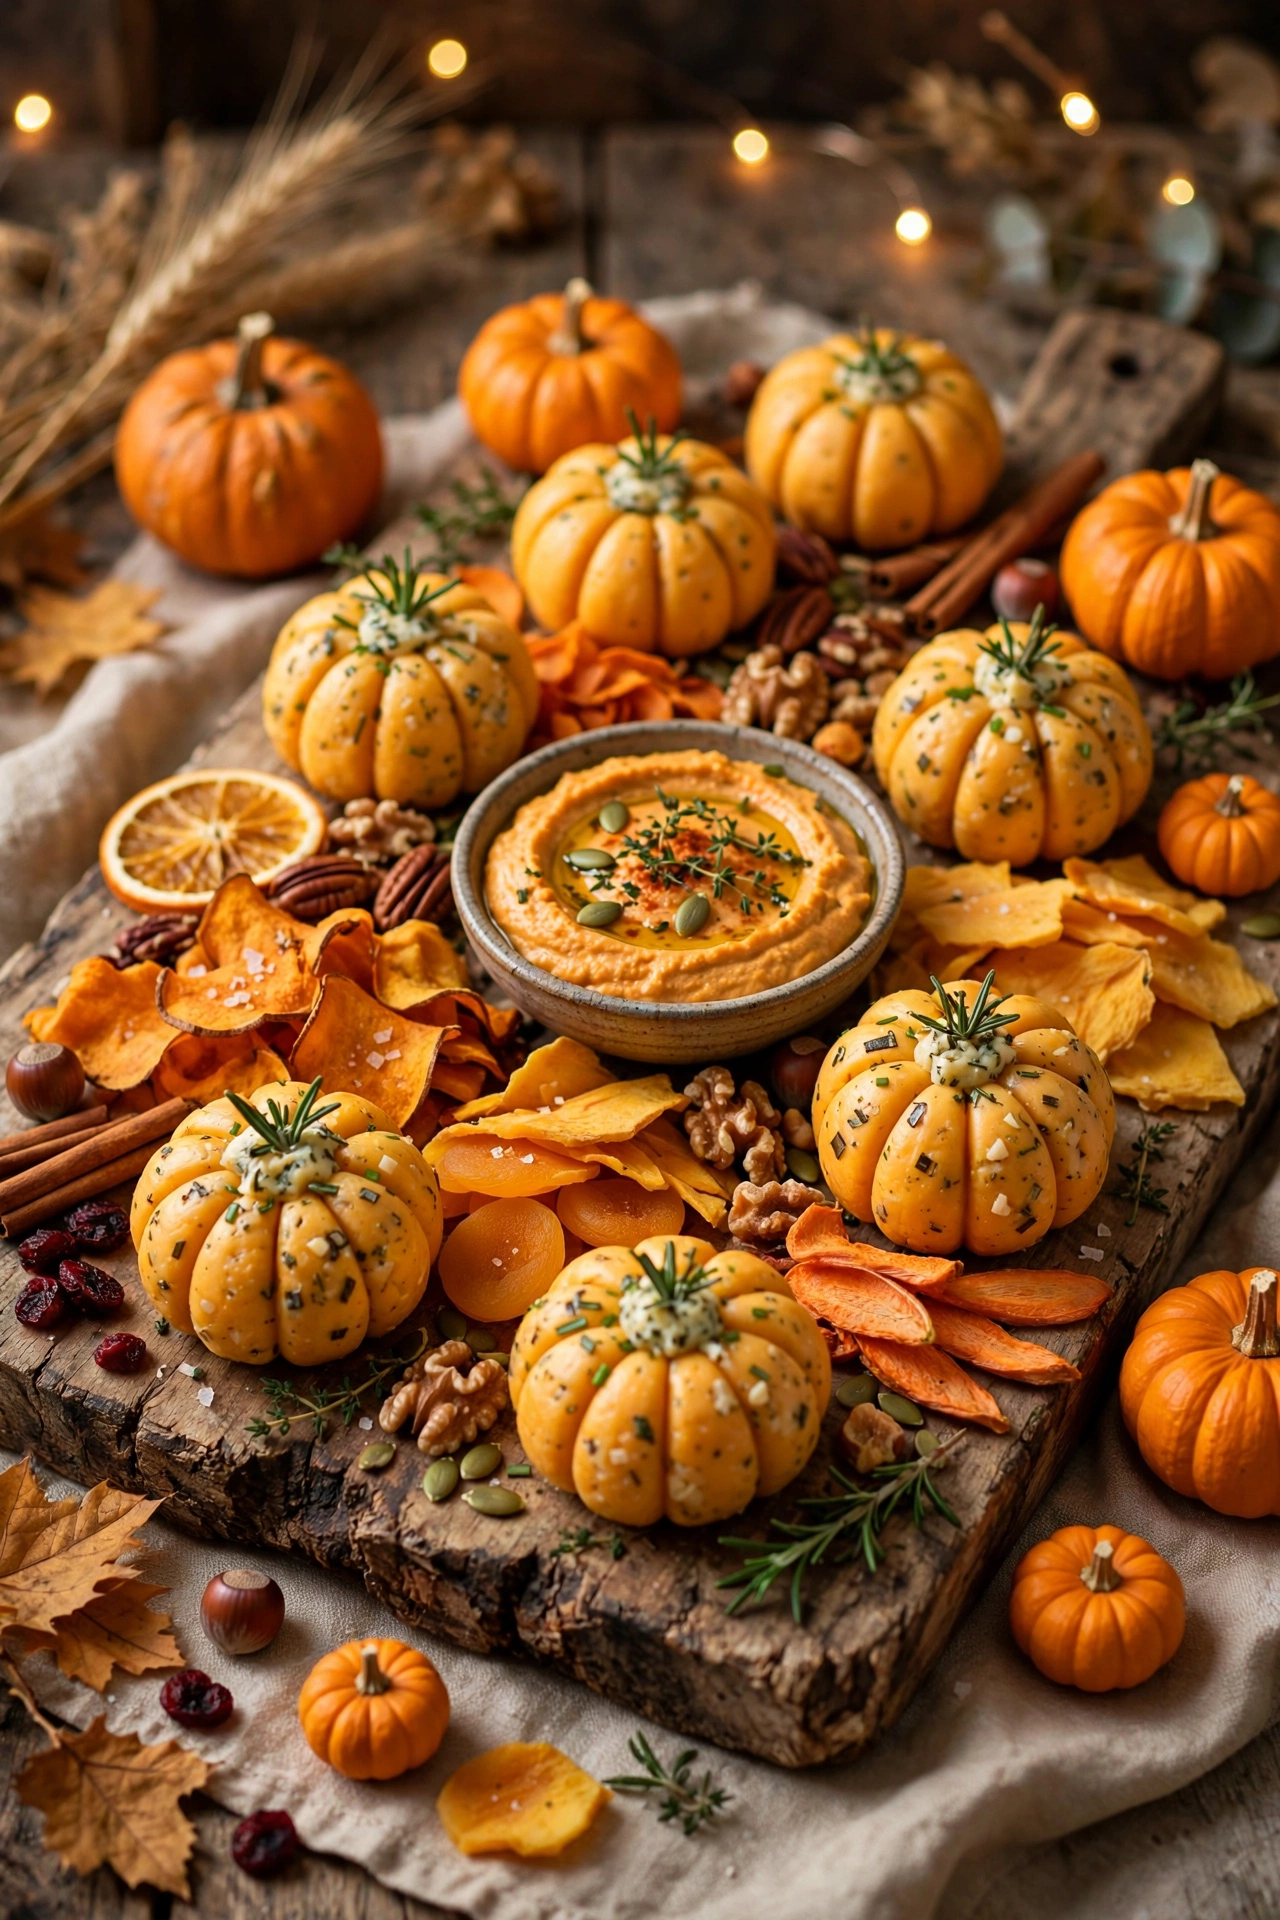
Mini bell peppers carved like jack o lanterns and filled with dip create an adorable pumpkin patch right on your board. The orange peppers look just like tiny pumpkins, especially with the faces cut in. Fill them with ranch, hummus, or pimento cheese.
Cut the tops off the peppers and scoop out the seeds, then use a small paring knife to cut triangle eyes and jagged mouths. Fill each pepper with your dip of choice and replace the tops. Surround them with green grapes as vines and crackers as the patch ground.
The peppers are sweet and crunchy, a fresh contrast to the creamy dips inside. Kids love picking their own little pumpkin and discovering what is inside. It is a fun way to get vegetables onto a party table without anyone complaining.
These take a bit of knife work but the payoff is huge. Make them the morning of the party and refrigerate until serving. They hold up well for several hours and the faces stay sharp.
Serving idea: place the pumpkin patch next to a warm queso or spinach dip bowl so guests can refill their peppers as they munch.
Veggie forward party food is always welcome, so see our easy fall appetizers for more fresh ideas. These little pumpkins also fit our healthy afternoon snacks roundup for lighter grazing.
Tasty Twists
- Fill with ranch, hummus, or pimento cheese.
- Use yellow peppers for a golden pumpkin patch.
- Add olive spiders on top of each pepper.
- Surround with green grapes as vines.
- Serve extra dip in a hollowed pumpkin.
Prep Ahead Tips
Carve and fill the peppers the morning of the party, then refrigerate until serving. They hold their shape for hours on a chilled board. Leftover filled peppers keep for two days in an airtight container.
What to Serve Alongside
Place a warm bowl of queso nearby for refills, plus plenty of crackers and pita chips. A crisp veggie tray extends the fresh theme, and a small bowl of mixed nuts adds crunch for grazers.
13. Creepy Crawler Board
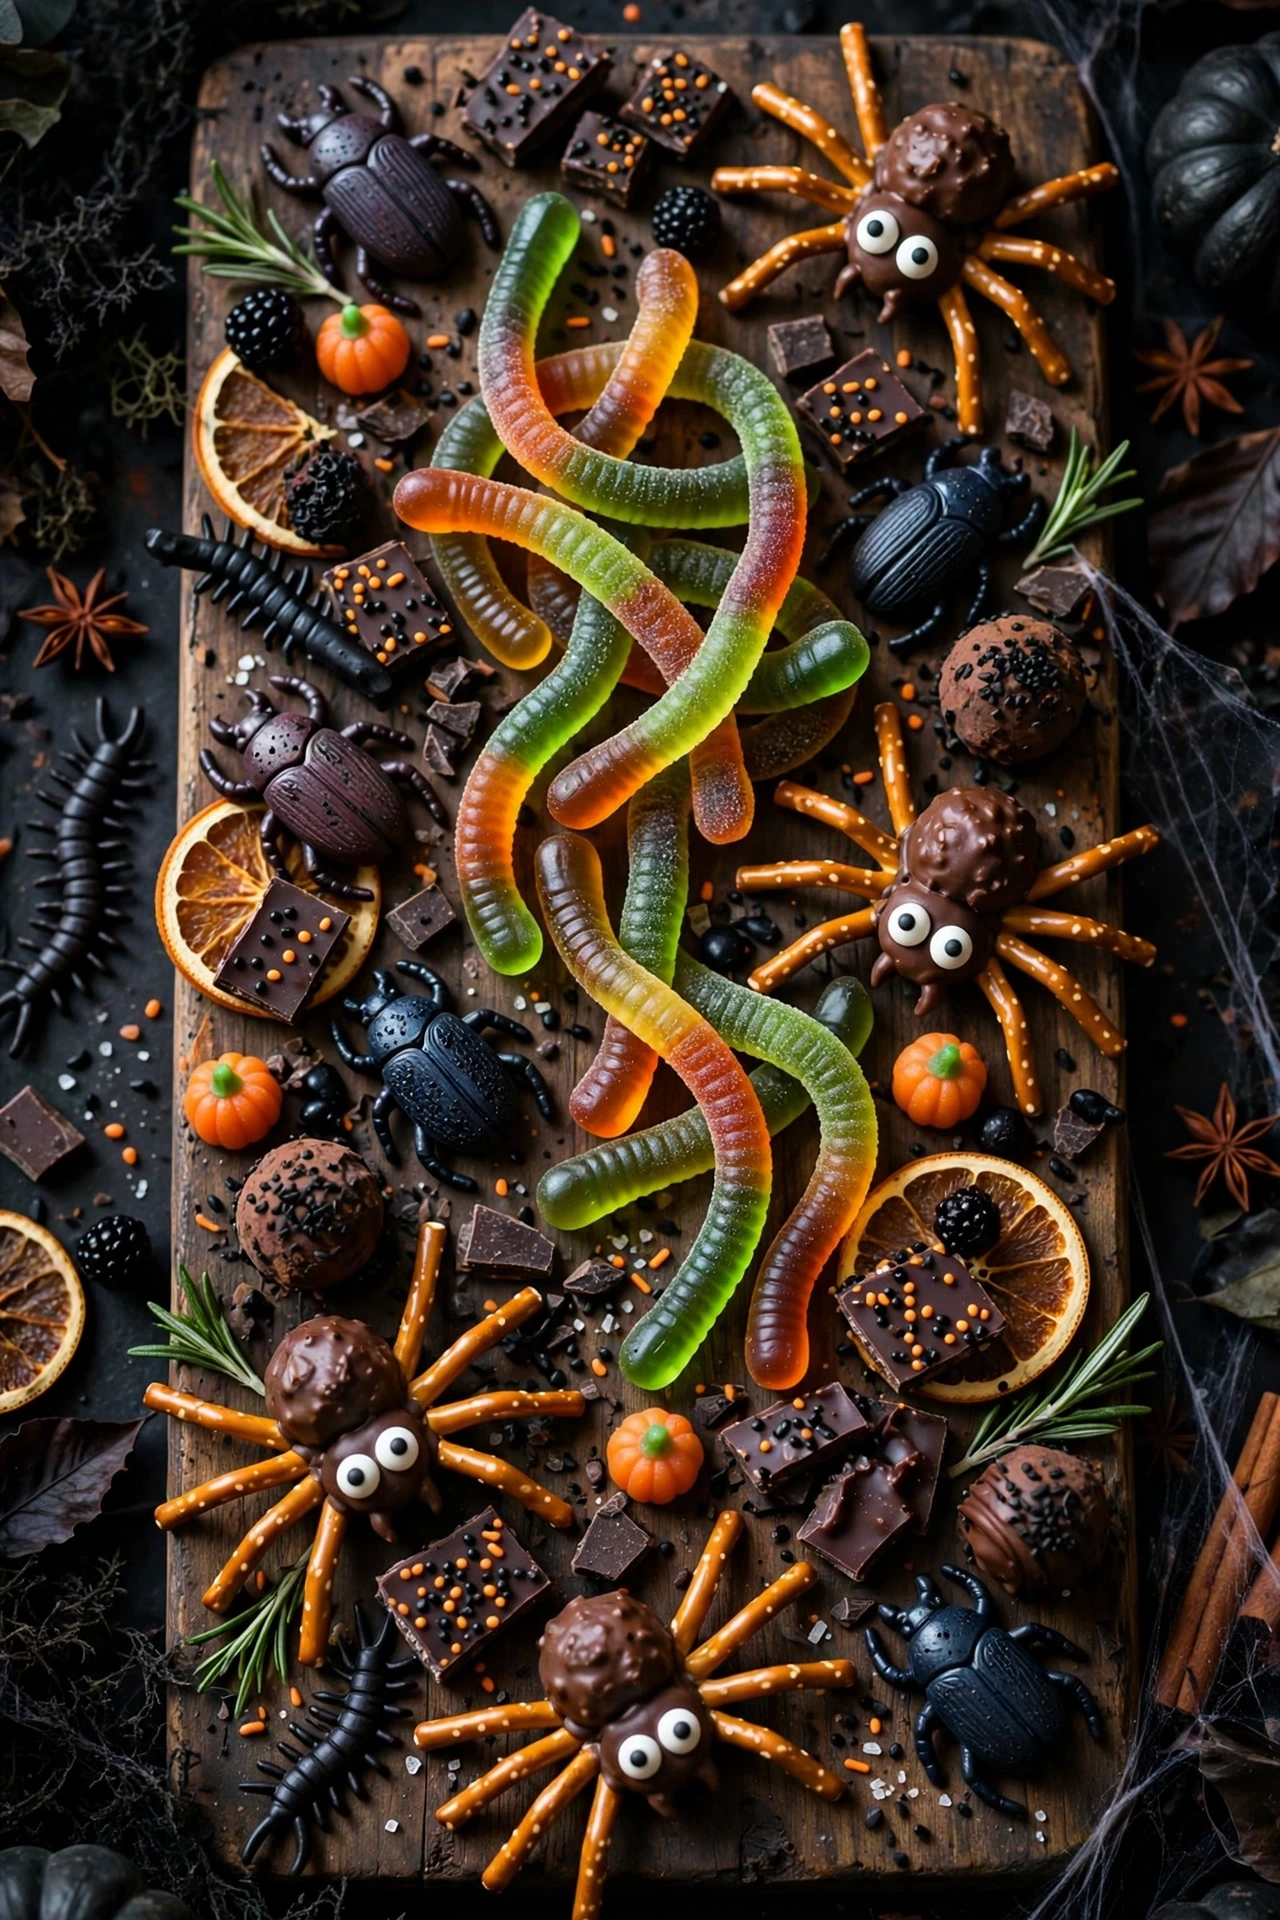
Gummy worms, chocolate covered pretzel spiders, and olive eyeballs turn a simple snack board into a creepy crawler infestation. Drape the gummies over bowls and let pretzel spiders climb across the cheeses. It is gross in the most delightful way.
Make spiders by pressing pretzel sticks into the sides of round chocolate candies for legs. Skewer green olives stuffed with pimentos onto toothpicks for eyeballs. Scatter gummy worms so they look like they are crawling out of the dip bowls. The more chaotic the arrangement, the better.
This board is pure fun with a mix of sweet gummies, salty pretzels, and briny olives. Every section offers a different flavor adventure. Kids dare each other to eat the eyeballs, which are just olives but feel thrilling on Halloween.
It is endlessly customizable based on what creepy candies you find. Hit the Halloween aisle and grab whatever looks gross. Assembly takes minutes and the effect is maximum spooky for minimum effort.
Pro tip: keep the chocolate spiders in a cool spot until serving. Warm party rooms can make the legs droop, which is funny but less impressive.
Hit the Halloween candy aisle for supplies, then check our spooky halloween treats for more creepy sweets. For the savory side of the table, our easy halloween appetizers keep the theme going.
Quick Assembly Tips
- Shop the Halloween aisle for the grossest looking candy.
- Build spiders just before serving so legs stay perky.
- Drape gummy worms over bowl edges for movement.
- Mix sweet, salty, and briny in every section.
- Embrace chaos, the messier the spookier.
How to Serve It
This board is built for daring, so encourage guests to try the olive eyeballs first. Set it near the drinks so people graze while they chat. Small bowls keep the gummy worms from sticking to everything.
Party Night Tips
Keep chocolate spiders cool until serving so the pretzel legs do not droop. Skewer olive eyeballs on short toothpicks with the sharp ends tucked in for safety. Refill from a hidden stash to keep the infestation looking fresh.
14. Haunted House Board
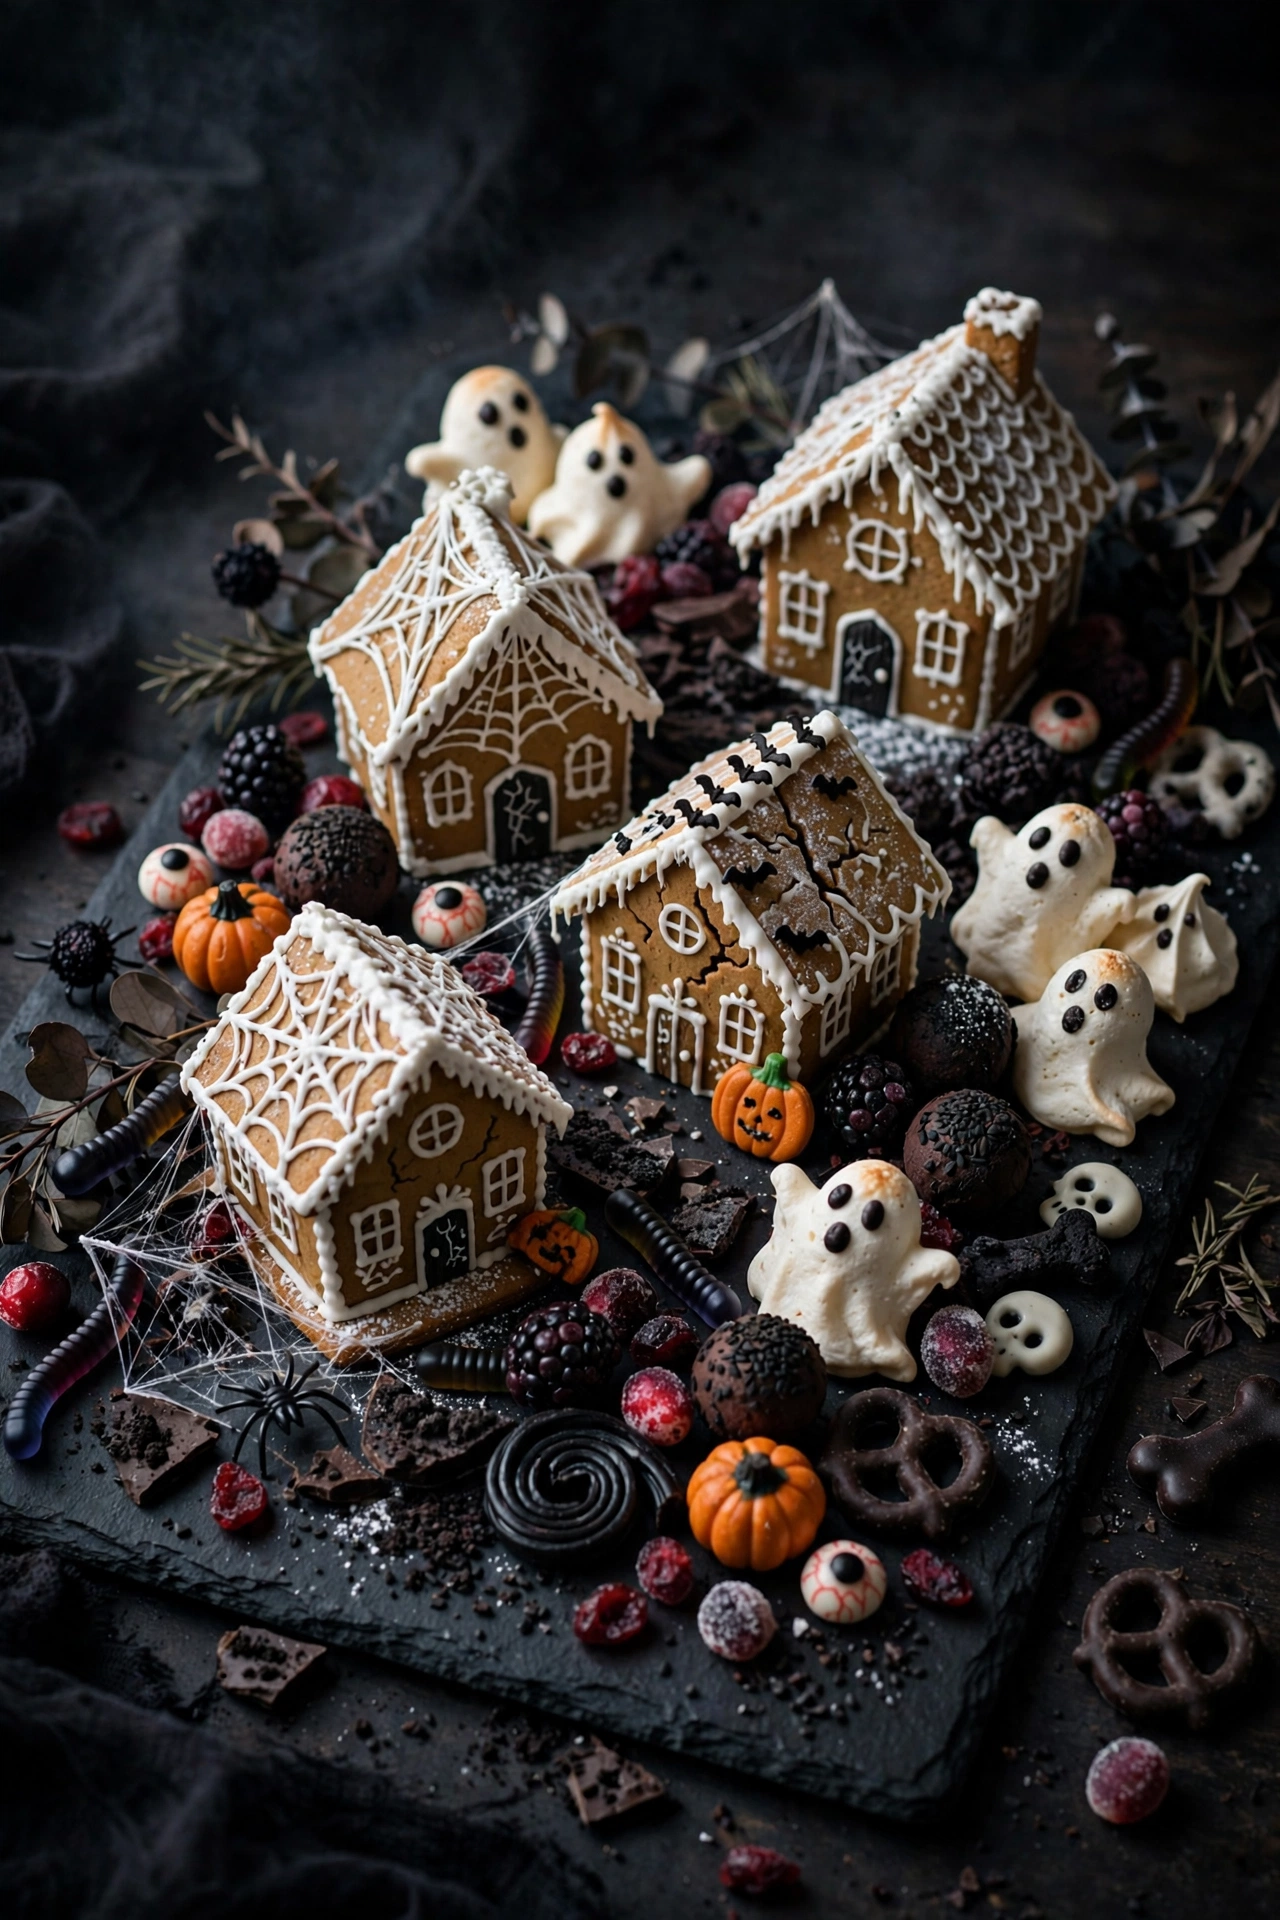
Build a gingerbread style haunted house from chocolate graham crackers and use it as the centerpiece of a dessert board. Royal icing holds the walls together and becomes the mortar for candy decorations. Surround it with cookie ghosts, candy pumpkins, and chocolate rocks.
Cut the graham crackers to size and pipe thick royal icing along the edges to assemble the house. Let it set for an hour before decorating. Add candy corn roof tiles, pretzel fences, and a cookie door. It does not need to be perfect since haunted houses are supposed to look crooked.
The house is mostly for show while guests snack on the surrounding treats. Chocolate graham crackers, frosted cookies, and candy make every bite sweet and satisfying. Breaking off a piece of the house at the end of the night is a beloved party tradition.
Start this project the day before so the icing fully hardens. It becomes a decoration that doubles as dessert, saving you money on separate centerpieces. Kids love helping with the candy decorating.
Variation: skip the house and build haunted cookie shacks from single graham cracker squares for individual treats guests can take home.
If you love decorated cookie projects, our christmas cookies to bake this season roundup has more icing and candy ideas for December. For October, our spooky halloween treats keep the sweets coming.
House Building Order
Cut, then assemble walls, then let set, then decorate. Rushing the setting step is the number one reason haunted houses collapse.
Pro Tips
- Use thick royal icing, it is the glue that holds everything.
- Let walls set for a full hour before decorating.
- Cut graham crackers with a serrated knife to avoid crumbling.
- Crooked is good, haunted houses should look spooky.
- Pipe icing snow on the roof edges for a creepy finish.
Make-Ahead and Storage
Build the house the day before so the icing hardens completely. Store it uncovered in a cool, dry spot, since humidity softens royal icing. The surrounding candies keep for weeks, so assemble the full board the morning of the party.
Party Activity Idea
Let kids decorate their own mini graham cracker shacks as a party activity, with bowls of candy for building. End the night by breaking off pieces of the big house for everyone to take home.
15. Trick-or-Treat Board
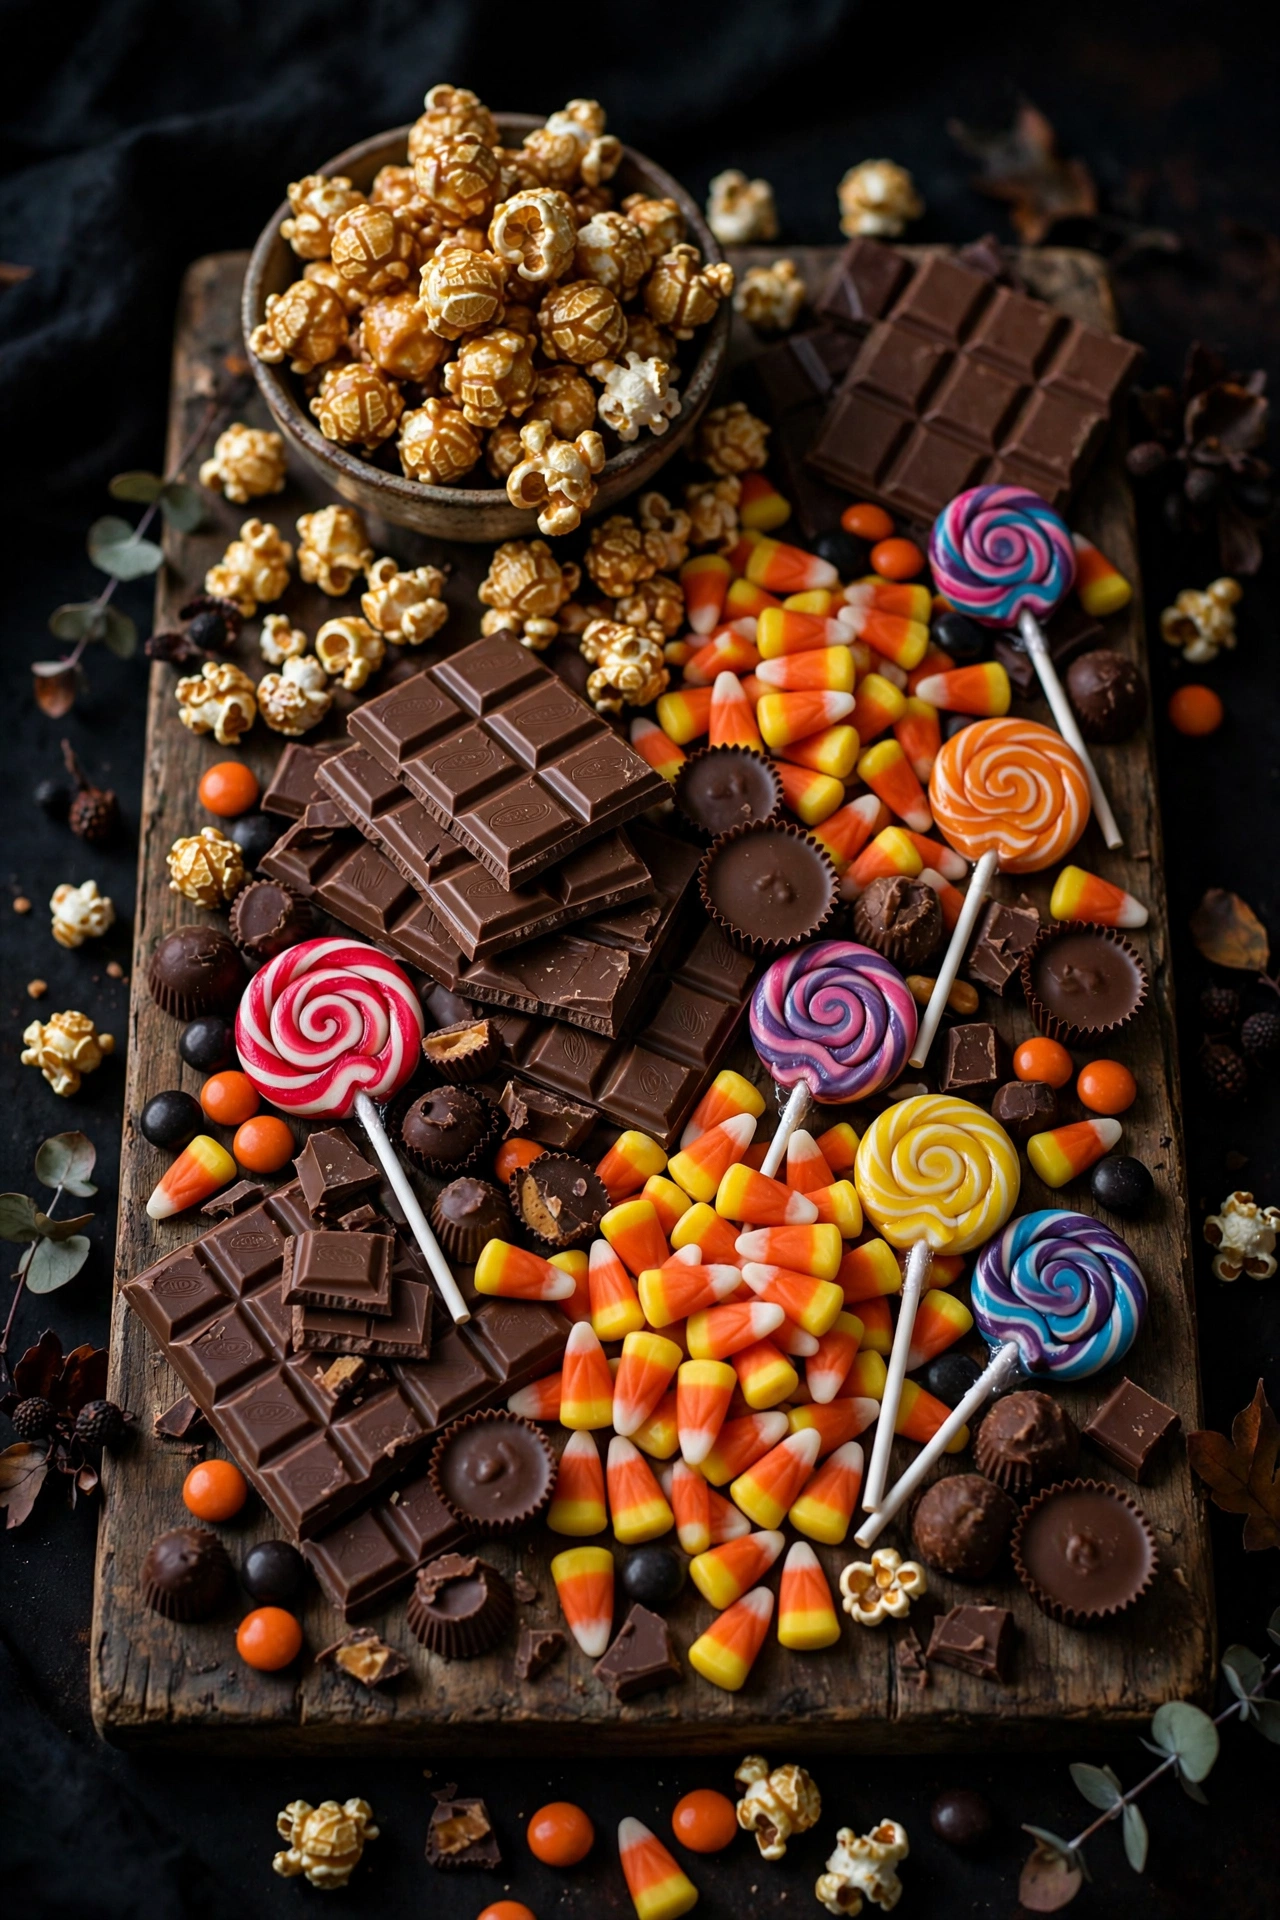
A little bit of everything makes this the ultimate Halloween grazing board. Pile on mini candy bars, popcorn balls, caramel corn, cheese cubes, and pretzels in generous mounds. It looks like someone dumped a trick or treat bag onto a board, in the best possible way.
The key is abundance. Fill every inch so the board looks overflowing and generous. Mix store bought candy with a few homemade touches like popcorn balls or rice crispy treats. Add small pumpkins and fall leaves around the edges for seasonal charm.
With so much variety, every guest finds something they love. The sweet candy balances with salty pretzels and savory cheese. It is the easiest board to assemble since there is no theme to follow beyond Halloween abundance.
This is your catch all board for when you want maximum impact with minimum planning. Buy candy on sale after checking what you already have. It works for any size crowd and scales up effortlessly.
Pro tip: put this board near the exit as a take home station. Set out small bags so guests can fill them with leftovers as they leave.
This catch all board pairs well with our spooky halloween treats for even more variety. Add a sweet station nearby with ideas from our caramel apple bar ideas and guests will never leave the dessert table.
Serving Suggestions
- Place near the exit as a take home station.
- Set out small bags for guests to fill.
- Mix homemade treats with store bought candy.
- Refill in waves to keep the board looking abundant.
- Add fall leaves and mini pumpkins for charm.
Scale It Your Way
Theme the board around one candy type, like all chocolate or all gummies, for a bolder look. Or go retro with candy from your own childhood trick or treat bags. A popcorn focused version with caramel corn and cheese popcorn is cheaper and still festive.
Smart Shopping Tips
Buy candy after Halloween sales start for the best prices, and check your pantry first to avoid duplicates. Keep chocolate away from sunny windows so nothing melts before the party starts.
Final Thought
From creepy charcuterie to candy loaded dessert boards, these halloween snack boards prove that party food can be scary and delicious at the same time. Choose your favorite, gather your ingredients, and get ready for guests to ask how you made something so spooktacular. Pair them with our easy fall appetizers and spooky halloween treats for a complete party spread.