
18 Red Velvet Cheesecake Recipes
Deep red crumb, a hint of cocoa, and a thick layer of tangy cream cheese: that is the magic of a great red velvet cake, and it only gets better in cheesecake form. These red velvet cheesecake recipes cover every style, from a classic baked cake and a no bake fridge cake to bars, cups, trifles, and party dips.
Pick a baked cake for a holiday table, a no bake version for a hot day, or a batch of minis when you need dessert for a crowd. Every recipe below uses simple pantry ingredients and clear steps, so even a first time cheesecake baker can get a smooth, crack free result.
Why You Will Love These Recipes
- Showstopper looks: the deep red crumb against white cream cheese topping looks stunning on any table
- Something for every skill level: no bake cups and dips sit beside classic baked cakes
- Make ahead friendly: most of these desserts taste even better after a night in the fridge
- Crowd sized options: bars, minis, cups, and trifles feed a party without tricky slicing
- Flexible flavors: chocolate, caramel, berries, pecans, and peppermint all pair with red velvet
1. Classic Baked Red Velvet Cheesecake
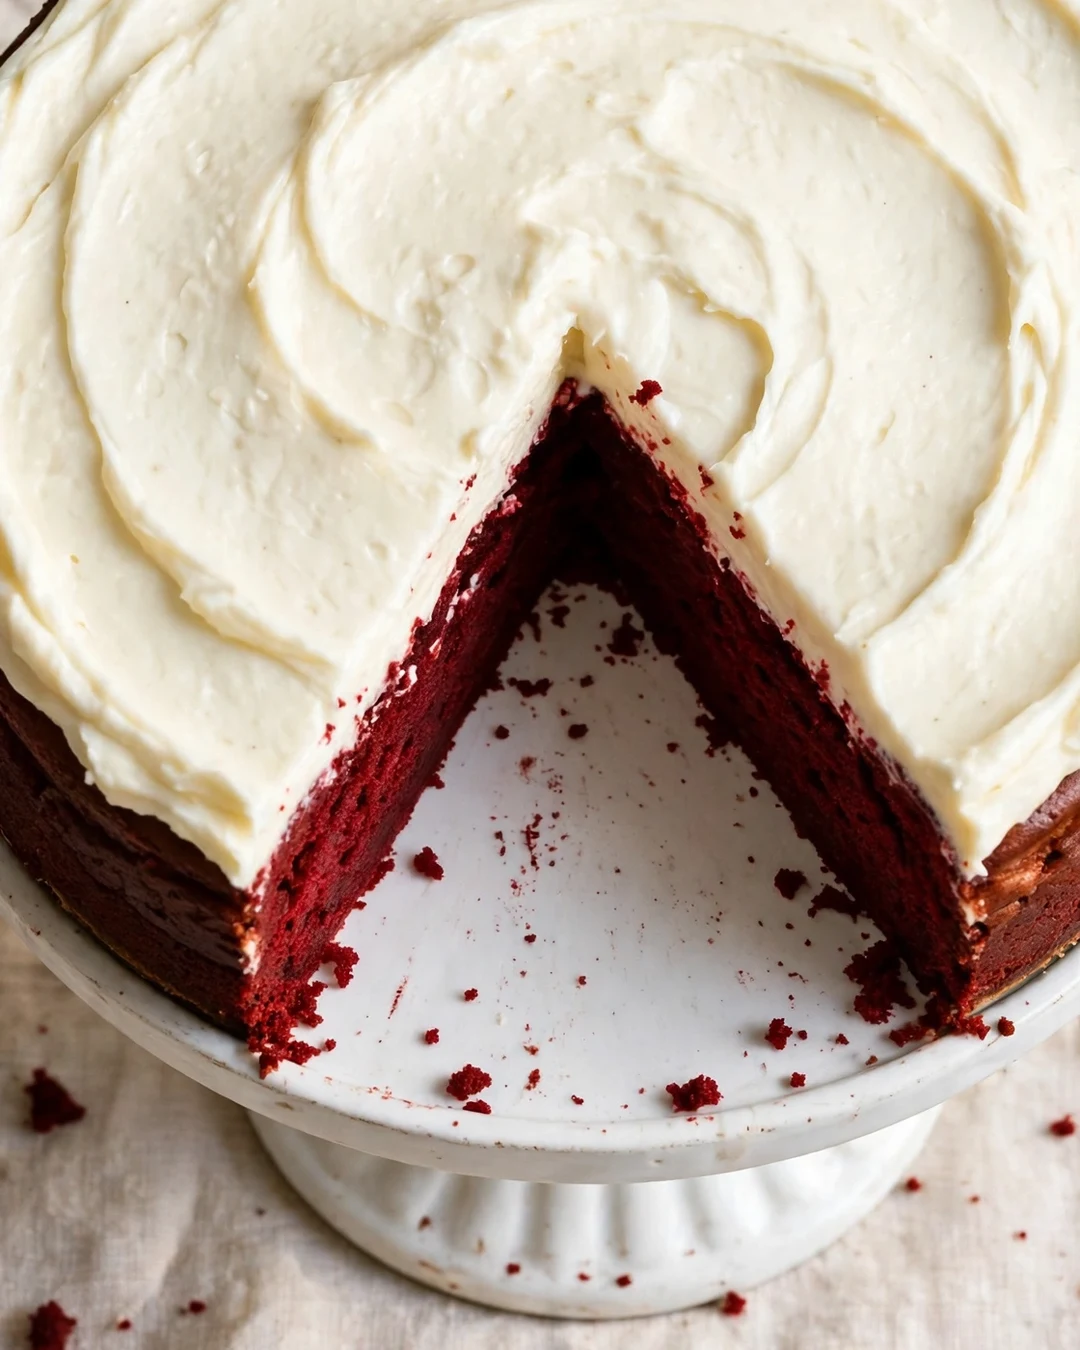
This is the cake to make when you want the real thing. A cocoa kissed red velvet base bakes up moist and tender under a thick layer of tangy cream cheese topping. The crumb stays soft for days, and the flavor gets even better after a night in the fridge.
Bake it in a springform pan set inside a larger pan of hot water. The gentle heat keeps the top flat and stops cracks from forming across the surface. Cool it slowly in the turned off oven with the door cracked, then chill it fully before you slice.
Pro Tips
Beat the cream cheese until completely smooth before you add anything else. Lumps at the start never disappear later, no matter how long you beat. Room temperature blocks, eggs, and sour cream blend into a silkier batter and a cleaner slice.
- Use room temperature cream cheese, eggs, and sour cream
- Bake in a water bath for a flat, crack free top
- Cool slowly in the oven, then chill overnight
- Slice with a hot, dry knife for clean layers
Serving Suggestions
Serve thin slices with a spoonful of whipped cream and a few fresh raspberries. It is rich enough for a holiday table, yet simple enough for a weekend dinner. A drizzle of chocolate sauce makes each plate look bakery made.
Easy variation: fold a cup of mini chocolate chips into the batter before baking for a double chocolate version, or swap the sour cream for Greek yogurt to lighten the tang a little. For a party look, top the chilled cake with piped cream cheese rosettes and a dusting of red velvet crumbs.
2. No Bake Red Velvet Cheesecake
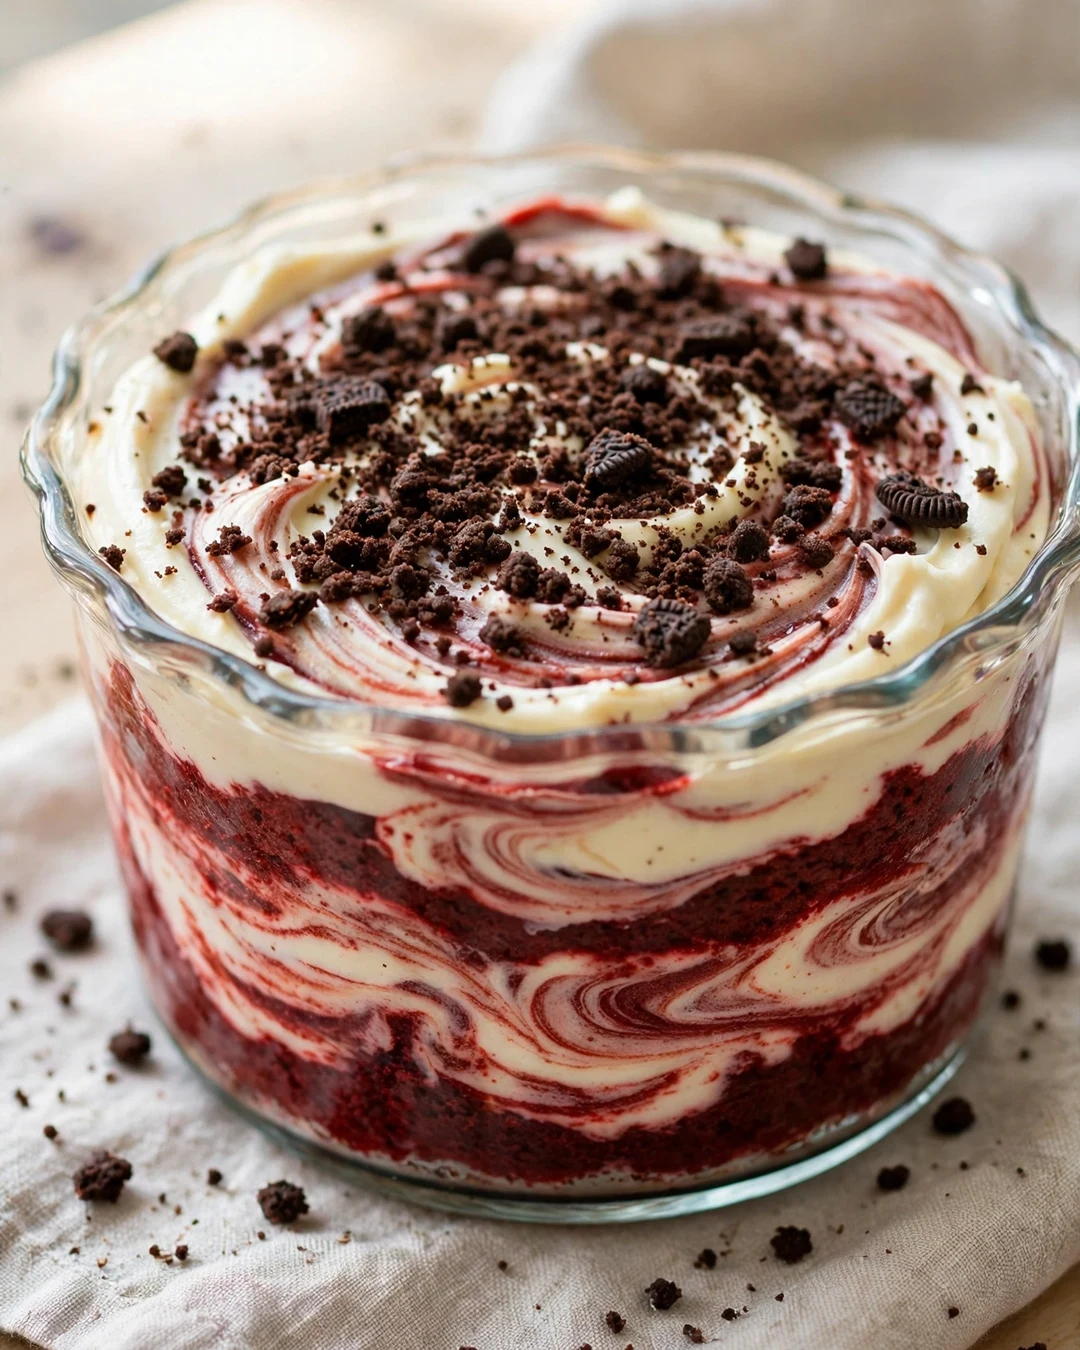
When the oven is busy or the day is hot, this no bake version saves dessert. Crushed chocolate cookies press into a firm base, and a whipped cream cheese filling sets up soft and sliceable in the fridge. The red velvet flavor comes from cocoa and a little food color.
Whip the cream to soft peaks first, then fold it gently into the sweetened cream cheese. Folding keeps the air in, which is what gives this cake its light, mousse like texture. Chill it for at least six hours so the slices hold their shape. For another make ahead dessert idea, try these cinnamon roll waffles on a busy weeknight.
Pro Tips
Do not rush the chill time. A no bake cake that looks set on top can still be soft in the middle. If you are short on time, set it in individual glasses instead, since small portions firm up faster and look lovely.
- Whip cream to soft peaks before folding it in
- Chill at least six hours, overnight if you can
- Use full fat cream cheese for the firmest set
- Fold, never stir hard, to keep the filling light
Serving Suggestions
Spoon it into pretty glasses for a party, or slice it from a springform pan for a classic look. Top each serving with chocolate shavings and a dollop of whipped cream. It pairs well with coffee after a heavy meal.
Serving idea: layer the crumbs and filling in small jars for grab and go desserts at a picnic or bake sale, and top each jar with a mini cookie. For a lighter twist, use half whipped cream and half whipped topping, and add a spoonful of raspberry jam between layers.
3. Red Velvet Cheesecake Swirl Brownies

These bars give you two desserts in one pan. A fudgy red velvet brownie base meets ribbons of sweet cream cheese, swirled together with a knife for a marbled top. They are easier than a whole cheesecake and just as crowd pleasing.
Keep the brownie batter thick so the cheesecake layer sits on top instead of sinking. Drop spoonfuls of the cheese mixture over the batter, then drag a skewer through it in lazy S shapes. Do not over swirl, or the pattern muddies into pink.
Pro Tips
Line the pan with parchment that hangs over two sides. The whole slab lifts out cleanly, and you can cut neat squares on a board instead of digging them out of the pan one by one.
- Keep brownie batter thick so layers stay distinct
- Swirl gently with a skewer for a marbled top
- Line the pan with overhanging parchment
- Chill before cutting for the neatest squares
Serving Suggestions
Serve the squares slightly chilled with a glass of cold milk. They travel well, so they are a strong pick for bake sales, potlucks, and lunchboxes. A light dusting of cocoa on top finishes them nicely.
Pro tip: add a handful of white chocolate chips to the brownie batter for extra sweetness, or press chopped pecans into the top before baking for crunch. If you like a sharper tang, add an extra spoonful of lemon juice to the cheese swirl.
4. Individual Red Velvet Cheesecake Cups

Single serve cups take all the stress out of slicing. Layers of cookie crumbs, red velvet cake crumbles, and whipped cheesecake filling stack up in small jars or glasses. Everyone gets the same pretty layers, and there is no cake left half cut on the counter.
Bake or buy one small red velvet cake layer, then crumble it once it cools. Build the cups in this order: crumbs, filling, cake, filling, then a crumb topping. Keep the layers thin so a spoon can reach every flavor in one bite. They are a fun match for friendsgiving recipes at a holiday table.
Pro Tips
Make the cups a day ahead and keep them covered in the fridge. The flavors meld overnight, and the crumbs soften just enough to eat easily with a spoon. Add any fresh toppings at serving time so they stay bright.
- Crumble cooled cake, never warm cake, for clean layers
- Keep layers thin so one spoonful gets every flavor
- Chill overnight for the best flavor and texture
- Add fresh toppings just before serving
Serving Suggestions
Set the cups out on a tray with small spoons for a dessert buffet. Guests can take one without a plate or a knife. They also work well as a make ahead treat for birthdays and showers.
Pairing idea: serve these cups beside fresh strawberries and a pot of hot coffee, or turn them into a sundae bar with whipped cream, chocolate sauce, and crushed cookies on the side. For kids, use clear plastic cups so the red and white layers show.
5. Red Velvet Cheesecake Bars with Cream Cheese Frosting

These bars are the sheet pan answer to a full cheesecake. A soft red velvet cake base bakes in a rectangle pan, then gets a thick spread of cream cheese frosting once cool. Cut into squares, they feed a crowd with very little fuss.
Bake the base until a toothpick comes out with a few moist crumbs, not wet batter. Overbaking dries the bars out, and frosting cannot rescue a dry base. Let the pan cool completely before frosting, or the topping will slide right off.
Pro Tips
Spread the frosting with an offset spatula in one smooth pass. Chilling the bars for thirty minutes after frosting firms the top, so your knife cuts straight lines instead of dragging frosting across the cake.
- Bake just until a toothpick shows moist crumbs
- Cool the pan fully before frosting
- Chill frosted bars briefly for clean cuts
- Wipe the knife between slices
Serving Suggestions
Stack the squares on a platter with a little space between them so the frosting stays neat. They are ideal for office parties and school events, where a fork free dessert is a plus. A sprinkle of cake crumbs on top ties the look together.
Variation: stir orange zest into the frosting for a citrus lift, or add a thin layer of chocolate ganache under the frosting for a richer bar. For a nutty finish, press toasted pecans into the frosting while it is still soft.
Mini Cheesecake Doneness Check
The centers should wobble like set jelly when you shake the pan gently. They finish setting in the fridge, so pulling them at the wobble stage is the secret to a creamy, not dry, mini.
6. Mini Red Velvet Cheesecakes
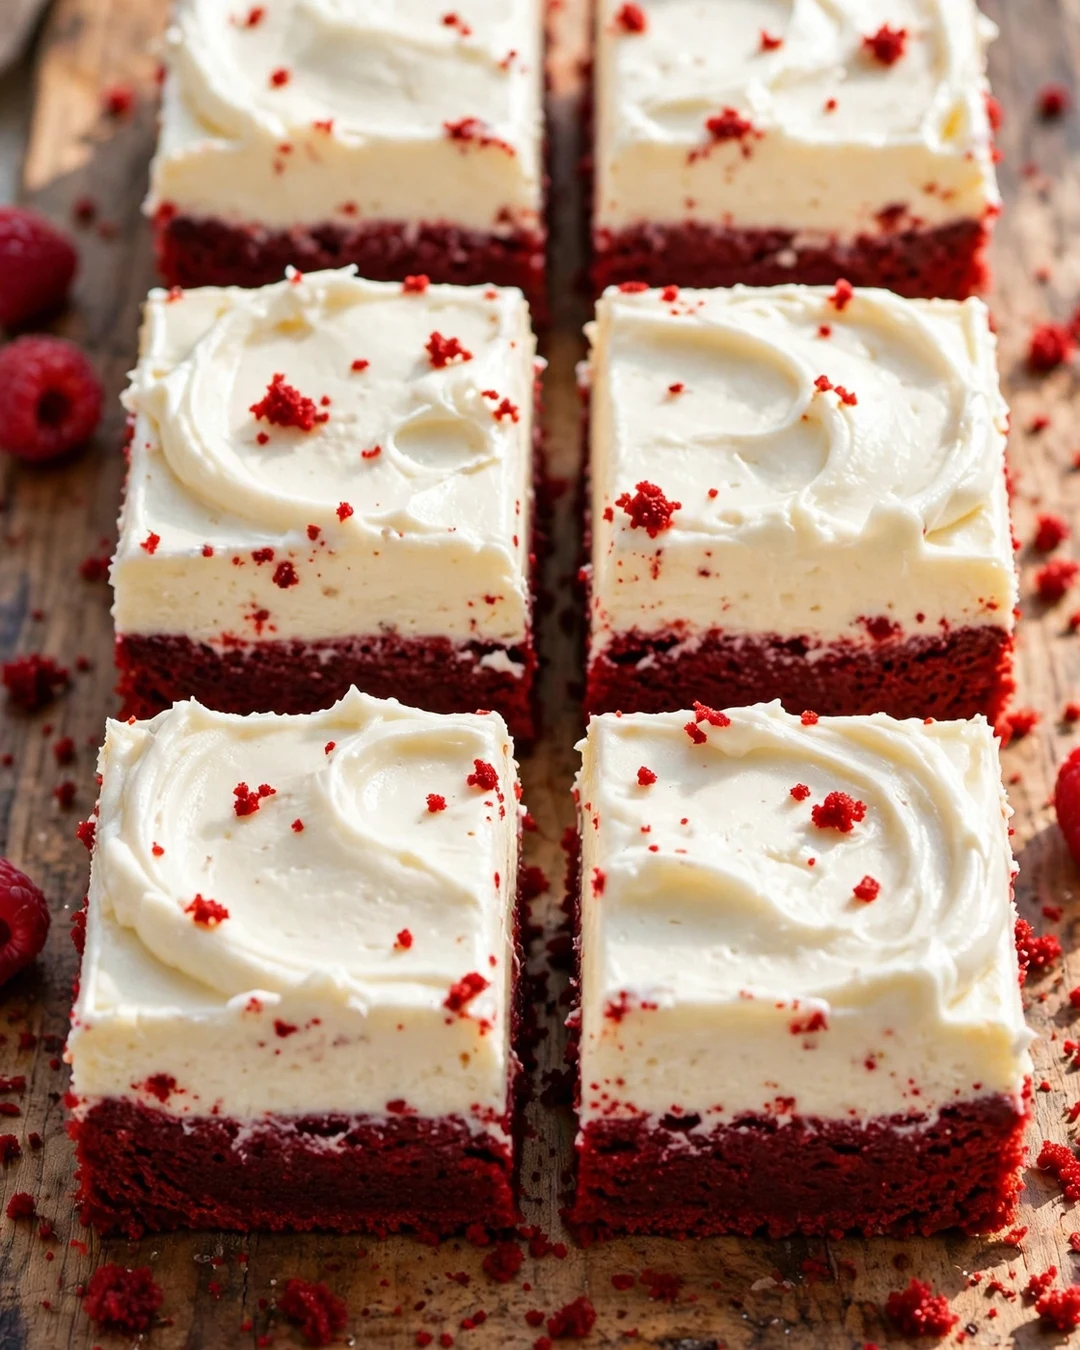
Mini cheesecakes baked in a muffin tin are portion perfect and party ready. Each one has its own cookie crust, a small red velvet cheesecake center, and a swirl of topping. They bake fast and cool fast, which makes them great for last minute plans.
Press the crust crumbs firmly into paper liners so the bases hold together when unwrapped. Fill each cup about three quarters full, since the centers puff a little in the oven and settle as they cool. A water bath is not needed at this small size. If you love small batch baking, these pistachio cheesecake recipes are another favorite to try.
Pro Tips
Do not overbake the minis. The centers should still wobble slightly when you shake the pan. They firm up in the fridge, and an overbaked mini turns dry and cracked instead of creamy.
Dip Dos and Do Nots
Do beat the cream cheese smooth first. Do chill the dip for an hour. Do not add all the crumbs at once, or the dip turns gritty. Do not use a deep bowl, since dippers break.
- Press crust crumbs firmly into the liners
- Fill cups three quarters full only
- Pull them while centers still wobble slightly
- Chill two hours before peeling the liners
Serving Suggestions
Serve the minis on a tiered stand with fresh berries scattered between them. They need no cutting and no plates, so they suit buffets and dessert tables. One or two per guest is plenty, since they are rich.
Tip: top half the batch with whipped cream and half with chocolate ganache so guests can choose, or add a single raspberry to each mini for color. For a holiday tray, dust the tops with powdered sugar just before serving.
7. Red Velvet Cheesecake Layer Cake
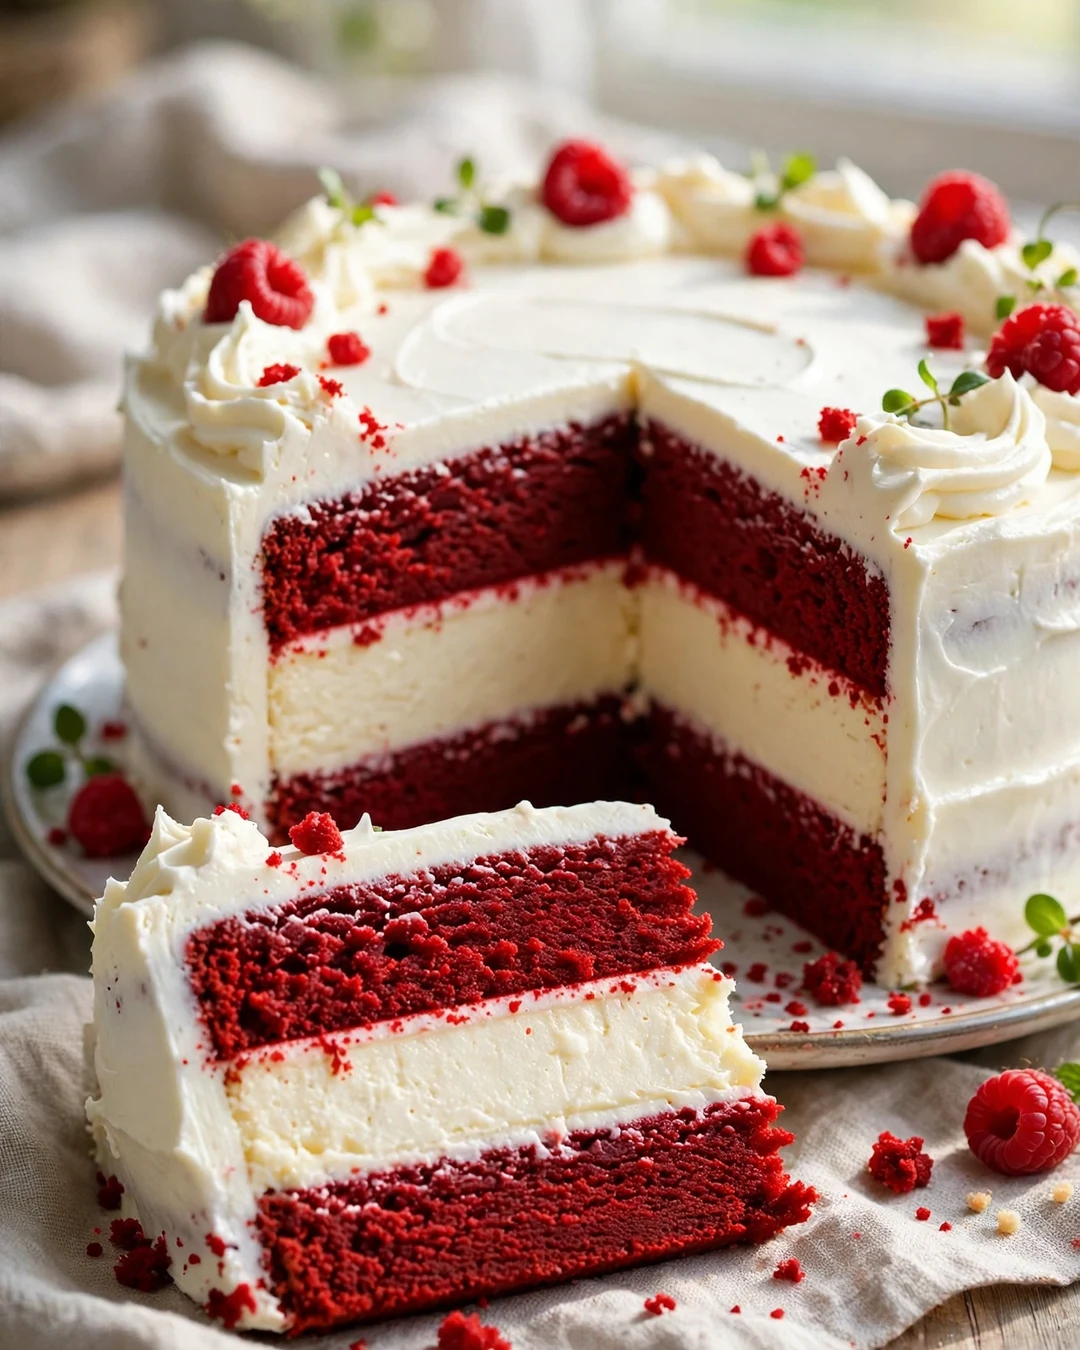
This showstopper stacks two red velvet cake layers around a full baked cheesecake layer. Cut into it, and the pale cheesecake stripe down the middle surprises everyone at the table. It looks like a bakery cake but uses simple steps.
Bake the cheesecake layer a day ahead and freeze it. A frozen layer stacks neatly and will not squish under the cake layers. Trim the cake layers flat with a long knife so the finished cake stands straight and frosts evenly.
Pro Tips
Use a crumb coat first: a thin layer of frosting that traps loose crumbs, chilled for twenty minutes. The final coat then goes on smooth and clean, with no red crumbs showing through the white frosting.
- Bake and freeze the cheesecake layer a day ahead
- Trim cake layers flat for a straight stack
- Crumb coat, chill, then apply the final coat
- Slice with a hot knife, wiping between cuts
Serving Suggestions
Bring the cake to the table whole for the big reveal, then slice it at the table. It serves a large group, so it fits birthdays and holiday dinners. Leftovers keep well in the fridge for several days.
Serving idea: garnish the top with red velvet cake crumbs and a ring of piped frosting, or add chocolate curls for a fancier finish. For a lighter slice, serve it with fresh berries instead of extra frosting. A few fresh mint leaves add a touch of green contrast.
8. Red Velvet Oreo Cheesecake
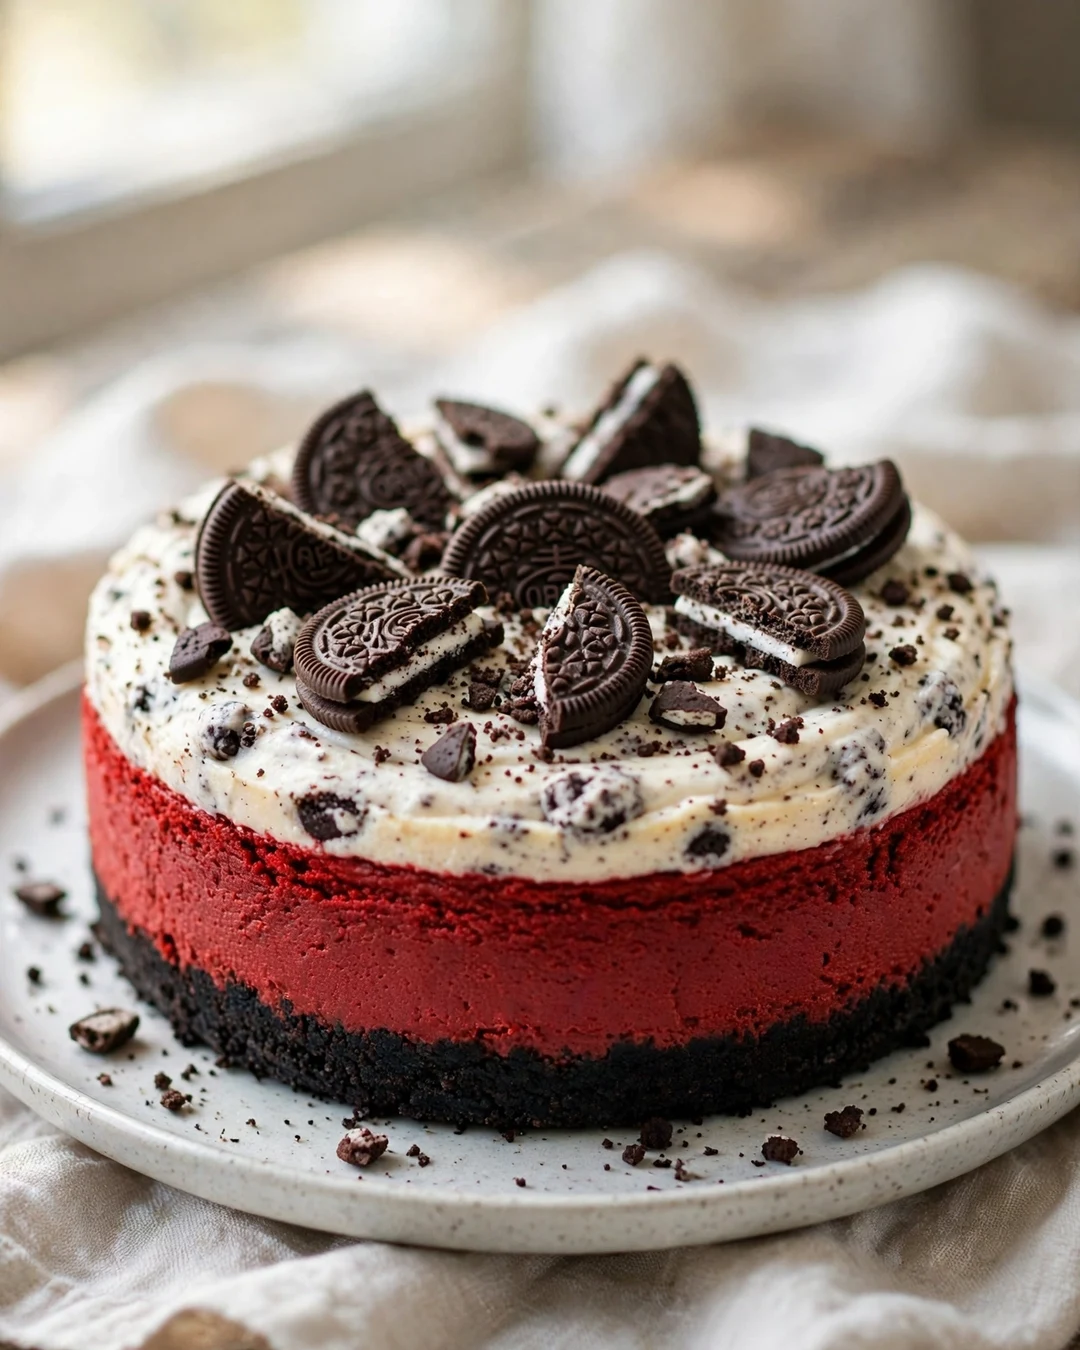
Chocolate sandwich cookies do double duty here: crushed into a dark crust and folded into the filling. The cookie crunch plays against the smooth red velvet cheesecake, and the black and red layers look striking on a plate.
Crush the cookies with their filling still on for a crust that holds together without extra sugar. Reserve a few whole cookies to chop and fold into the batter at the very end, so the pieces stay chunky instead of dissolving.
Pro Tips
Press the crust up the sides of the pan a little, not just across the bottom. A taller crust gives each slice a dark border that frames the red filling and keeps the edges tidy when you lift slices out.
- Crush cookies with filling on for a firm crust
- Fold chopped cookies in last to keep chunks
- Press crust slightly up the pan sides
- Chill overnight for the cleanest slices
Serving Suggestions
Serve with a glass of milk or a scoop of vanilla ice cream. The cookie flavor makes this a hit with kids and with anyone who loves cookies and cream desserts. A whole mini cookie on each slice is a fun garnish.
Variation: use mint filled sandwich cookies for a cool twist, or golden cookies for a lighter color contrast. If you want more crunch, scatter extra cookie crumbs over the top just before serving. This pairs well with reuben casserole recipes on a dessert table.
9. White Chocolate Red Velvet Cheesecake
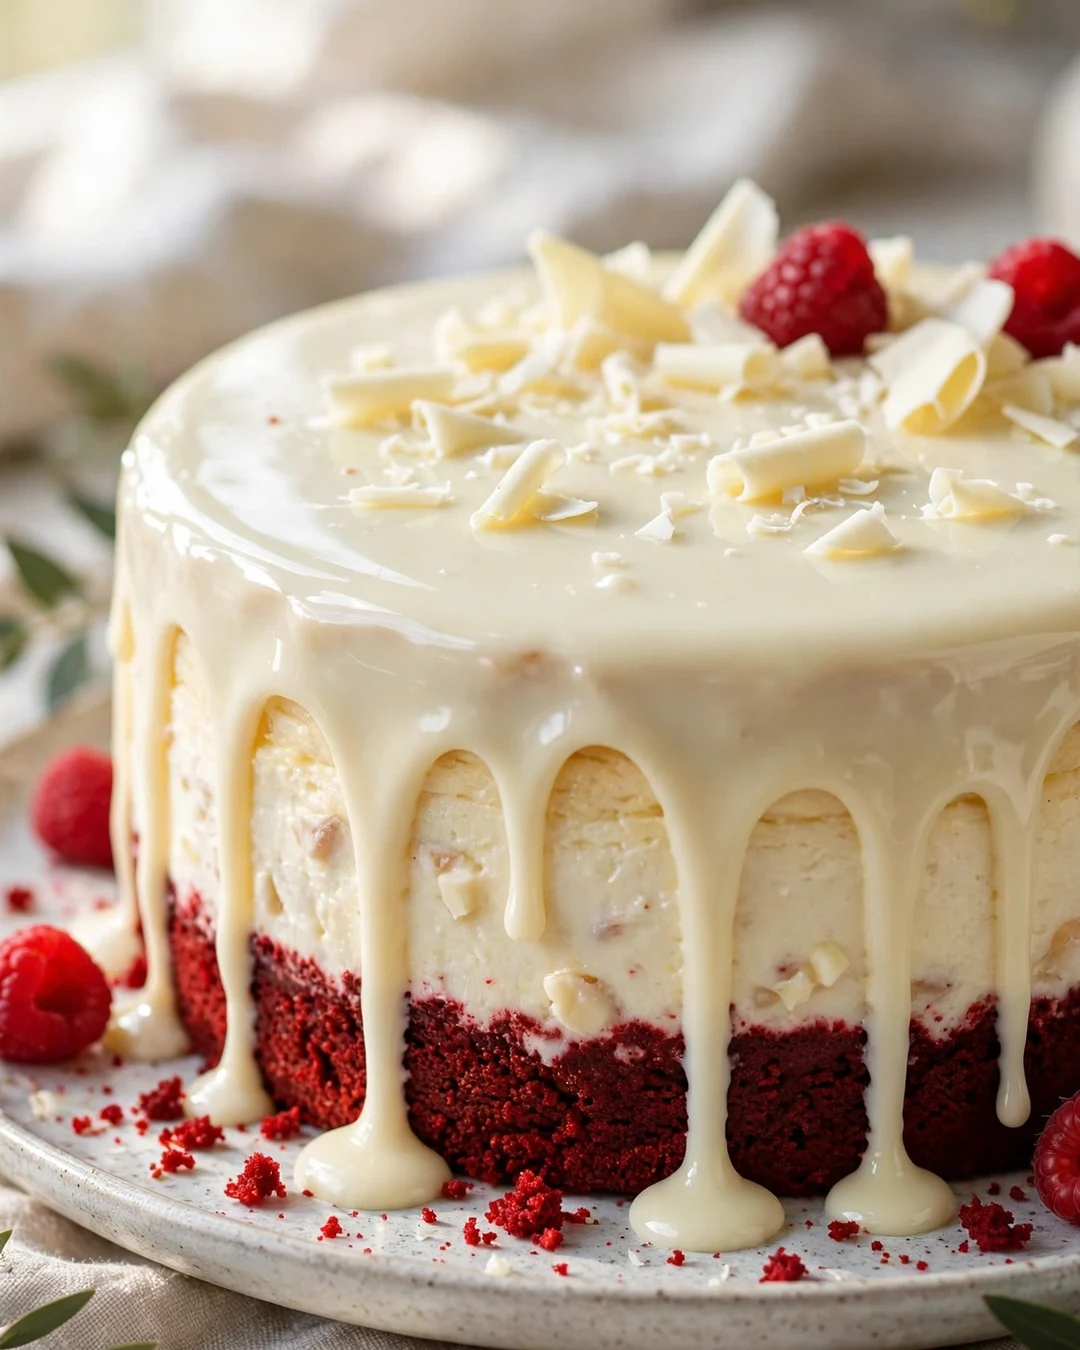
White chocolate ganache poured over a baked red velvet cheesecake adds sweetness and shine. The pale topping sets into a soft shell that cracks gently under a fork, revealing the deep red cake below. It is an elegant finish for a special occasion.
Melt the white chocolate gently with warm cream, stirring until smooth. If the mixture looks grainy, it got too hot; a spoonful of warm cream whisked in slowly can often bring it back. Pour the ganache over a cold cake so it sets in a neat layer.
Pro Tips
Use good quality white chocolate bars, not chips, for the smoothest ganache. Chips contain stabilizers that can make the topping thick and dull instead of glossy and pourable.
Praline Timing Guide
Pale gold means the sugar is still cooking and the flavor is mild. Amber means nutty and ready to pour. Dark brown means it is close to burnt, so pull the pan at once and pour quickly.
- Melt white chocolate gently with warm cream
- Pour ganache over a cold cake for a neat set
- Use white chocolate bars, not chips, for shine
- Let the ganache set before slicing
Serving Suggestions
Serve thin slices with fresh strawberries, which cut the sweetness nicely. This cake suits weddings, anniversaries, and any table where dessert should look as good as it tastes. Keep it chilled until serving time.
Tip: add a teaspoon of vanilla bean paste to the ganache for extra flavor, or tint a small portion pink for a decorative drizzle. For a nutty crunch, sprinkle toasted almonds over the ganache while it is still soft. A drizzle of dark chocolate over the white ganache looks striking.
10. Red Velvet Cheesecake Trifle

A trifle turns leftover cake into a centerpiece. Cubes of red velvet cake layer with whipped cheesecake cream and berries in a glass bowl, so every layer shows. It is forgiving, fast, and feeds a crowd without any precise baking.
Whip the cheesecake cream until it holds soft peaks, then layer it generously; thin layers disappear between cake cubes. Use a clear bowl or trifle dish, since the red, white, and berry layers are half the appeal. If you need a savory starter first, try these chicken poblano soup recipes before dessert.
Pro Tips
Do not assemble more than a day ahead if you use fresh berries, since their juices can soften the cake too much. For a firmer trifle, use a little less cream between layers and keep it well chilled.
- Use a clear bowl so the layers show
- Layer cream generously between cake cubes
- Assemble within a day when using fresh berries
- Keep well chilled until serving
Serving Suggestions
Scoop the trifle at the table with a large spoon so each serving gets all the layers. It is a natural fit for potlucks, since it travels in its own bowl. Top with extra berries and crumbs at the last minute.
Pairing idea: add a layer of chocolate pudding for a richer trifle, or swap the berries for sliced peaches in summer. For a holiday version, use cranberries and a dusting of powdered sugar on top. Keep a few whole berries aside for the very top.
11. Red Velvet Cheesecake Stuffed Cookies

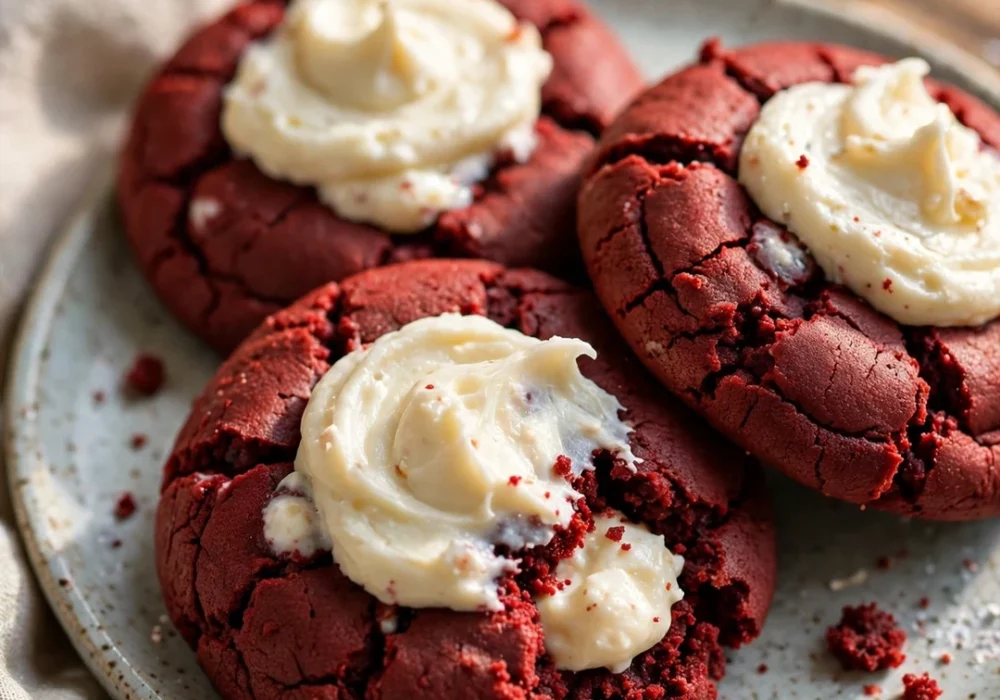
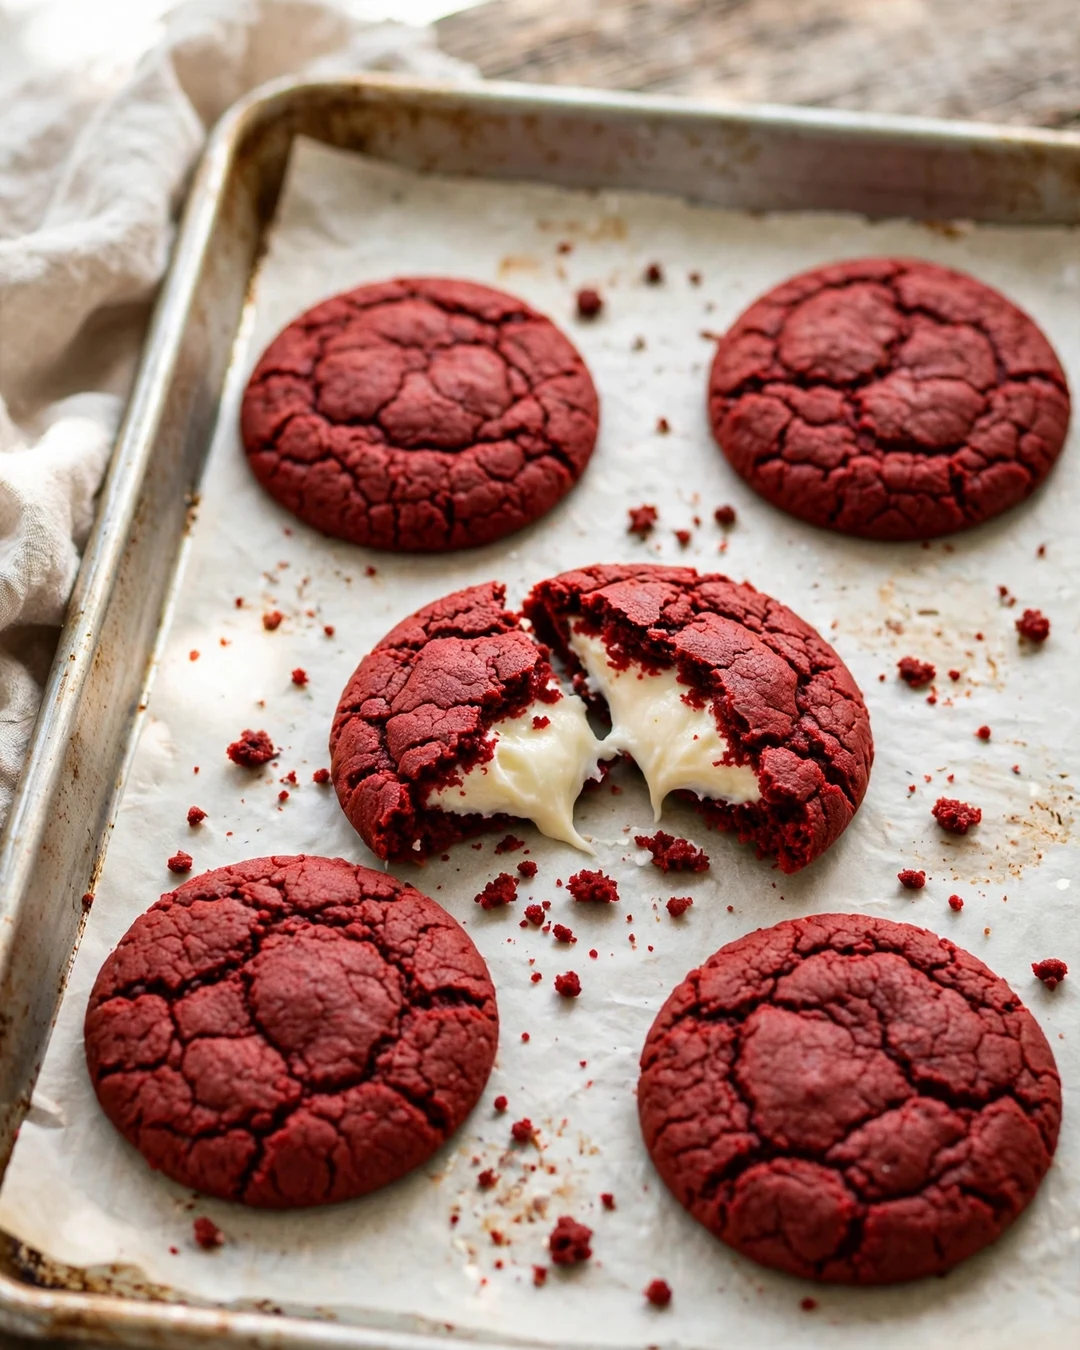
These cookies hide a surprise: a soft red velvet cookie wrapped around a cold ball of sweetened cream cheese. Bite in, and the creamy center shows against the red crumb. They are fun to make with kids and even more fun to eat warm.
Freeze the cream cheese balls for at least thirty minutes before wrapping. Cold filling stays put in the oven instead of melting out the sides. Seal the dough fully around each ball, with no gaps at the seams.
Pro Tips
Chill the shaped cookies for twenty minutes before baking. Cold dough spreads less, so the cookies stay thick and the centers stay hidden. Bake just until the edges set, since the centers keep cooking on the tray.
- Freeze cream cheese balls before wrapping
- Seal dough fully around each filling ball
- Chill shaped cookies before baking
- Bake just until edges set
Serving Suggestions
Serve the cookies slightly warm with milk, or pack them in a tin for gifts. They keep their surprise center for days in an airtight container. A dusting of powdered sugar makes them look bakery fresh.
Variation: roll the dough balls in coarse sugar before baking for a sparkly crust, or add white chocolate chips to the dough for extra sweetness. For a holiday tin, mix these with plain chocolate chip cookies. Chill any leftover filling for your next batch of cookies.
12. Red Velvet Cheesecake Party Dip
This dip turns cheesecake into a party snack. Sweetened cream cheese whips up with cocoa, red velvet cake crumbs, and a little vanilla into a thick, scoopable dip. Set it out with fruit, cookies, and pretzels, and it disappears fast.
Beat the cream cheese smooth first, then add the crumbs a little at a time so the dip stays creamy, not gritty. If it feels too thick for dipping, beat in a spoonful of milk until it scoops easily. Chill it for an hour so the flavors blend. It sits happily next to peach butter swim biscuits recipes on a holiday snack table.
Pro Tips
Serve the dip in a wide, shallow bowl rather than a deep one. A shallow bowl keeps the dippers from breaking and lets guests reach the dip easily right to the last spoonful.
- Beat cream cheese smooth before adding crumbs
- Add milk a spoonful at a time to adjust thickness
- Chill one hour so flavors blend
- Use a wide shallow bowl for easy dipping
Serving Suggestions
Put out a mix of dippers: strawberries, vanilla wafers, pretzel rods, and graham crackers. The salty sweet mix keeps people coming back. It is a low effort dessert for game day and casual parties.
Berry Topping in Three Steps
First, wash and dry the berries well. Next, place large berries first and fill gaps with small ones. Last, brush with a little warmed jam for shine, and serve soon after topping.
Tip: swirl chocolate sauce through the top of the dip for a pretty finish, or fold in mini chocolate chips for crunch. For a lighter dip, use half cream cheese and half whipped topping. Set out extra napkins, since this dip invites generous scooping.
13. No Bake Red Velvet Icebox Cake

An icebox cake needs no oven at all. Chocolate wafers or thin cookies layer with sweetened red velvet cheesecake cream, then soften overnight into sliceable cake layers. It tastes like a fancy layered dessert with almost no work.
Spread the cream evenly and press each wafer layer down gently so no air pockets remain. Air pockets leave dry gaps after chilling. Cover the dish tightly so the cream does not pick up fridge smells overnight.
Pro Tips
Use thin, crisp wafers, not soft cookies. Crisp wafers absorb moisture slowly and turn cake like, while soft cookies turn mushy and the layers collapse when you slice.
- Spread cream evenly with no air pockets
- Press wafer layers down gently
- Cover tightly before chilling overnight
- Use thin crisp wafers, not soft cookies
Serving Suggestions
Slice with a sharp knife and serve on chilled plates. It is a perfect summer dessert, since the fridge does all the work. A few fresh berries on each slice add color and a tart contrast.
Variation: alternate the cheesecake cream with a thin layer of chocolate ganache, or use vanilla wafers for a lighter color. For a party, build it in a loaf pan so the slices look like a classic icebox cake. A dusting of cocoa over each slice finishes the plate nicely.
14. Red Velvet Cheesecake with Chocolate Ganache
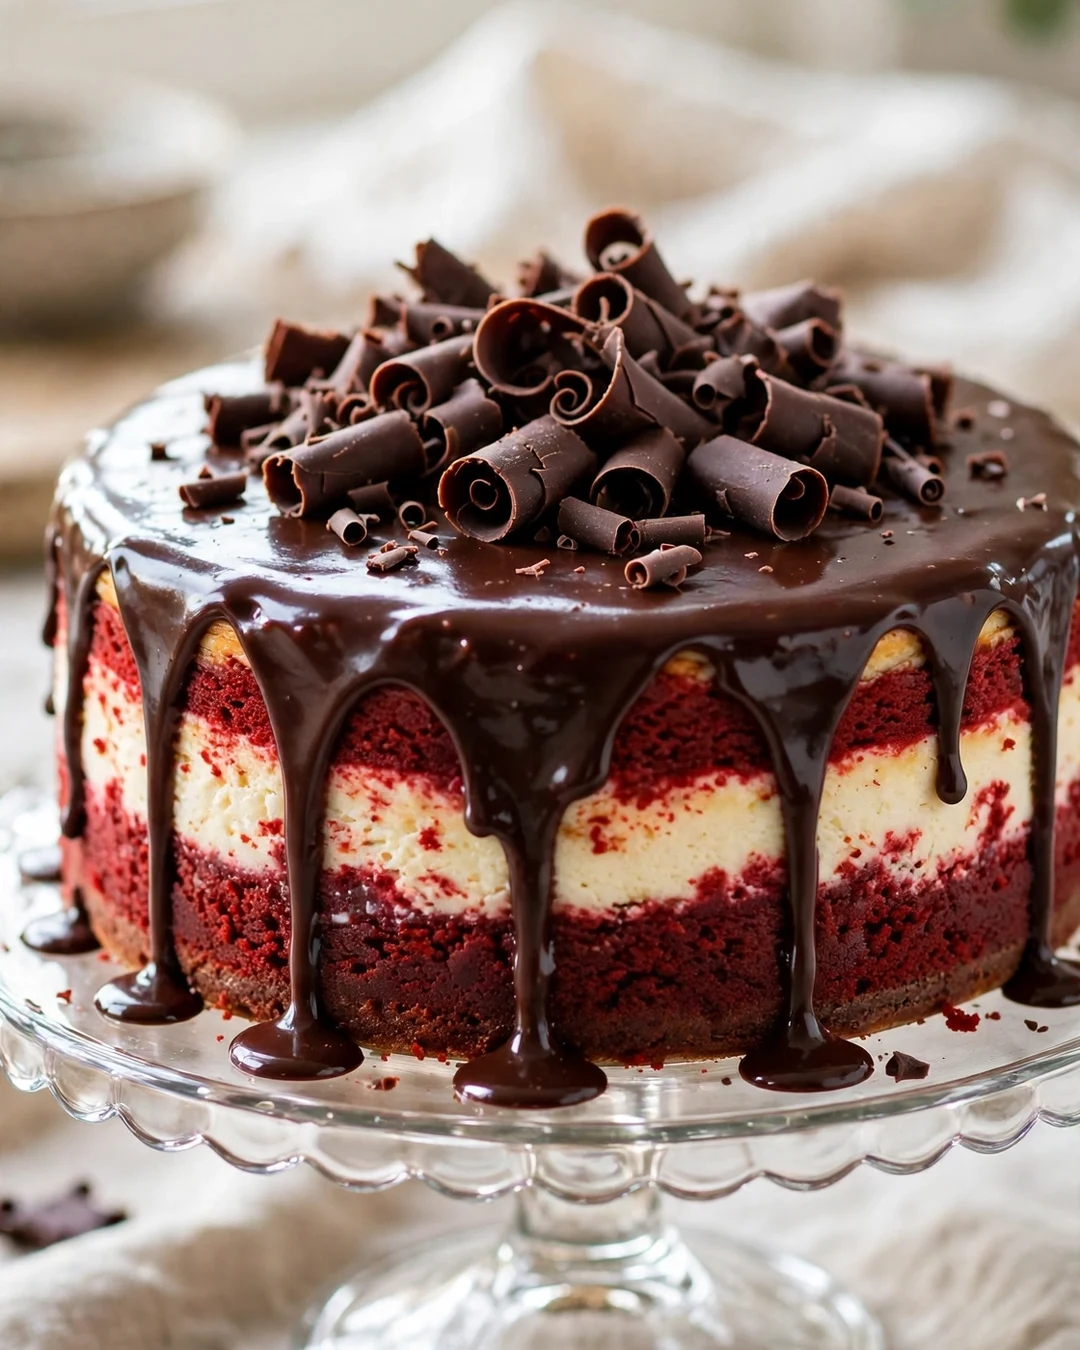
Dark chocolate ganache is the classic partner for red velvet. Poured over a chilled cheesecake, it sets into a glossy coat that adds a deep chocolate note without hiding the tang of the cream cheese. It is simple, dramatic, and always popular.
Pour the ganache in the center and nudge it toward the edges with a spatula, letting a few drips run down the sides. Work while the ganache is warm and fluid; once it cools, it thickens and will not drip smoothly. This rich finish also pairs well with french dip sandwich recipes at a big family dinner.
Pro Tips
Chill the cake well before pouring. A cold surface helps the ganache set quickly in a smooth coat, instead of sliding off in a thick puddle around the base of the cake.
- Pour ganache in the center, nudge to edges
- Work while ganache is warm and fluid
- Chill the cake well before pouring
- Let drips fall naturally for a rustic look
Serving Suggestions
Serve with unsweetened whipped cream to balance the rich chocolate. This version suits dinner parties and holiday tables, where a dramatic cake earns its place. Keep slices small, since it is very rich.
Tip: sprinkle flaky sea salt over the ganache for a salted chocolate finish, or add chocolate curls on top for texture. For a lighter touch, use a thin ganache layer instead of a thick coat. Let the cake stand at room temperature for fifteen minutes before slicing.
15. Berry Topped Red Velvet Cheesecake

Fresh berries are the easiest way to dress up a red velvet cheesecake. A pile of strawberries, raspberries, and blueberries adds tartness, color, and freshness against the rich cake. It also makes the cake look finished with almost no extra work.
Dry the berries well after washing, since wet berries weep juice onto the topping and stain it. Arrange the largest berries first, then fill the gaps with smaller ones. A light brush of warmed jam gives the fruit a glossy shine.
Pro Tips
Add the berries just before serving if the cake will sit out for a while. Berries soften in the fridge over the topping, and a freshly topped cake looks brighter and tastes fresher.
- Dry berries well after washing
- Place large berries first, fill gaps with small ones
- Brush with warmed jam for a glossy shine
- Top just before serving for the freshest look
Serving Suggestions
Serve with a berry sauce made from crushed raspberries and a little sugar. The sauce echoes the topping and gives each plate a restaurant finish. It is a lovely choice for spring and summer gatherings.
Pairing idea: use only strawberries for a classic look, or mix in blackberries for a deeper flavor. For a winter version, use sugared cranberries and a few rosemary sprigs as garnish. A spoonful of lightly sweetened whipped cream beside each slice completes the dessert.
16. Salted Caramel Red Velvet Cheesecake

Salted caramel drizzle turns a red velvet cheesecake into a sweet and salty showpiece. The buttery caramel pools over the cream cheese topping and drips down the sides, and a pinch of flaky salt sharpens every bite. It is indulgent without being fussy.
Make or warm the caramel until it pours in a thin stream, then drizzle it over a cold cake. Cold cake sets the caramel in place instead of letting it slide off. Sprinkle the salt last, so the flakes stay visible and crunchy. For another sweet finish, these fried apples recipes are a classic crowd pleaser.
Pro Tips
Use flaky sea salt, not fine table salt. Fine salt dissolves into the caramel and can make it taste simply salty, while flakes give little bursts of saltiness that contrast with the sweet caramel.
- Drizzle caramel over a cold cake
- Warm caramel until it pours in a thin stream
- Sprinkle flaky salt last for crunch
- Use flaky sea salt, not fine salt
Serving Suggestions
Serve small slices with coffee, since the caramel makes each bite very rich. It is a strong pick for fall gatherings and holiday dessert tables. A scoop of vanilla ice cream on the side never hurts.
Swirl Without the Muddy Middle
Drop the cheese mixture in spoonfuls and drag a skewer through it only two or three times. More swirling mixes the colors into one flat pink layer, while a light hand keeps bold red and white ribbons.
Variation: add a layer of caramel between the crust and the filling for a hidden surprise, or stir chopped toasted pecans into the caramel for crunch. If you prefer less sweetness, use a darker caramel cooked a minute longer. Serve it on warmed plates for a restaurant style touch.
17. Pecan Praline Red Velvet Cheesecake

Candied pecans add crunch and a buttery brown sugar note to a smooth red velvet cheesecake. The praline topping crackles under a fork and gives each slice texture that plain cheesecake lacks. It is a Southern style finish that suits fall tables.
Cook the praline just until it turns amber and smells nutty, then pour it over the nuts at once. It sets fast, so have the pan ready before the sugar colors. Break the cooled praline into pieces rather than cutting it, for a rustic look.
Pro Tips
Do not stir the sugar constantly while it cooks. Stirring can make it seize into grainy crystals. Swirl the pan gently instead, and watch the color closely, since caramel goes from amber to burnt in seconds.
- Cook praline just until amber and nutty smelling
- Have the pan ready before sugar colors
- Swirl the pan instead of stirring constantly
- Break cooled praline by hand for a rustic look
Serving Suggestions
Serve with whipped cream and a drizzle of any leftover praline syrup. The crunch makes this cake a talking point at Thanksgiving and Christmas tables. It also travels well if you add the topping at the destination.
Tip: make extra praline to crumble over ice cream later in the week, or swap pecans for walnuts if you prefer. For a simpler version, use store bought candied pecans scattered over the chilled cake. Store leftover praline in an airtight tin for up to one week.
18. Holiday Peppermint Red Velvet Cheesecake Jars

These jars are made for December. Layers of red velvet cake crumbs, peppermint cream cheese filling, and crushed candy canes stack up in small jars with a festive red and white look. They are easy to make ahead and easy to hand out.
Crush the candy canes just before layering, since crushed candy absorbs moisture and turns sticky if left out. Fold the peppermint extract into the filling a drop at a time and taste as you go; peppermint strengthens fast and can overpower the cake.
Pro Tips
Keep the jars chilled and add the candy topping at serving time. Candy left on top overnight softens into the cream and loses its crunch, which is half the charm of this dessert.
- Crush candy canes just before layering
- Add peppermint a drop at a time, tasting as you go
- Add candy topping at serving time for crunch
- Chill jars until ready to serve
Serving Suggestions
Hand the jars out as edible gifts with a small spoon tied on with ribbon, or set them on a holiday dessert table. They are a cheerful end to a Christmas dinner and a fun project for a snowy afternoon.
Variation: use chocolate mint cookies in place of cake crumbs for a deeper mint flavor, or skip the peppermint for a plain holiday jar with red and green sprinkles. For adults, a spoonful of chocolate liqueur in the cream adds warmth.
Frequently Asked Questions
Can I make red velvet cheesecake ahead of time?
Yes. Most baked versions taste better after a night in the fridge, since the flavors meld and the texture firms up. No bake versions need at least six hours to set, so making them a day ahead is ideal. Add fresh fruit or candy toppings just before serving.
Why did my cheesecake crack on top?
Cracks usually come from overbaking or cooling too fast. Bake just until the center wobbles slightly, then cool the cake slowly in the turned off oven with the door cracked. A water bath also helps, and any small cracks hide easily under ganache or frosting.
Do I need red food coloring for red velvet cheesecake?
A little food coloring gives the classic deep red color, since cocoa alone makes a brownish crumb. Gel food coloring works best because it adds strong color without thinning the batter. For a natural version, use beet powder, though the color will be softer.
Can I freeze red velvet cheesecake?
Yes, baked cheesecake freezes well for up to two months. Chill it fully, wrap it tightly in plastic wrap and foil, and thaw it overnight in the fridge. No bake versions also freeze, but their texture softens a little, so serve them well chilled.
What crust works best for red velvet cheesecake?
Chocolate cookie crumbs make a classic dark crust that frames the red filling nicely. Graham cracker crumbs give a lighter, buttery base, and crushed sandwich cookies add extra chocolate flavor. Press the crumbs firmly so the crust holds together when sliced.
The Ganache Rule
Warm cream plus good white chocolate, poured over a cold cake, gives a glossy coat every time. Hot cake melts ganache into a puddle, and cold ganache will not pour smoothly.
How do I get clean slices of cheesecake?
Chill the cake fully, then cut with a long, sharp knife dipped in hot water and wiped dry between cuts. The hot blade melts a clean path through the filling instead of dragging it. Thin slices also plate more neatly than thick wedges.
Final Thought
From a classic baked cake to no bake cups, swirl brownies, and holiday jars, these red velvet cheesecake recipes prove that one beloved flavor can fill a whole dessert table. Pick the version that fits your day, chill it well, and enjoy a slice that looks as good as it tastes.