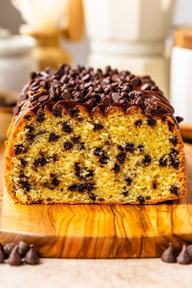

here’s something special about a homemade Chocolate Chip Cake with a soft, buttery crumb and plenty of chocolate chips in every bite. But if you’ve ever baked a cake that turned out dry, dense, or filled with chocolate chips that sank straight to the bottom, you know how frustrating it can be.
The good news? You don’t need professional baking skills or fancy equipment to make a delicious chocolate chip cake at home. With a few basic ingredients and the right mixing method, you can bake a light, tender cake that’s full of chocolate flavor.
This recipe uses butter for richness, milk for moisture, and a careful mixing method to keep the crumb soft. You’ll also learn a handy trick that may help keep the chocolate chips better distributed throughout the batter.
The entire process takes about 1 hour and 20–25 minutes, including baking and cooling. Most of that time is hands-off, so you can prepare the batter without spending hours in the kitchen.
Grab your mixing bowls, preheat your oven, and get ready to make a homemade cake that’s lovely with coffee, tea, or a scoop of vanilla ice cream.
Chocolate Chip Cake at a Glance
Bake: 30–35 minutes | Cool: 30 minutes | Servings: 9
What You’ll Need
Ingredients
- 1½ cups all-purpose flour
- 1 tablespoon extra flour for coating chips
- 1½ teaspoons baking powder
- ¼ teaspoon salt
- ½ cup unsalted butter, softened
- ¾ cup granulated sugar
- 2 large eggs, room temperature
- 2 teaspoons vanilla extract
- ½ cup whole milk, room temperature
- ¾ cup semi-sweet chocolate chips
Equipment
- 8-inch square baking pan
- Large mixing bowl
- Medium mixing bowl
- Small bowl
- Electric mixer or sturdy whisk
- Rubber spatula
- Measuring cups and spoons
- Parchment paper
- Cooling rack
- Toothpick or cake tester
Before You Start: Let the butter, eggs, and milk come to room temperature. This helps the ingredients blend into a smoother batter.
12 Steps to Homemade Chocolate Chip Cake
- Preheat Your Oven to 350°F (175°C)
- Prepare an 8-Inch Baking Pan
- Whisk Together the Dry Ingredients
- Cream the Butter and Sugar Until Fluffy
- Beat the Eggs Into the Butter Mixture
- Mix in the Vanilla Extract
- Combine the Dry Ingredients With the Milk Mixture
- Coat the Chocolate Chips With Flour
- Fold the Chocolate Chips Into the Cake Batter
- Spread the Batter Evenly Into the Baking Pan
- Bake the Chocolate Chip Cake Until Golden
- Cool the Cake Before Slicing and Serving
Follow each step in order for the best results.
Preheat Your Oven to 350°F (175°C)
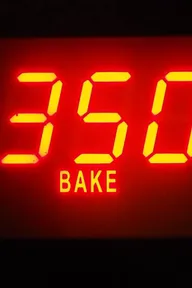
Set your oven to 350°F (175°C) and allow it to heat fully before baking. A properly preheated oven helps the cake rise evenly and develop a soft, tender crumb.
If your oven has a preheat indicator, wait until it signals that the temperature has been reached.
Use the center oven rack for more even heat circulation. Avoid putting the cake into a cold oven, as the slower temperature rise may affect its texture.
Prepare an 8-Inch Baking Pan
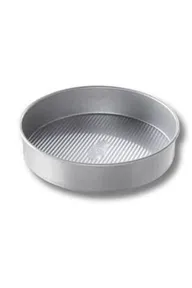
An 8-inch square baking pan works well for this recipe and makes 9 generous slices.
Line the bottom and two opposite sides with parchment paper, leaving a little overhang so you can lift the cake out later. Lightly grease the exposed sides with butter or baking spray.
Make sure the parchment sits flat against the bottom of the pan. Wrinkled paper can leave uneven marks on the cake.
This preparation helps prevent sticking and makes removing the finished cake much easier.
Whisk Together the Dry Ingredients
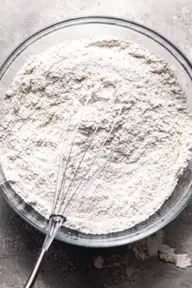
In a medium mixing bowl, add 1½ cups all-purpose flour, 1½ teaspoons baking powder, and ¼ teaspoon salt.
Use a whisk to mix everything for about 30 seconds, until the baking powder and salt are evenly distributed throughout the flour.
This step matters because unevenly mixed baking powder can cause some areas of the cake to rise more than others.
Use the spoon-and-level method when measuring flour. Scooping directly with the measuring cup can pack in too much flour and produce a dry cake.
Keep the extra 1 tablespoon flour separate for coating the chocolate chips later.
Cream the Butter and Sugar Until Fluffy
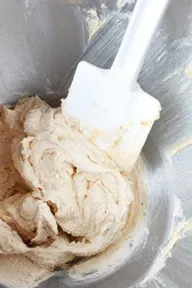
Place ½ cup (113 g) softened unsalted butter and ¾ cup (150 g) granulated sugar in a large mixing bowl.
Beat with an electric mixer on medium speed for 3–4 minutes, until the mixture becomes pale, light, and fluffy. Scrape down the sides of the bowl halfway through so everything mixes evenly.
This step creates tiny air pockets that help the cake rise and develop a soft texture. The butter should be soft enough to press with your finger but not melted.
Pro Tip: Get the Butter Temperature Right
Butter that is too cold will not cream properly, while melted butter cannot hold enough air for a fluffy cake. Leave refrigerated butter at room temperature for about 30–60 minutes, depending on your kitchen temperature.
Beat the Eggs Into the Butter Mixture

Add 2 large room-temperature eggs, one at a time, to the creamed butter and sugar.
Beat on medium-low speed for about 20–30 seconds after each egg, until it blends into the mixture.
Adding eggs gradually helps the batter stay smooth and prevents the fat and liquid from separating.
If the mixture looks slightly curdled, don’t panic. This can happen when the ingredients are at different temperatures. It often comes together once the flour is added.
Mix in the Vanilla Extract

Pour 2 teaspoons vanilla extract into the butter, sugar, and egg mixture.
Beat on low speed for 10–15 seconds, until the vanilla is evenly incorporated.
Vanilla adds a warm, sweet aroma that complements the chocolate chips and rich buttery flavor.
Pure vanilla extract offers a fuller flavor, but imitation vanilla works if that’s what you have available.
Combine the Dry Ingredients With the Milk Mixture
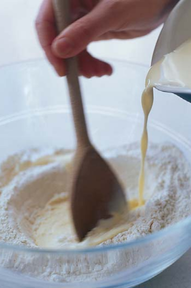
With your mixer on low speed, gradually add the prepared dry ingredients to the butter mixture, alternating with ½ cup (120 ml) room-temperature whole milk.
Start with one-third of the flour mixture, followed by half the milk. Repeat this pattern, finishing with the remaining flour.
Mix until the batter looks smooth and no large streaks of dry flour remain. The batter should be thick, creamy, and easy to spread.
Avoid overmixing, as this can develop too much gluten and make your cake dense rather than soft
Heads Up: Avoid Overmixing the Cake Batter
Once the flour is added, excessive mixing can make the cake tough and dense. Keep your mixer on low speed and stop as soon as the ingredients are combined. A few tiny lumps are perfectly fine.
Coat the Chocolate Chips With Flour
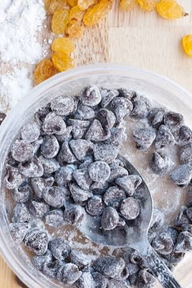
Place ¾ cup (130 g) semi-sweet chocolate chips in a small bowl and sprinkle with 1 tablespoon all-purpose flour.
Toss gently with a spoon until the chocolate chips have a thin, even coating of flour.
This light coating may help the chips stay better distributed throughout the cake instead of collecting at the bottom, although batter thickness and chip size matter more.
Mini chocolate chips are another good option because their smaller size makes them less likely to sink. Avoid adding too much extra flour, which can affect the cake’s texture.
Fold the Chocolate Chips Into the Cake Batter
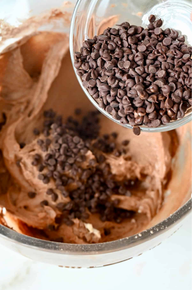
The cake batter should be thick enough to hold the chocolate chips without letting them sink immediately.
Add the flour-coated chocolate chips to the bowl and use a rubber spatula to fold them into the batter.
Gently scoop the spatula underneath the mixture and lift the batter over the chocolate chips. Repeat for about 8–12 folds, or until the chips are evenly distributed.
Avoid vigorous stirring, which can knock out some of the air incorporated during creaming.
The finished batter should look creamy, with chocolate chips scattered throughout.
Spread the Batter Evenly Into the Baking Pan

Pour the prepared chocolate chip cake batter into your lined 8-inch square baking pan.
Use a rubber spatula to spread the batter evenly, paying special attention to the corners. Smooth the surface gently so the cake bakes at a consistent thickness.
The batter should be thick but spreadable, with chocolate chips visible throughout.
Avoid pressing down too firmly with the spatula, as this can remove some of the air that helps the cake rise.
Bake the Chocolate Chip Cake Until Golden
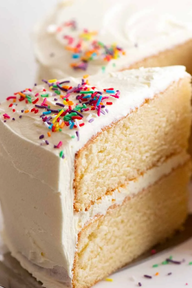
Place the baking pan on the center rack of your preheated 350°F (175°C) oven.
Bake for 30–35 minutes, or until the top looks lightly golden and the center feels set.
Start checking around 30 minutes by inserting a toothpick into the center of the cake. It should come out clean or with a few moist crumbs. If you hit melted chocolate, test another spot.
If wet batter sticks to the toothpick, continue baking for 3–5 minutes before checking again.
Avoid opening the oven repeatedly during the first 25 minutes, as sudden temperature changes can affect the cake’s rise.
Cool the Cake Before Slicing and Serving
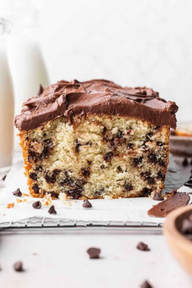
Let the freshly baked cake cool in its pan for 10–15 minutes. This allows the soft crumb to firm up, making the cake less likely to break when removed.
Carefully lift the cake out using the parchment paper overhang and place it on a wire cooling rack.
Allow it to cool for another 15–20 minutes before cutting it into 9 squares.
The chocolate chips may still be slightly melted, giving each slice delicious pockets of chocolate. Serve warm or at room temperature with coffee, tea, or vanilla ice cream.
Chocolate Chip Cake Troubleshooting
Common baking problems and how to prevent them.
| If This Happens | Try This |
|---|---|
| Cake turns out dry | Measure flour using the spoon-and-level method. Start checking for doneness at 30 minutes and remove the cake when a toothpick shows a few moist crumbs. |
| Chocolate chips sink | Use mini chocolate chips or a thicker batter. Lightly coating chips with flour may help, but it cannot guarantee they will stay suspended. |
| Cake feels dense or heavy | Cream softened butter and sugar for 3–4 minutes. Avoid overmixing after adding flour, and check that your baking powder is fresh. |
| Center stays underbaked | Check the oven temperature and use the correct pan size. Continue baking in 3–5 minute intervals until the center is set and a toothpick has no wet batter. |
| Cake rises unevenly | Place the pan on the center oven rack. Spread the batter evenly, distribute the baking powder thoroughly, and avoid opening the oven door early. |
Baking Reminder: Oven temperatures can vary. Check the center of the cake rather than relying on baking time alone.
Chocolate Chip Cake FAQs
1. How do I keep chocolate chips from sinking to the bottom?
Use a thick cake batter and consider mini chocolate chips, which are lighter than regular chips. Tossing the chips in a little flour may help, but batter consistency plays the biggest role in keeping them distributed.
2. Can I use milk chocolate chips instead of semi-sweet?
Yes! Milk chocolate chips make the cake sweeter, while dark chocolate chips create a richer flavor. You can also mix different types of chocolate chips while keeping the total amount at ¾ cup.
3. How should I store homemade chocolate chip cake?
Store the completely cooled cake in an airtight container at room temperature for up to 2–3 days in a cool, dry kitchen. For longer storage, refrigerate it for up to 5 days. Keep it tightly covered to prevent drying.
4. Can I freeze chocolate chip cake?
Yes. Wrap cooled cake slices individually in plastic wrap and place them in a freezer-safe container. Freeze for up to 3 months for best quality. Thaw wrapped slices at room temperature before serving.
5. Can I make chocolate chip cake without an electric mixer?
Yes. Use a sturdy whisk or wooden spoon to cream the softened butter and sugar until noticeably lighter and fluffy. This takes more effort than an electric mixer, but it is possible to make the batter by hand.
6. Why is my chocolate chip cake not fluffy?
Too much flour, old baking powder, or excessive mixing can produce a dense cake. Measure ingredients accurately, cream the butter and sugar thoroughly, and stop mixing once the flour is incorporated.
Chocolate Chip Cake
A soft, buttery homemade cake filled with delicious chocolate chips.
Ingredients
- 1½ cups all-purpose flour
- 1 tablespoon extra flour for coating chips
- 1½ teaspoons baking powder
- ¼ teaspoon salt
- ½ cup unsalted butter, softened
- ¾ cup granulated sugar
- 2 large eggs, room temperature
- 2 teaspoons vanilla extract
- ½ cup whole milk, room temperature
- ¾ cup semi-sweet chocolate chips
12 Quick Baking Steps
- Preheat: Set oven to 350°F (175°C).
- Prepare: Line and grease an 8-inch square baking pan.
- Whisk: Combine 1½ cups flour, baking powder, and salt.
- Cream: Beat butter and sugar for 3–4 minutes until fluffy.
- Add eggs: Beat in one at a time until incorporated.
- Add vanilla: Mix until evenly combined.
- Combine: Alternate the dry ingredients with milk, mixing gently.
- Coat: Toss chocolate chips with 1 tablespoon flour.
- Fold: Gently incorporate chocolate chips into the batter.
- Spread: Transfer batter into the prepared pan and level the top.
- Bake: Bake for 30–35 minutes, until a toothpick shows no wet batter.
- Cool: Rest in pan for 10–15 minutes, then cool on a rack for another 15–20 minutes before slicing.
Use room-temperature ingredients, avoid overmixing once flour is added, and check the cake early to prevent overbaking. Mini chocolate chips can help create a more even chocolate distribution.
Store covered at room temperature for 2–3 days in a cool kitchen, or freeze individual slices for up to 3 months.
CONCLUSION
A homemade Chocolate Chip Cake is a lovely treat for birthdays, afternoon snacks, or whenever you’re craving something sweet.
With its buttery crumb and chocolate chips in every bite, this recipe brings bakery-style comfort straight to your kitchen.
Enjoy a slice while it’s slightly warm, or add a dusting of powdered sugar for a pretty finishing touch.
Love this recipe? Save it to your Pinterest baking board so you can make it again whenever the craving hits!