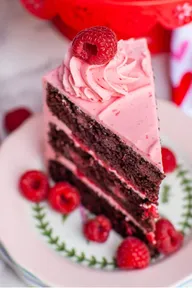

A rich chocolate cake with a fresh raspberry filling is one of those desserts that looks impressive but doesn’t require professional baking skills. This homemade chocolate raspberry cake brings together soft, moist chocolate layers, a sweet-tart raspberry filling, and smooth chocolate buttercream. Every bite has deep chocolate flavor balanced by the bright taste of raspberries.
The biggest challenge for beginners is keeping the cake moist while making sure the raspberry filling stays between the layers. A few small details make a big difference. Using oil in the batter helps the cake stay tender, while hot coffee brings out the cocoa flavor without making the cake taste like coffee. Cooking the raspberries into a thick filling also helps prevent them from soaking into the cake.
This recipe uses basic baking ingredients and two 8-inch round cake pans. You don’t need special decorating skills, and I’ll explain what the batter, filling, and frosting should look like at each stage.
Plan for about 2 hours and 45 minutes, including baking, cooling, assembling, and chilling. Much of that time is hands-off.
Makes 12 slices | Two 8-inch cake layers
What You Need
Gather your ingredients and baking tools before starting.
Chocolate Cake
- 1¾ cups (220 g) all-purpose flour
- 1¾ cups (350 g) granulated sugar
- ¾ cup (65 g) unsweetened cocoa powder
- 1½ tsp baking powder
- 1½ tsp baking soda
- 1 tsp fine salt
- 2 large eggs
- 1 cup (240 ml) buttermilk
- ½ cup (120 ml) vegetable oil
- 2 tsp vanilla extract
- 1 cup (240 ml) hot brewed coffee
Raspberry Filling
- 2 cups (250 g) fresh or frozen raspberries
- ⅓ cup (65 g) granulated sugar
- 1 tbsp fresh lemon juice
- 1½ tbsp cornstarch
- 2 tbsp cold water
Chocolate Buttercream
- 1 cup (227 g) unsalted butter, softened
- 3 cups (360 g) powdered sugar
- ½ cup (45 g) unsweetened cocoa powder
- 3–4 tbsp milk or heavy cream
- 1 tsp vanilla extract
- Pinch of salt
Decoration
- 1 cup fresh raspberries
- Butter or baking spray for greasing pans
Equipment
- Two 8-inch round cake pans, at least 2 inches deep
- Parchment paper
- Large and medium mixing bowls
- Whisk and rubber spatula
- Measuring cups and spoons or kitchen scale
- Electric hand mixer or stand mixer
- Medium saucepan and spoon
- Wire cooling rack
- Toothpick or cake tester
- Oven mitts
- Offset spatula or butter knife
- Piping bag or zip-top bag
- Cake stand or serving plate
Chocolate Raspberry Cake at a Glance
Follow these 19 steps in order for a moist, neatly layered cake.
- Preheat the oven to 350°F.
- Prepare two 8-inch cake pans.
- Whisk the dry ingredients.
- Mix the wet ingredients.
- Combine the wet and dry ingredients.
- Stir hot coffee into the batter.
- Divide the batter between the pans.
- Bake for 30–35 minutes.
- Cool the cake layers completely.
- Cook the raspberry filling.
- Cool the raspberry filling.
- Beat the chocolate buttercream.
- Place the first cake layer.
- Pipe a buttercream border.
- Spread the raspberry filling.
- Position the second cake layer.
- Frost the cake with buttercream.
- Decorate with fresh raspberries.
- Chill until the frosting sets.
Baking tip: Let the layers and filling cool before assembling to prevent melting frosting.
Chocolate Raspberry Cake at a Glance
Follow these 19 steps in order for a moist, neatly layered cake.
- Preheat the oven to 350°F.
- Prepare two 8-inch cake pans.
- Whisk the dry ingredients.
- Mix the wet ingredients.
- Combine the wet and dry ingredients.
- Stir hot coffee into the batter.
- Divide the batter between the pans.
- Bake for 30–35 minutes.
- Cool the cake layers completely.
- Cook the raspberry filling.
- Cool the raspberry filling.
- Beat the chocolate buttercream.
- Place the first cake layer.
- Pipe a buttercream border.
- Spread the raspberry filling.
- Position the second cake layer.
- Frost the cake with buttercream.
- Decorate with fresh raspberries.
- Chill until the frosting sets.
Baking tip: Let the layers and filling cool before assembling to prevent melting frosting.
Preheat the Oven to 350°F (175°C)
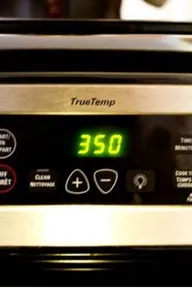
A fully heated oven helps the chocolate cake rise evenly and develop a soft, tender crumb. Set an oven rack in the middle position and preheat the oven to 350°F (175°C), using the regular bake setting rather than convection.
Allow approximately 15–20 minutes for preheating, depending on your oven. The oven should reach the correct temperature before the filled cake pans go inside. Baking in an oven that is still heating can cause uneven rising and a dense center.
Prepare Two 8-Inch Round Cake Pans
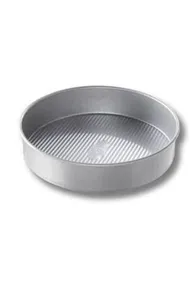
Use two 8-inch round cake pans that are at least 2 inches deep. Lightly grease the bottoms and sides with butter or baking spray. Cut two parchment paper circles to fit the bottoms, then press one into each pan.
The parchment paper helps the baked cakes release without tearing. Be sure the paper lies flat, especially around the edges. Properly prepared pans make it much easier to remove the soft chocolate layers after baking without damaging their shape.
Whisk the Dry Cake Ingredients Together
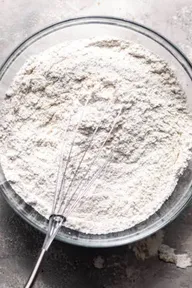
In a large mixing bowl, combine 1¾ cups all-purpose flour, 1¾ cups granulated sugar, ¾ cup unsweetened cocoa powder, 1½ teaspoons baking powder, 1½ teaspoons baking soda, and 1 teaspoon fine salt.
Use a whisk to blend everything for about 45–60 seconds, until the mixture has a consistent color and no large cocoa lumps remain.
This step helps distribute the raising agents evenly through the flour. Break up any visible cocoa clumps with the whisk so they don’t leave bitter, dry pockets in the finished cake. The mixture should look light, powdery, and evenly chocolate-colored.
Mix the Wet Cake Ingredients Until Smooth
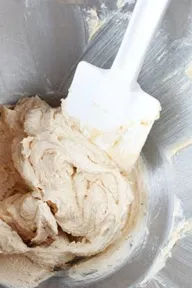
In a separate medium mixing bowl, add 2 large eggs, 1 cup (240 ml) buttermilk, ½ cup (120 ml) vegetable oil, and 2 teaspoons vanilla extract.
Whisk everything together for about 45–60 seconds, until the eggs are fully blended and the mixture looks smooth and slightly creamy.
Make sure the eggs and buttermilk are at room temperature before mixing. Cold ingredients can make the batter harder to blend evenly. The oil helps keep the chocolate cake soft and moist, even after refrigeration.
Combine the Wet and Dry Ingredients
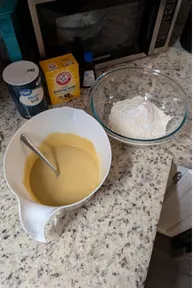
Pour the wet ingredient mixture into the large bowl containing the dry ingredients. Using a whisk or electric hand mixer on low speed, mix for approximately 30–45 seconds, until the flour is incorporated and no large dry patches remain.
The batter should look thick, smooth, and chocolate-colored at this stage. A few tiny lumps are fine, so avoid mixing longer than necessary.
Overmixing can develop too much gluten in the flour, leaving the finished cake dense or chewy instead of soft and tender.
Stir Hot Coffee Into the Chocolate Batter
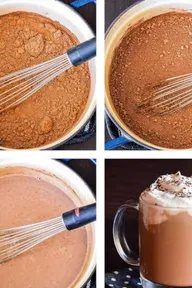
Slowly pour 1 cup (240 ml) hot brewed coffee into the chocolate batter while stirring gently with a whisk. Use hot coffee that is no longer boiling to avoid splashing or overheating the mixture.
Continue stirring for about 30–45 seconds, until the coffee is fully incorporated.
The batter will become noticeably thinner and more pourable. This is completely normal. Hot coffee helps bring out the rich cocoa flavor and produces a deeper chocolate taste without making the cake taste strongly of coffee.
Hot coffee enhances the natural flavor of cocoa powder, making your chocolate raspberry cake taste richer. If you prefer a cake without coffee, replace it with the same amount of hot water. The batter should be thin and pourable after mixing, so avoid adding extra flour to thicken it.
Divide the Batter Evenly Between the Cake Pans

Pour the prepared chocolate batter into the two greased and parchment-lined 8-inch round cake pans, dividing it as evenly as possible.
Each pan should contain approximately half of the batter. For greater accuracy, use a kitchen scale to check that both pans hold similar amounts.
The batter will be thin, so it should spread naturally across the bottom. If needed, gently tilt each pan to level the surface. Evenly filled pans help both cake layers bake at the same rate and produce a balanced, attractive layered cake.
Bake the Chocolate Cake Layers for 30–35 Minutes
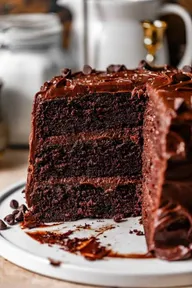
Place both cake pans on the middle oven rack, leaving a little space between them for proper air circulation.
Bake at 350°F (175°C) for approximately 30–35 minutes. Begin checking at 30 minutes by inserting a toothpick into the center of each cake.
The cakes are ready when the toothpick comes out clean or with a few moist crumbs. Wet batter means they need another 2–3 minutes before checking again.
The tops should look set and spring back gently when touched. Avoid baking longer than necessary because overbaking can dry out the chocolate layers.
HEADS UP: Avoid Overbaking
Chocolate cake can become dry if left in the oven too long. Start checking at 30 minutes. A toothpick with a few moist crumbs is fine, but it should not have wet batter on it. Use oven mitts when handling hot pans, and avoid opening the oven repeatedly during the first 25 minutes of baking.
Cool the Cake Layers Completely
Let the baked cakes rest in their pans for 10–15 minutes. This gives the delicate chocolate layers time to firm up before removal.
Carefully run a thin knife around the edges, turn each cake onto a wire cooling rack, and gently peel away the parchment paper.
Allow the layers to cool for another 45–60 minutes, or until they reach room temperature. Do not frost warm cake because the buttercream can melt and slide off.
If your kitchen is warm, refrigerate the cooled layers for 15–20 minutes before assembling. Slightly chilled cake layers are easier to handle and less likely to crumble.
Cook the Raspberry Filling Until Thickened
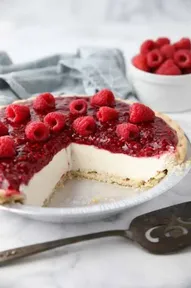
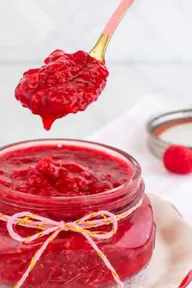
In a medium saucepan, combine 2 cups (250 g) fresh or frozen raspberries, ⅓ cup (65 g) granulated sugar, and 1 tablespoon fresh lemon juice. Cook over medium heat for 4–5 minutes, stirring occasionally until the raspberries release their juices and begin to break down.
In a small bowl, dissolve 1½ tablespoons cornstarch in 2 tablespoons cold water. Stir this mixture into the warm raspberries and continue cooking for another 1–2 minutes, until thick and glossy.
The filling should coat the back of a spoon without running off quickly. Avoid overcooking, as the mixture will thicken further as it cools.
Cool the Raspberry Filling Completely
Transfer the cooked raspberry filling into a shallow, heat-safe bowl. Spread it into an even layer to help release heat more quickly.
Allow the filling to cool at room temperature for approximately 30–45 minutes, stirring occasionally to prevent a thick skin from forming on the surface.
The filling should feel cool and have a thick, jam-like consistency before you use it between the cake layers.
If it still feels warm, place it in the refrigerator for 15–20 minutes. Warm filling can soften the buttercream border and cause the cake layers to slide during assembly.
Beat the Chocolate Buttercream Until Fluffy
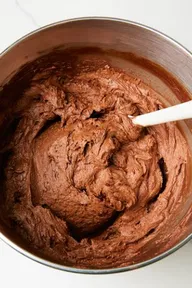
Place 1 cup (227 g) softened unsalted butter in a large mixing bowl. Beat with an electric mixer for 2 minutes, until pale and creamy.
Add 3 cups (360 g) powdered sugar and ½ cup (45 g) unsweetened cocoa powder gradually, mixing on low speed. Pour in 3 tablespoons milk or heavy cream, 1 teaspoon vanilla extract, and a pinch of salt.
Increase the mixer speed to medium and beat for another 2–3 minutes, until light and fluffy.
If the frosting feels too thick to spread, mix in the remaining 1 tablespoon milk or cream. It should hold its shape while spreading smoothly.
Place the First Chocolate Cake Layer on a Serving Plate
Choose a sturdy cake stand or flat serving plate that is slightly wider than your 8-inch chocolate cake layers.
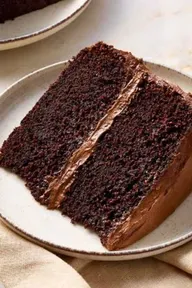
Place the first completely cooled cake layer in the center, with its flattest side facing upward. This creates a stable surface for the raspberry filling.
If the cake has a slightly rounded top, you can position that side facing downward for better balance.
Make sure the layer sits evenly and does not wobble. A stable base helps prevent the finished cake from leaning or sliding during assembly.
Pipe a Chocolate Buttercream Border Around the Cake Layer
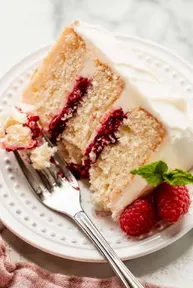
Transfer approximately ½ cup chocolate buttercream into a piping bag fitted with a large round tip. If you don’t have a piping bag, use a sturdy zip-top bag with one corner snipped off.
Pipe a continuous buttercream border around the outer edge of the first cake layer, approximately ½ inch (1.3 cm) high.
Keep the border thick and even, with no visible gaps.
This buttercream ring acts as a barrier, keeping the raspberry filling inside the cake rather than allowing it to leak down the sides.
Spread the Raspberry Filling Inside the Border
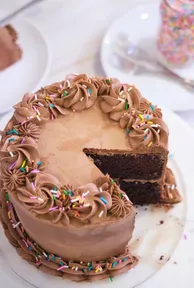
Spoon the completely cooled raspberry filling into the center of the chocolate cake layer, keeping it inside the buttercream border.
Using the back of a spoon or a small offset spatula, gently spread the filling into an even layer, approximately ¼ inch (6 mm) thick. Avoid pressing too hard against the buttercream ring.
The filling should look thick, glossy, and evenly distributed.
If you have more filling than the border can hold, reserve the extra for serving. Overfilling can cause the cake layers to slide or the raspberry mixture to spill out.
Position the Second Chocolate Cake Layer on Top
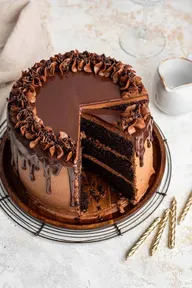
Carefully lift the second completely cooled chocolate cake layer and position it directly over the raspberry filling, with its flattest side facing downward.
Lower the cake gently, making sure the edges line up with the bottom layer. Avoid pressing down firmly, as this can push the raspberry filling through the buttercream border.
Check the cake from the side to make sure both layers are level. If the top layer appears uneven, carefully adjust its position before frosting.
A properly aligned cake will be easier to decorate and slice neatly.
Frost the Cake with Chocolate Buttercream
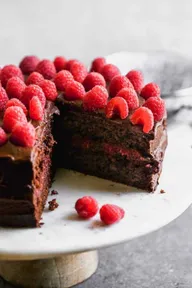
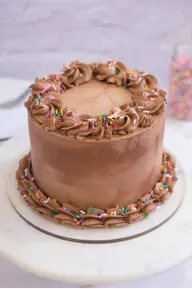
Using an offset spatula or butter knife, spread a thin layer of chocolate buttercream over the top and sides of the assembled cake. This first coating catches loose crumbs.
Apply the remaining frosting over the cake, spreading it into an even layer approximately ¼ inch (6 mm) thick, or as thick as your remaining buttercream allows.
Use gentle, sweeping motions to smooth the sides and top without pressing into the soft cake layers.
For a homemade bakery-style finish, leave subtle swirls in the frosting rather than trying to make every surface perfectly smooth.
Decorate the Chocolate Raspberry Cake with Fresh Raspberries
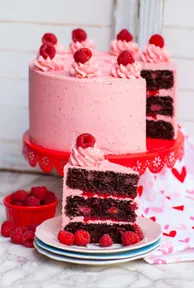
Arrange approximately 1 cup of fresh raspberries over the frosted chocolate cake, focusing on the outer edge or creating a small cluster in the center.
Gently press each raspberry into the buttercream so it stays in place without sinking into the frosting.
Choose firm, dry raspberries for decoration. Wet berries can release moisture and leave red streaks across the chocolate buttercream.
Carefully place the decorated chocolate raspberry cake in the refrigerator for 20–30 minutes, allowing the chocolate buttercream to firm up and the raspberry filling to settle between the layers.
For an attractive finish, vary the placement slightly rather than packing the berries too tightly. The bright red raspberries create a beautiful contrast against the rich chocolate frosting.
Chill the Assembled Cake Until the Frosting Sets
Keep the cake on a flat, stable shelf to prevent it from tilting or shifting during chilling.
The frosting should feel slightly firm to the touch without becoming completely hard. This helps the cake maintain its shape and makes slicing easier.
For the best flavor and texture, remove the cake from the refrigerator 20–30 minutes before serving. Letting it warm slightly softens the buttercream and brings out the rich chocolate and raspberry flavors.
Chocolate Raspberry Cake Troubleshooting Guide
Having trouble with your cake? Use these fixes to get better results.
| If This Happens | Try This |
|---|---|
| Cake turns out dry | Check the cake at 30 minutes. Remove it when a toothpick comes out with a few moist crumbs. Measure flour accurately to avoid using too much. |
| Cake sinks in the middle | Check that the baking powder and baking soda are fresh. Avoid opening the oven during the first 25 minutes. Make sure the center is fully baked before removing the cake. |
| Raspberry filling is runny | Return the filling to the saucepan and simmer until thick. If necessary, stir in a small additional slurry of cornstarch and cold water, then cook briefly to activate it. Cool completely. |
| Buttercream is too thick | Beat in milk or cream, 1 teaspoon at a time, until the frosting spreads smoothly without losing its shape. |
| Buttercream is too soft | Refrigerate the frosting for 10–15 minutes, then beat briefly. Add a little powdered sugar if it still cannot hold a piped border. |
| Filling leaks between layers | Use fully cooled, thick raspberry filling. Pipe a continuous buttercream border and keep the filling below its height. Avoid overfilling. |
| Cake layers break during assembly | Cool the layers completely before moving them. Chill them for 15–20 minutes if they feel fragile, and use a wide spatula or cake lifter for support. |
Baker’s reminder: Cool the cake layers and raspberry filling completely before assembling. Warm components are a common cause of slipping and melting frosting.
Chocolate Raspberry Cake FAQs
1. Can I use frozen raspberries instead of fresh?
Yes. Frozen raspberries work well for the filling and do not need to be thawed first. They may need a few extra minutes of cooking to evaporate excess moisture. Use fresh raspberries for decorating whenever possible.
2. Can I make chocolate raspberry cake without coffee?
Yes. Replace the 1 cup of hot brewed coffee with 1 cup of hot water. Coffee enhances the cocoa flavor, but hot water still produces a moist chocolate cake with a rich taste.
3. Can I make this cake ahead of time?
Yes. Bake the chocolate cake layers one day ahead and wrap them tightly after cooling. Refrigerate the raspberry filling separately in an airtight container for up to 2 days. Assemble the cake when both components are cool.
4. How do I store leftover chocolate raspberry cake?
Store leftover cake in an airtight container in the refrigerator for up to 3–4 days. Let individual slices sit at room temperature for about 20 minutes before serving for softer frosting and better flavor.
5. Can I freeze the chocolate cake layers?
Yes. Wrap completely cooled, unfrosted cake layers tightly in plastic wrap, followed by a layer of foil. Freeze for up to 2 months for the best quality. Thaw them wrapped in the refrigerator before assembling.
6. Why is my chocolate cake batter so thin?
The batter becomes thin after adding hot coffee or water. This is expected with this recipe. Do not add extra flour, as that can make the finished chocolate cake dry and dense.
Chocolate Raspberry Cake
Moist chocolate cake layers with homemade raspberry filling and creamy chocolate buttercream.
What You Need
Chocolate Cake
- 1¾ cups all-purpose flour
- 1¾ cups granulated sugar
- ¾ cup unsweetened cocoa powder
- 1½ tsp baking powder
- 1½ tsp baking soda
- 1 tsp fine salt
- 2 large eggs
- 1 cup buttermilk
- ½ cup vegetable oil
- 2 tsp vanilla extract
- 1 cup hot brewed coffee
Raspberry Filling
- 2 cups raspberries
- ⅓ cup granulated sugar
- 1 tbsp lemon juice
- 1½ tbsp cornstarch
- 2 tbsp cold water
Chocolate Buttercream
- 1 cup unsalted butter
- 3 cups powdered sugar
- ½ cup cocoa powder
- 3–4 tbsp milk or cream
- 1 tsp vanilla extract
- Pinch of salt
Decoration
- 1 cup fresh raspberries
- Butter or baking spray for pans
Equipment
- Two 8-inch round cake pans
- Parchment paper
- Mixing bowls and whisk
- Electric mixer
- Saucepan and spoon
- Measuring tools
- Wire cooling rack
- Toothpick and oven mitts
- Spatula and piping bag
- Serving plate or cake stand
Quick Instructions
- Preheat oven to 350°F (175°C).
- Grease and line two 8-inch cake pans.
- Whisk all dry cake ingredients.
- Mix eggs, buttermilk, oil, and vanilla.
- Combine wet and dry mixtures.
- Stir in hot brewed coffee.
- Divide batter evenly between pans.
- Bake for 30–35 minutes.
- Cool cake layers completely.
- Cook raspberry filling until thick.
- Cool raspberry filling completely.
- Beat chocolate buttercream until fluffy.
- Place the first cake layer on a serving plate.
- Pipe a buttercream border around the edge.
- Spread raspberry filling inside the border.
- Position the second cake layer on top.
- Frost the top and sides with buttercream.
- Decorate with fresh raspberries.
- Chill for 20–30 minutes before serving.
Baker’s Notes
For moist cake, avoid overbaking. Use completely cooled cake layers and thick raspberry filling. Remove the finished cake from the refrigerator 20–30 minutes before serving for the best texture.
Save this recipe for your next special occasion.
CONCLUSION
You’ve made a beautiful homemade chocolate raspberry cake with soft chocolate layers, a rich buttercream frosting, and a sweet-tart raspberry center.
The combination of deep chocolate flavor and fresh raspberries makes this cake a lovely choice for birthdays, holidays, or weekend baking.
Serve each slice slightly cool or at room temperature, and enjoy the tender cake with its creamy chocolate frosting.