
Mini Lunchbox Pizzas sound like a safe bet until you open the container and find damp crusts, loose toppings, and cheese stuck to the lid. The trouble is rarely the recipe. Too much sauce and packing the pizzas while warm are usually to blame.
This method makes 6 small pizzas with crisp edges, melted cheese, and toppings that stay in place. Mini naan rounds work well because they are firm enough to hold sauce without bending. Mini pita breads or split English muffins also work, though their texture will be a little different.
You will use a thin layer of sauce, low-moisture mozzarella, and finely cut toppings. Smaller pieces cook at the same rate and are less likely to slide off when the pizzas are picked up. The finished pizzas need 8–10 minutes to cool before packing. That cooling time lets steam escape instead of collecting inside the lunchbox.
Set aside about 30 minutes from start to finish. The hands-on work takes around 12 minutes, so this recipe fits into a busy evening or school-morning prep session.
What You Need
Ingredients
- 6 mini naan rounds, about 3 inches wide
- ⅓ cup thick pizza sauce
- 1 cup shredded low-moisture mozzarella
- Up to ¼ cup finely cut toppings
- Dried oregano, optional
Tools
- Large baking sheet
- Parchment paper
- Measuring cups
- Teaspoon or small spoon
- Wire cooling rack
- Lunch container and frozen ice pack
Base swap: Use mini pita breads or split English muffins when mini naan is not available. Pick pieces close to the same size so they bake evenly.
At a Glance
- Preheat the oven to 400°F.
- Line a baking sheet with parchment paper.
- Arrange the mini pizza bases in one layer.
- Spread a thin layer of pizza sauce.
- Sprinkle each pizza with shredded cheese.
- Add small, lunchbox-friendly toppings.
- Bake the Mini Lunchbox Pizzas until crisp.
- Cool the pizzas completely on a wire rack.
- Pack the pizzas in a chilled lunchbox.
Preheat the oven to 400°F
A fully heated oven firms the bottoms before the sauce has time to soak into the bread. Allow about 10–15 minutes for preheating, even if the oven signals that it is ready sooner. Keep the baking rack in the center position for balanced heat. An oven that is still warming may leave the naan pale and soft underneath.
Line a baking sheet with parchment paper
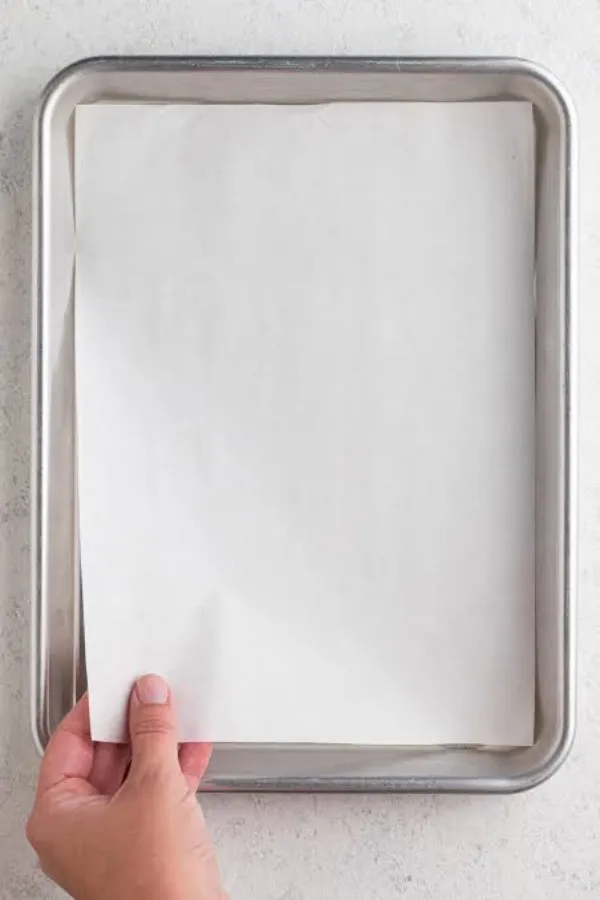
Cover the flat surface of a large baking sheet, keeping the paper away from the oven walls and heating elements. Parchment stops melted cheese from bonding to the pan and makes the pizzas easier to lift after baking. If parchment is not available, coat the pan with a very thin layer of cooking spray. Skip wax paper because its coating is not made for oven heat.
Arrange the mini pizza bases in one layer
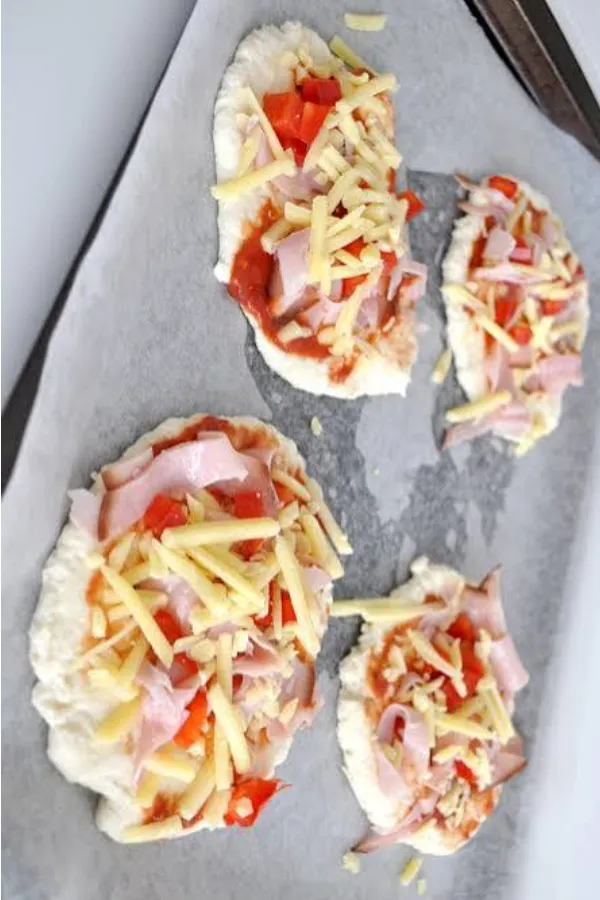
Place all 6 mini naan rounds flat on the prepared sheet with about 1 inch of space between them. Keep every base fully inside the pan rather than hanging over an edge. The open space allows hot air to move around each pizza, which helps the sides brown. Use bases of similar thickness so none finish long before the others.
Spread a thin layer of pizza sauce
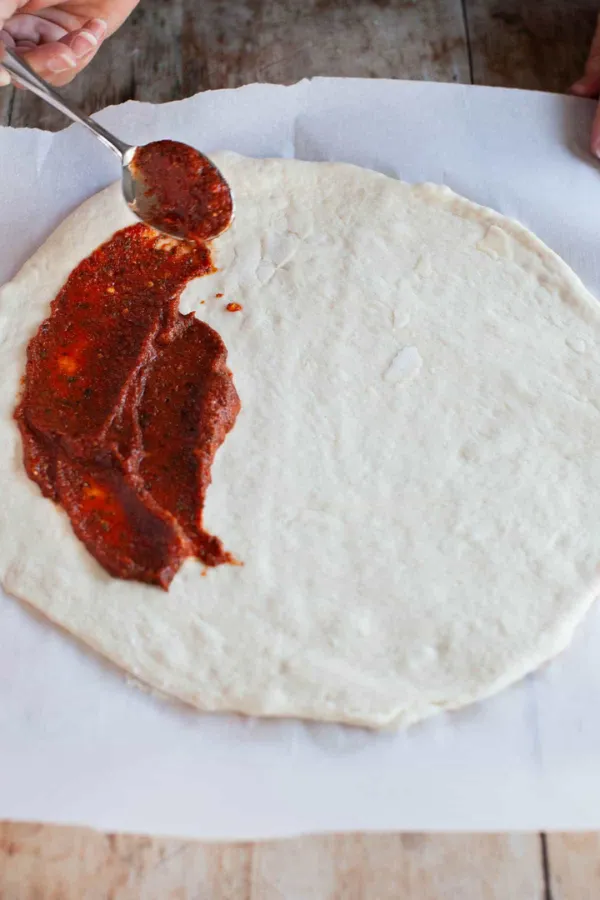
Spoon 2 teaspoons of thick pizza sauce onto the center of each base. Push it outward with the back of the spoon, leaving a ¼-inch border around the edge. The bare rim gives the pizza a crisp place to hold and keeps sauce from running onto the pan. Stay below 1 tablespoon per pizza; extra sauce is the main cause of a wet lunchbox crust.
Sprinkle each pizza with shredded cheese
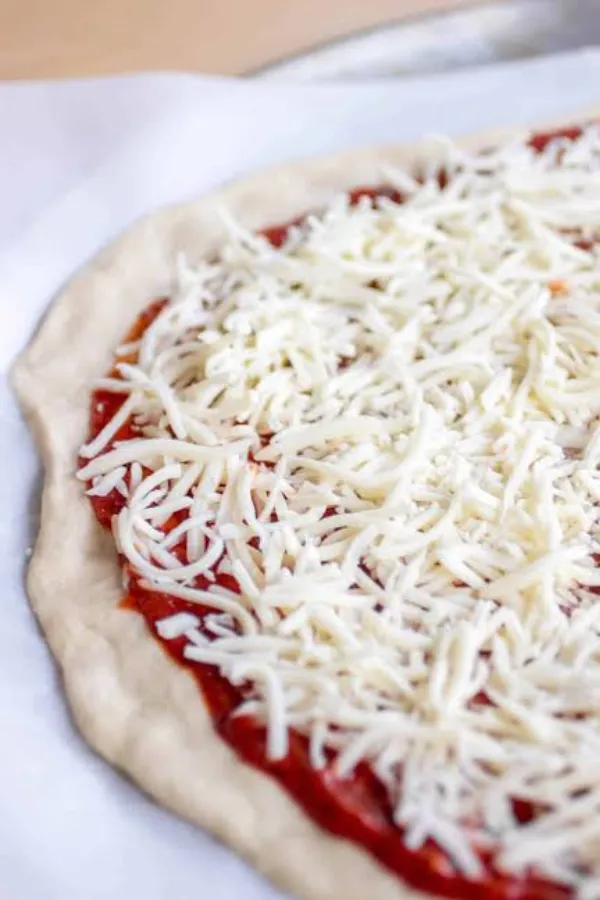
A loose 2½-tablespoon layer of low-moisture mozzarella is enough for each pizza. Cover most of the sauce, but keep the cheese inside the uncovered rim so it does not melt onto the parchment. Low-moisture cheese releases less water than fresh mozzarella. Break up large clumps with your fingers so the cheese melts at the same rate across the surface.
Add small, lunchbox-friendly toppings
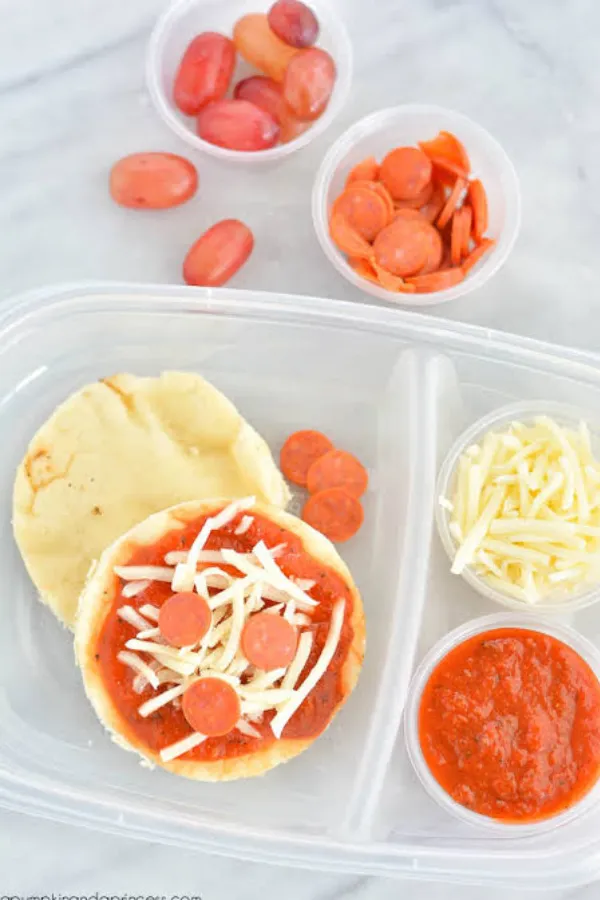
Choose no more than 2 or 3 toppings and cut each piece smaller than ½ inch. Good choices include diced bell pepper, sliced olives, sweetcorn, cooked chicken, or mini pepperoni. Use about 2 teaspoons of toppings per pizza so the center does not become heavy.
Press loose pieces lightly into the cheese. Cook raw meat before using it, and pat wet vegetables dry with a paper towel. Pineapple, tomatoes, and mushrooms can release enough water to soften the crust if they go on dripping wet.
Bake the Mini Lunchbox Pizzas until crisp
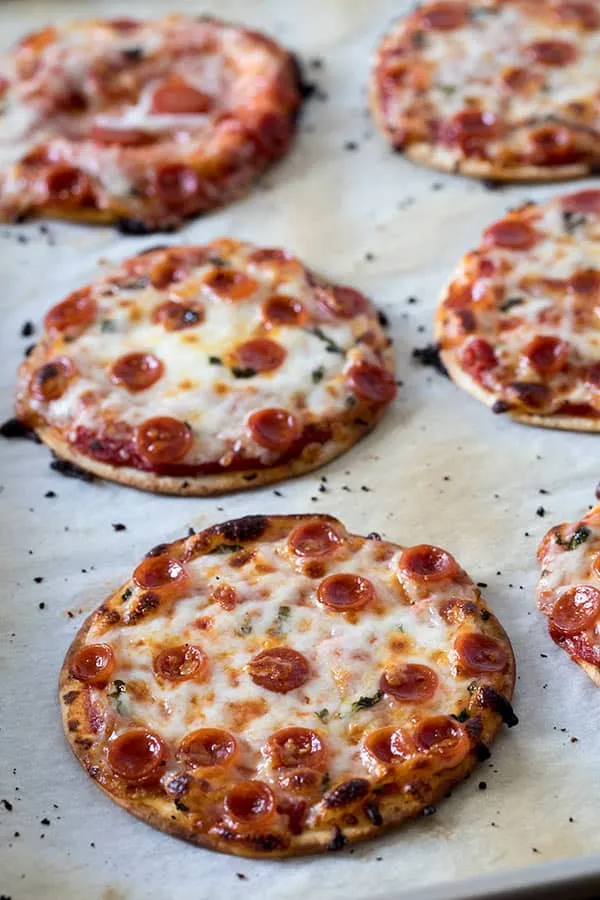
Slide the pan onto the center rack and bake for 10–12 minutes. Look for bubbling cheese, lightly browned edges, and firm bottoms that lift cleanly from the parchment. Check at 10 minutes, since thin naan and English muffins may brown faster than pita bread. If the cheese is ready but the base still feels soft, bake for 1–2 minutes longer. Remove the whole pan from the oven with dry oven mitts.
Cool the pizzas completely on a wire rack

Transfer the pizzas to a wire rack and leave them uncovered for 8–10 minutes. Air needs to pass underneath so steam does not soften the bottoms. The cheese should feel set rather than runny, and no heat should rise when you hold your hand above a pizza. A clean plate works when you do not have a rack, but the bases may stay slightly softer.
Pack the pizzas in a chilled lunchbox
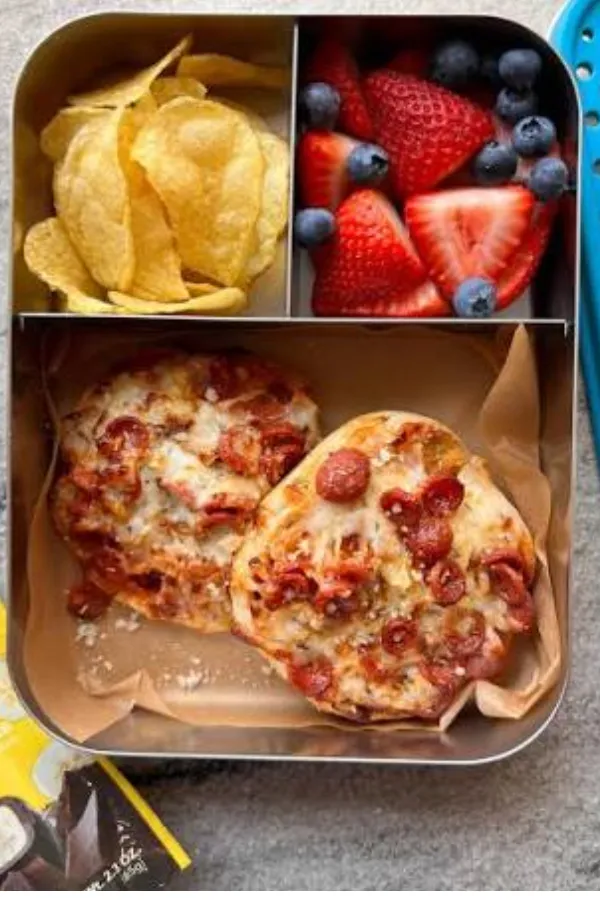
Place the fully cooled pizzas in a single layer inside a firm container. Add a small sheet of parchment between layers if you need to stack them. Close the lid and put the container in an insulated lunch bag with a frozen ice pack.
Keep juicy fruit, dips, and cut vegetables in separate sealed cups so they cannot leak onto the crust. For smaller children, cut each pizza into 2 or 4 pieces before packing.
Troubleshoot Common Pizza Problems
| If This Happens | Try This |
|---|---|
| The crust feels soggy. | Use no more than 2 teaspoons of thick sauce per pizza. Pat wet toppings dry, bake until the bottom feels firm, and cool the pizzas on a wire rack. |
| The cheese burns before the base is crisp. | Move the pan one rack lower and check the pizzas at 8 minutes. Use low-moisture mozzarella rather than finely grated cheese that browns too fast. |
| The toppings slide off. | Cut toppings smaller than ½ inch, use fewer pieces, and press them lightly into the cheese before baking. |
| The pizzas stick to the pan. | Line the pan with parchment paper or apply a thin coat of cooking spray. Let spilled cheese cool for 1 minute before lifting it with a spatula. |
| Water forms inside the lunch container. | Cool the pizzas uncovered for the full 8–10 minutes. Pack them only when no warmth or steam remains. |
Mini Lunchbox Pizza FAQ
Can I make these the night before?
Yes. Cool the pizzas fully, place them in an airtight container, and refrigerate them for up to 3 days. Pack them cold with an ice pack.
Can I freeze the pizzas?
Freeze the cooled pizzas in one layer until firm, then move them to a freezer bag with parchment between each piece. Keep them frozen for up to 2 months.
Do the pizzas need to be reheated?
No. They can be eaten cold or at a safe chilled temperature. To serve them warm at home, heat them in a 350°F oven for 5–7 minutes.
Can I use fresh mozzarella?
You can, but it holds more water. Slice it thinly, blot it well with paper towels, and use less than you would use for shredded low-moisture mozzarella.
How do I keep the lunch cold?
Place the sealed container beside a frozen ice pack inside an insulated lunch bag. Keep the bag away from heaters, sunny windows, and warm cars.
Mini Lunchbox Pizzas Quick Reference
Makes 6 mini pizzas · 400°F · 30 minutes
What You Need
- 6 mini naan rounds
- ⅓ cup thick pizza sauce
- 1 cup low-moisture mozzarella
- Up to ¼ cup finely cut toppings
- Parchment-lined baking sheet
- Wire cooling rack
Steps
- Preheat the oven to 400°F.
- Line a baking sheet with parchment.
- Arrange the bases 1 inch apart.
- Spread on 2 teaspoons of sauce each.
- Add about 2½ tablespoons of cheese each.
- Top with small, dry pieces.
- Bake for 10–12 minutes.
- Cool for 8–10 minutes.
- Pack cold with a frozen ice pack.
You now have six crisp, cheesy Mini Lunchbox Pizzas ready to pack, chill, or save for another day.
Once you know the basic method, try changing the toppings to match what your family already likes. Keep the pieces small and the wet ingredients light, and the pizzas should hold up well in the lunchbox.
Save this recipe to your lunch ideas board so it is ready for the next busy school morning.
Mini Lunchbox Pizzas
Ingredients
Equipment
Method
- Preheat the oven
- Prepare the pan
- Arrange the bases
- Add the sauce
- Add the cheese
- Add the toppings
- Bake the pizzas
- Cool completely
- Pack for lunch
Notes
- Use thick pizza sauce. Watery sauce can make the bases soggy.
- Pat wet vegetables dry before adding them.
- Cook all meat before using it as a topping.
- Do not seal warm pizzas inside a container. Trapped steam will soften the crust.
- Mini pita breads or split English muffins can replace the mini naan.
- Cut each pizza into two or four pieces for younger children.