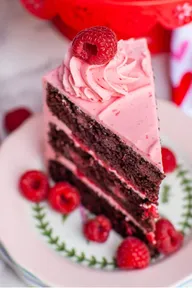
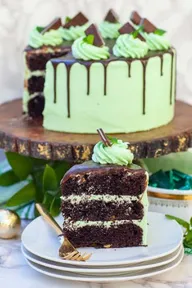

A chocolate mint cake should taste rich and chocolatey first, with a cool mint finish that does not overpower every bite. The problem is that mint extract is strong. A little too much can make homemade frosting taste more like toothpaste than dessert.
This recipe keeps the balance right. You will make soft chocolate cake layers with cocoa powder and hot coffee, then pair them with a light mint buttercream. The coffee deepens the cocoa flavor without making the cake taste like coffee. You can leave the frosting naturally white or tint it a pale mint green if you want the classic chocolate-and-mint look.
This is a beginner-friendly layer cake, even if you have never stacked one before. Most of the work is mixing, baking, cooling, and frosting. Plan for about 2 hours 45 minutes from start to finish, including cooling and chilling time. Your active work is closer to 45 minutes.
By the end, you will have a moist chocolate mint cake with two even layers, creamy mint frosting, and enough structure to slice cleanly.
What You Need
For the Chocolate Cake
- 1¾ cups all-purpose flour
- ¾ cup unsweetened cocoa powder
- 1¾ cups granulated sugar
- 2 teaspoons baking soda
- 1 teaspoon baking powder
- 1 teaspoon fine salt
- 2 large eggs
- 1 cup buttermilk
- ½ cup vegetable oil
- 2 teaspoons vanilla extract
- 1 cup hot coffee
For the Mint Buttercream
- 1 cup unsalted butter, softened
- 4 cups powdered sugar
- 3 tablespoons heavy cream or milk
- ½ teaspoon peppermint extract
- 1 teaspoon vanilla extract
- Pinch of salt
- Green food coloring, optional
Equipment
- Two 8-inch round cake pans
- Parchment paper
- 2 large mixing bowls
- Whisk
- Electric hand mixer or stand mixer
- Rubber spatula
- Cooling rack
- Offset spatula or butter knife
- Long serrated knife
Chocolate Mint Cake at a Glance
- Preheat the oven.
- Prepare the cake pans.
- Whisk the dry ingredients together.
- Combine the wet ingredients.
- Mix the chocolate cake batter.
- Divide the batter between the pans.
- Bake the chocolate cake layers.
- Cool the cake layers completely.
- Beat the mint buttercream until fluffy.
- Level the cooled cake layers.
- Stack the chocolate mint cake.
- Cover the cake with mint frosting.
- Finish the cake with chocolate topping.
- Chill the cake before slicing.
Preheat the oven to 350°F
Set your oven to 350°F (175°C) and let it heat fully before the cake batter goes in. An oven that is still warming can make the center rise at a different speed from the edges. Give it at least 15 minutes to reach a steady temperature.
If your oven runs hot or cold, place an oven thermometer on the middle rack. Even a small temperature difference can change how quickly thin cake layers bake.
Prepare two 8-inch cake pans

Grease the bottom and sides of two 8-inch round pans with a thin layer of butter or nonstick baking spray. Cut parchment circles to fit the bottoms and press them flat inside each pan.
The parchment gives you extra protection against sticking, especially because chocolate cake is soft while warm. If you do not have parchment paper, grease the pans well and dust them lightly with cocoa powder instead of flour. Cocoa keeps white streaks from appearing around the finished chocolate cake.
Whisk the dry ingredients together
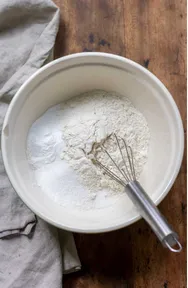
Use a large bowl and combine 1¾ cups flour, ¾ cup cocoa powder, 1¾ cups sugar, 2 teaspoons baking soda, 1 teaspoon baking powder, and 1 teaspoon salt. Whisk for about 30 seconds, reaching around the edges and across the bottom of the bowl.
Break up any visible cocoa lumps before moving on. Even distribution matters because concentrated pockets of baking soda can leave a bitter taste, while clumps of cocoa can create dry dark spots inside the baked layers.
Combine the wet ingredients
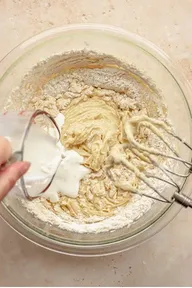
In a second large bowl, whisk 2 large eggs, 1 cup buttermilk, ½ cup vegetable oil, and 2 teaspoons vanilla extract until the mixture looks smooth and even. About 30 to 45 seconds of whisking is enough.
Use room-temperature eggs and buttermilk if possible. Cold ingredients can make the batter harder to blend evenly. If you forgot to take them out early, place the eggs in warm water for 5 minutes and let the measured buttermilk sit on the counter while you prepare the dry ingredients.
Mix the chocolate cake batter
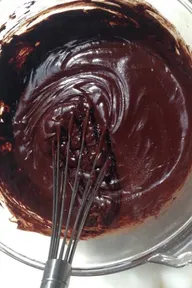
Pour the wet mixture into the bowl of dry ingredients. Whisk gently until most of the dry flour disappears, then slowly pour in 1 cup hot coffee while continuing to mix. Stop as soon as the batter looks smooth.
The batter will be much thinner than a typical vanilla cake batter. That is expected. Hot coffee helps the cocoa bloom, giving the finished cake a deeper
Divide the batter between the pans
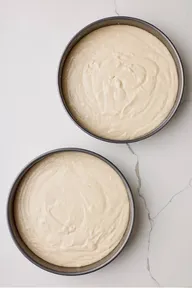
Set both prepared pans next to each other and pour half of the batter into each one. For the most even layers, weigh the filled pans on a kitchen scale and adjust until they contain roughly the same amount of batter.
No scale is required. You can alternate between the pans, adding a little batter to each at a time until the bowl is empty. Gently tap each pan on the counter 2 or 3 times to bring large trapped air bubbles to the surface.
The batter should sit at about the same depth in both pans before they go into the oven.
Bake the chocolate cake layers
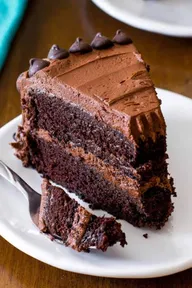
Place both pans on the center oven rack, leaving a little space between them so hot air can circulate. Bake at 350°F (175°C) for 28 to 34 minutes.
Start checking at 28 minutes. Insert a toothpick into the center of each cake. A few moist crumbs are fine, but wet batter means the layers need another 2 to 3 minutes.
Try not to open the oven during the first 22 minutes. A sudden drop in heat can make the centers sink before the cake structure has set.
Cool the cake layers completely
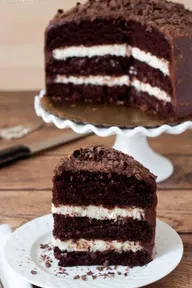
Leave the cakes in their pans for 10 minutes after baking. Run a thin knife around the edges, turn each layer onto a cooling rack, and peel away the parchment paper.
Give the layers at least 45 to 60 minutes to reach room temperature before frosting. The centers should feel completely cool when you touch the tops.
Beat the mint buttercream until fluffy
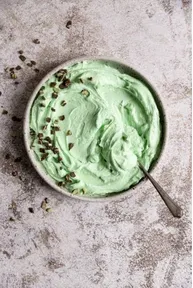
Start with 1 cup softened unsalted butter in a large bowl. Beat it with an electric mixer for 2 to 3 minutes, until pale and creamy. Add 4 cups powdered sugar gradually, mixing on low speed so the sugar stays in the bowl.
Pour in 3 tablespoons heavy cream or milk, ½ teaspoon peppermint extract, 1 teaspoon vanilla extract, and a pinch of salt. Beat for another 2 minutes until light and spreadable.
Level the cooled cake layers
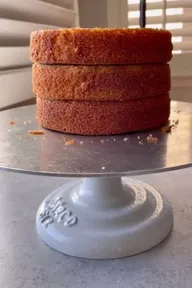
Place one completely cooled cake layer on a flat cutting board. If the top has formed a dome, hold a long serrated knife parallel to the board and trim off only the raised section.
Work slowly and rotate the cake as you cut instead of pushing the knife straight through from one side. The goal is a flat surface, not a thinner cake.
Repeat with the second layer. If both cakes already baked fairly level, leave them alone. Removing extra cake when you do not need to can make the layers more fragile.
Stack the chocolate mint cake
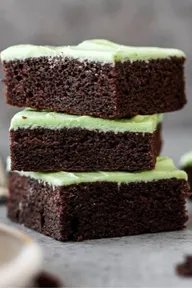
Set the first cake layer cut-side up on a cake plate or serving board. Spread about 1 to 1¼ cups mint buttercream across the top, keeping the layer even from the center to the edge.
Place the second cake layer on top with its flattest side facing upward. Look at the cake from eye level and gently shift the top layer until the sides line up.
Cover the cake with mint frosting
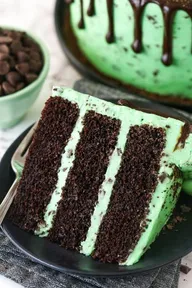
Spread a thin layer of buttercream over the top and sides to trap loose chocolate crumbs. This first coat does not need to look neat. Refrigerate the cake for 15 to 20 minutes, until the frosting feels firm when lightly touched.
Use the remaining buttercream for the outer coat. Add a generous amount to the top, spread it toward the edges, then smooth frosting around the sides with an offset spatula or a regular butter knife.
Keep the finished coating about ¼ inch thick so the mint flavor stays balanced with the chocolate cake.
Finish and chill the cake before slicing
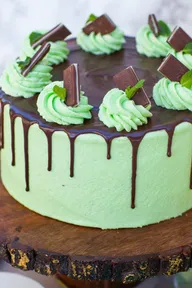
Decorate the top with 2 to 3 tablespoons chocolate shavings, chopped chocolate, or a light drizzle of cooled melted chocolate. Keep the decoration restrained so the mint frosting stays visible and the cake does not become overly sweet.
Move the finished cake to the refrigerator for 20 to 30 minutes before cutting. This short chill firms the buttercream and helps the layers stay in place when sliced.
For the cleanest pieces, dip a sharp knife into hot water, wipe it dry, and cut one slice. Clean and warm the knife again before the next cut. Let refrigerated slices sit at room temperature for about 15 minutes before serving so the cake and buttercream soften slightly.
Chocolate Mint Cake Troubleshooting
| If This Happens | Try This |
|---|---|
| The cake turns out dry | Start checking the layers at 28 minutes. Remove them when a toothpick comes out with a few moist crumbs rather than waiting until it is completely dry. |
| The center sinks | Avoid opening the oven during the first 22 minutes. Check that your baking powder and baking soda are fresh, and let the oven fully reach 350°F (175°C) before baking. |
| The frosting is too soft | Beat in powdered sugar 2 tablespoons at a time, or refrigerate the buttercream for 10 to 15 minutes before using it. |
| The frosting is too stiff | Mix in heavy cream or milk 1 teaspoon at a time until the buttercream spreads smoothly without becoming runny. |
| The mint flavor is too strong | Mix in more plain buttercream if you have some available. Next time, begin with ¼ to ½ teaspoon peppermint extract and increase it in very small amounts. |
| The layers slide while frosting | Refrigerate the stacked cake for about 15 minutes. Firm buttercream gives the layers more grip before you apply the final coating. |
Chocolate Mint Cake FAQ
Chocolate Mint Cake Quick Reference
Cake
- 1¾ cups all-purpose flour
- ¾ cup unsweetened cocoa powder
- 1¾ cups granulated sugar
- 2 teaspoons baking soda
- 1 teaspoon baking powder
- 1 teaspoon salt
- 2 large eggs
- 1 cup buttermilk
- ½ cup vegetable oil
- 2 teaspoons vanilla extract
- 1 cup hot coffee
Mint Buttercream
- 1 cup unsalted butter
- 4 cups powdered sugar
- 3 tablespoons heavy cream or milk
- ½ teaspoon peppermint extract
- 1 teaspoon vanilla extract
- Pinch of salt
- 1–2 drops green food coloring, optional
Key Numbers
- Oven: 350°F (175°C)
- Bake: 28–34 minutes
- Pan size: Two 8-inch pans
- Cool in pans: 10 minutes
- Cool completely: 45–60 minutes
- Final chill: 20–30 minutes
Steps
- Preheat the oven to 350°F.
- Prepare two 8-inch cake pans.
- Whisk the dry ingredients together.
- Combine the wet ingredients.
- Mix in the hot coffee.
- Divide the batter between the pans.
- Bake for 28–34 minutes.
- Cool the cake layers completely.
- Beat the mint buttercream.
- Level the cake layers if needed.
- Stack with mint buttercream.
- Cover the cake with frosting.
- Add chocolate topping and chill.
Conclusion
You now have a rich chocolate mint cake with soft chocolate layers, creamy mint frosting, and a clean chocolate finish.
The key is keeping the peppermint measured and letting the cake cool fully before you start frosting. Those two details make the biggest difference in both flavor and structure.
Serve it slightly softened from the refrigerator for the best texture.
Save this recipe to your Pinterest cake board so you can find it again the next time you want a chocolate dessert with a cool mint twist.